Off The Shelf Solar DHW -- First Cut
Glazing to Improve Cold Weather Performance
This is an attempt to improve the performance of our inexpensive and
easy to build solar water heating system that uses a polypropylene pool
heating collector to save cost and simplify the installation.
This pool collector approach works well, but the unglazed pool
heating collector is inefficient in the winter. This test is a
look at adding a very simple glazing system. The glazing system is
designed to leak enough air that the collector will not overheat even
when stagnated in the summer, but at the same time provide enough
glazing benefit to make winter performance somewhat better.
On this first try at glazing the pool heating collector to make in more
efficient, I went for a very simple scheme.
The glazing is two sheets of 2 ft wide corrugated SunTuf polycarbonate
spliced together to make a 4 ft wide sheet. The length is cut so that it
just fits between the manifolds and lays right down on the pool collector
surface.
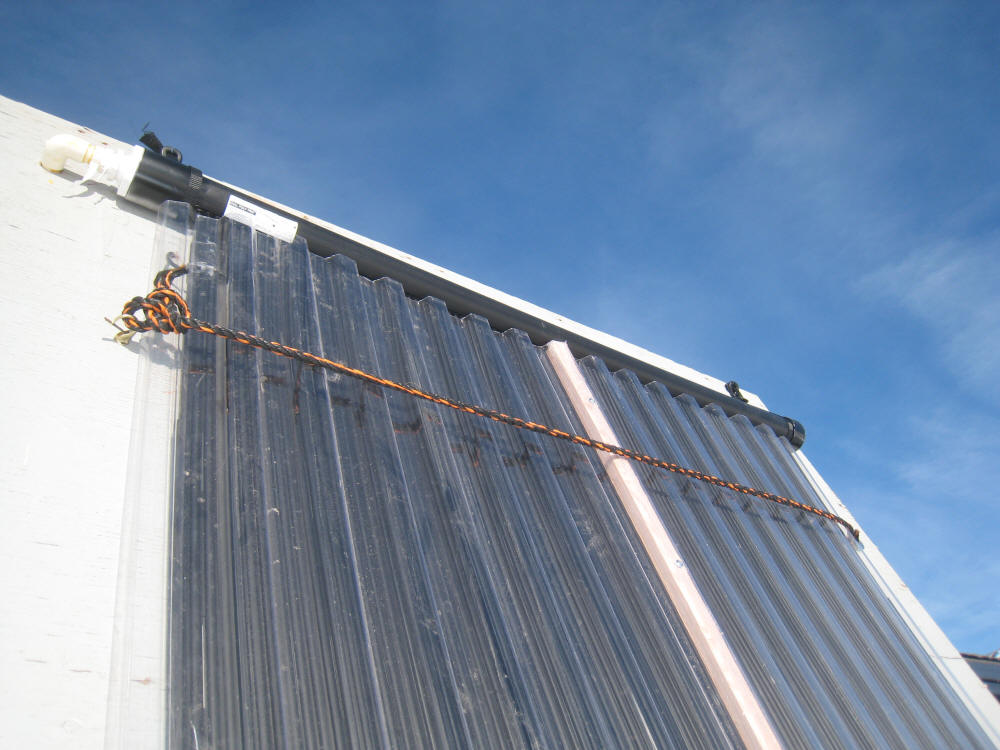
A bit hard to see, but the glazing is in place
The wood splice strip is visible right
up the middle of the panel.
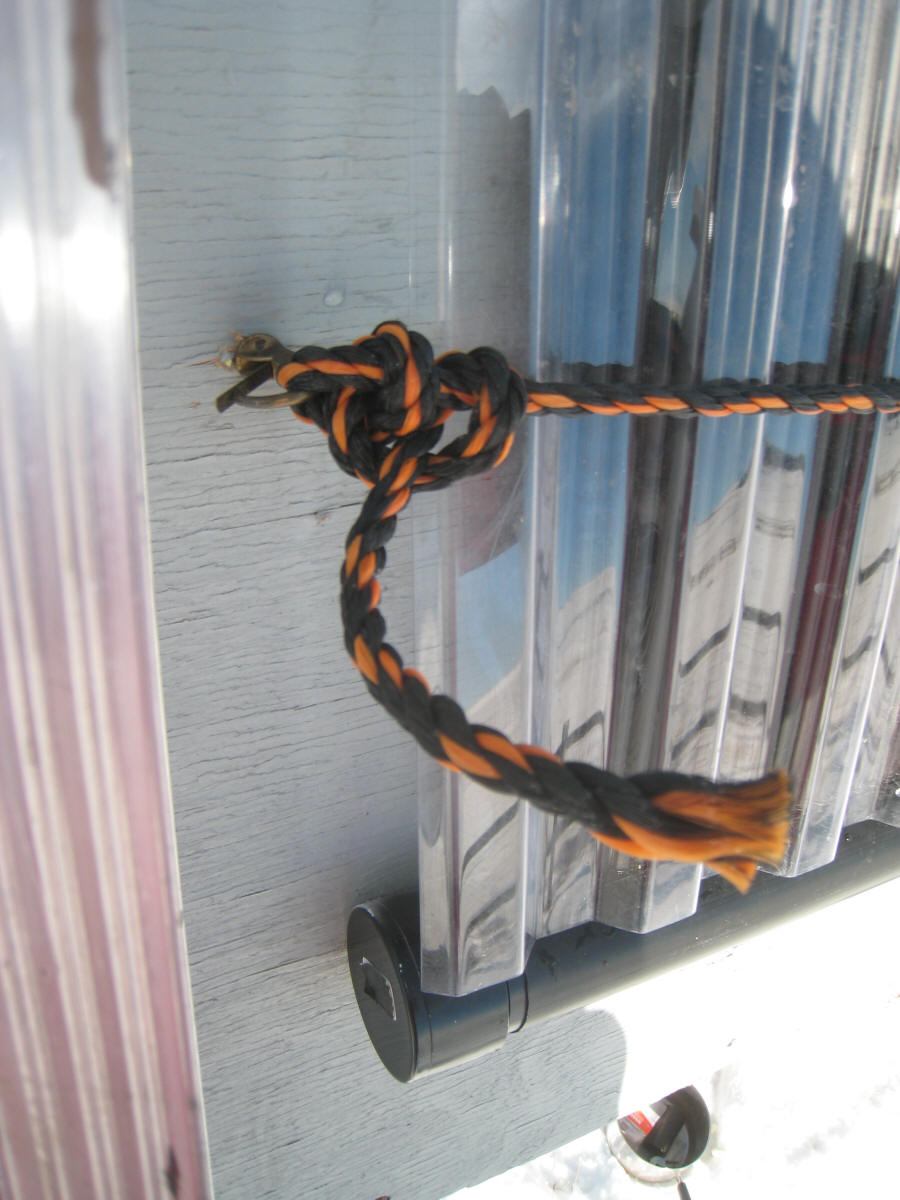
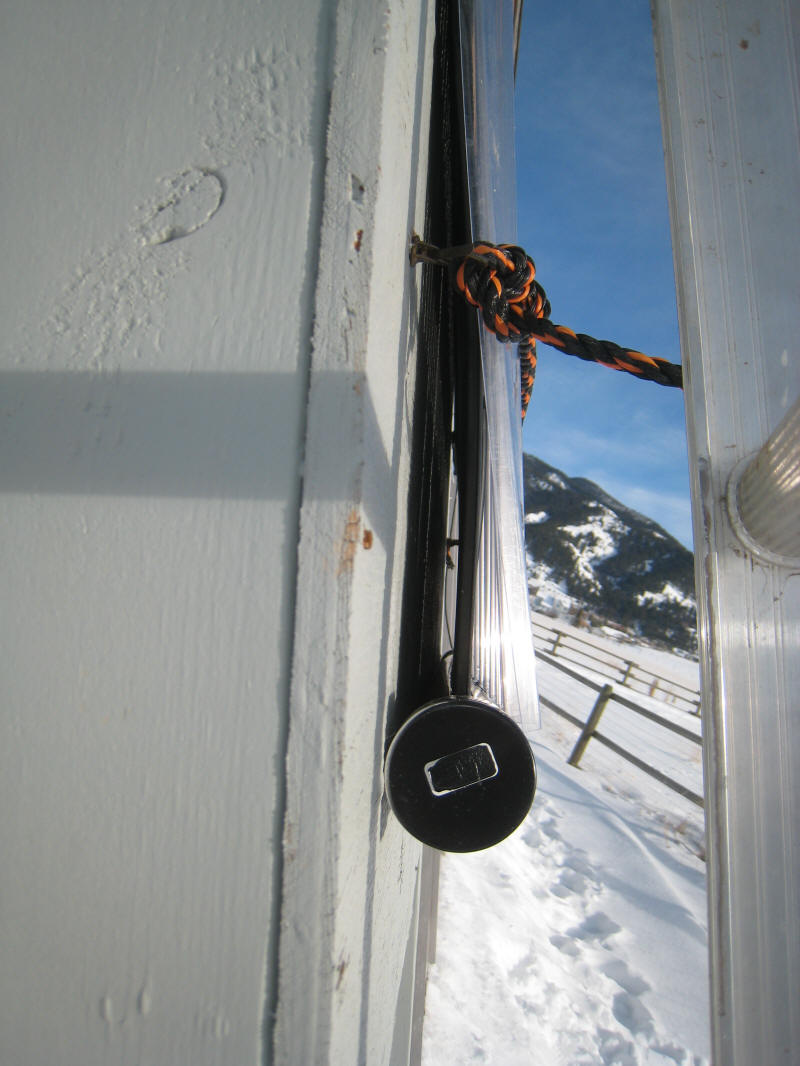
The two orange and black ropes
hold the glazing in place for the test to
allow easy removal.
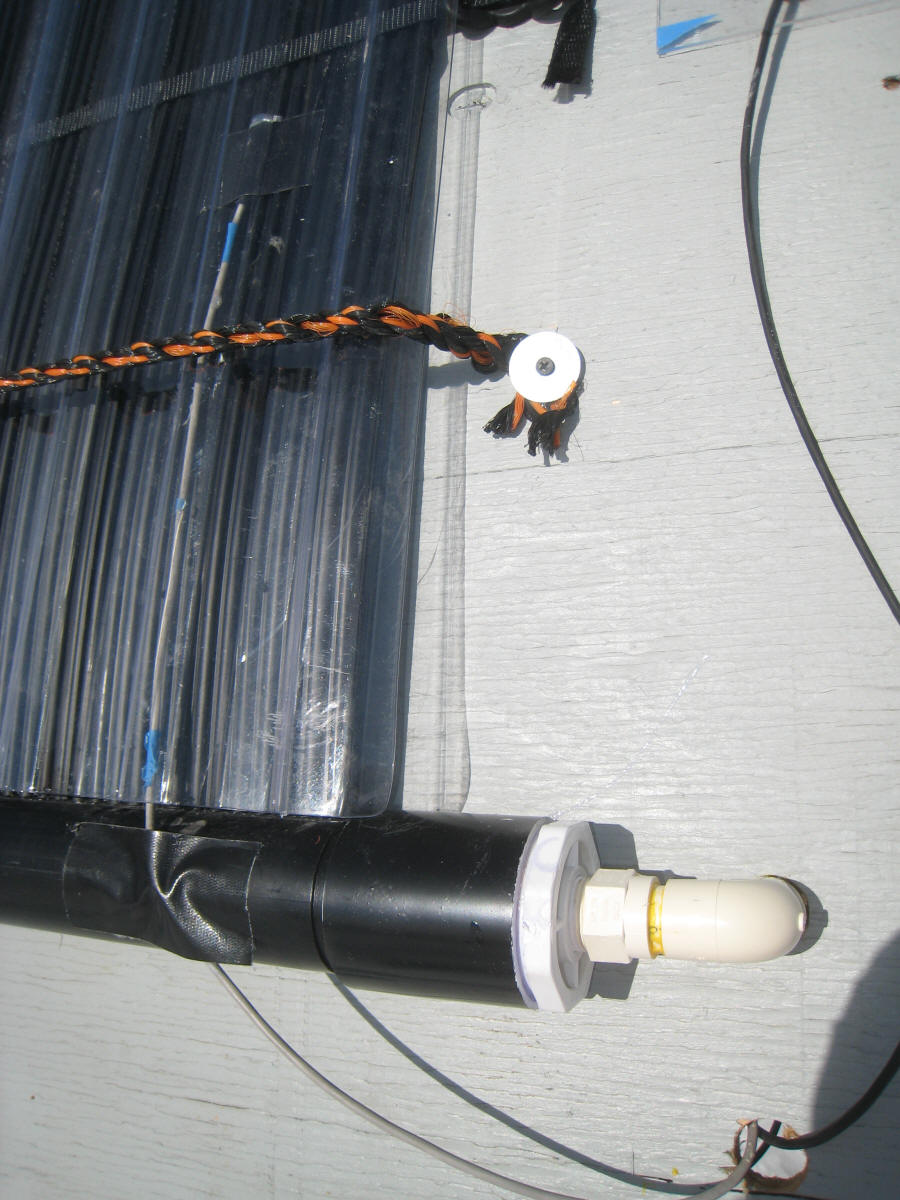
Lower right corner showing glazing
sitting on manifold and the tie down rope.
The bottom manifold supports the weight of the glazing and the two orange and
black ropes hold it in place. If this scheme were actually used, the same
straps that hold the pool collector down (the black ones) could probably also
hold the glazing down.
The narrow vertical wood strip up the middle is used along the overlap splice
of the 2 ft glazing panels to make the 4 ft wide panel. To do the splice,
the two panels are overlapped one corrugation and clear silicone is placed in
the corrugation to glue the two pieces together, then the 3/4 inch wood strip is
placed within the corrugation and a few screws used to hold everything tight
while the silicone is curing. I have done this without using the wood
strip and relied on the silicone only, and that worked fine.
Lower left of collector with glazing
resting on manifold and the tie rope.
Edge view.
Some big gaps both under the collector absorber
and also between glazing and collector.
These occur at both the top and the bottom and
would certainly let the wind into places
that would reduce the performance of the collector.
Top part of collector with glazing and
tie down.
So, this is about as simple as it could be. Only problem is that it
does not help the performance very much -- see below.
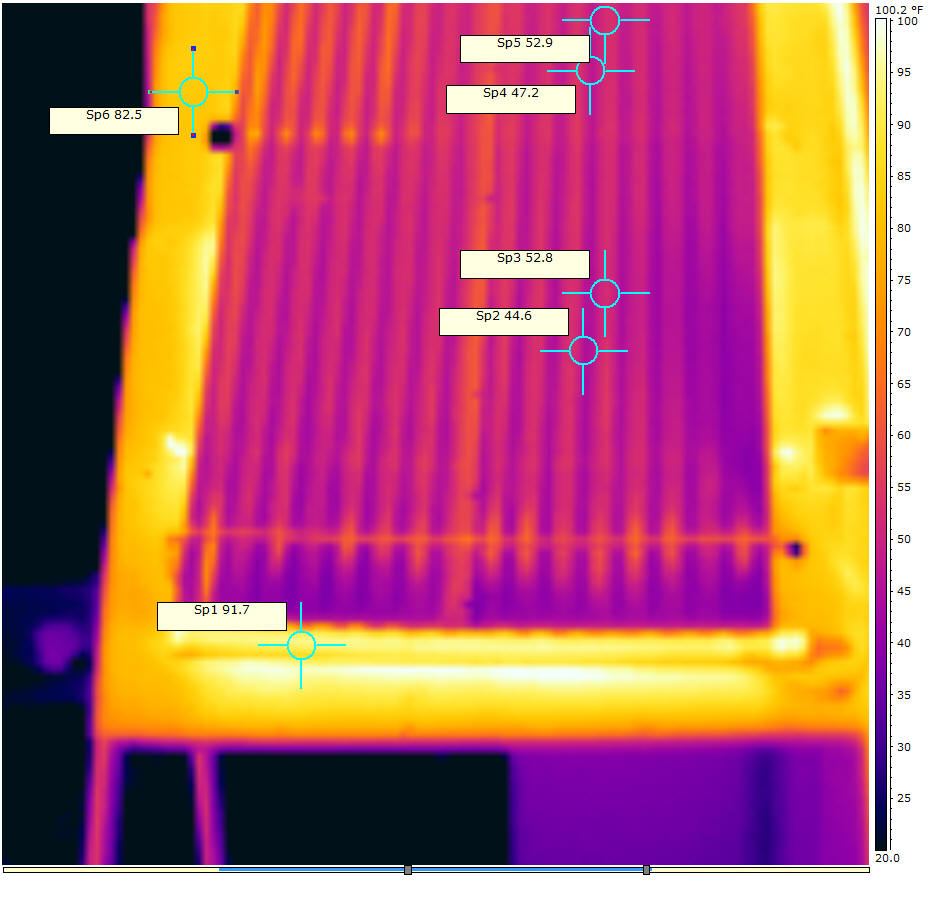
Thermal images with the glazing in place.
With glazing in place.
Bottom surface of glazing corrugations in
direct contact with collector.
The above are IR pictures at 12:50 pm -- tank temperature 75F.
Note that the bottoms of the corrugations run quite a bit hotter than the
tops because they sit right on the collector surface.
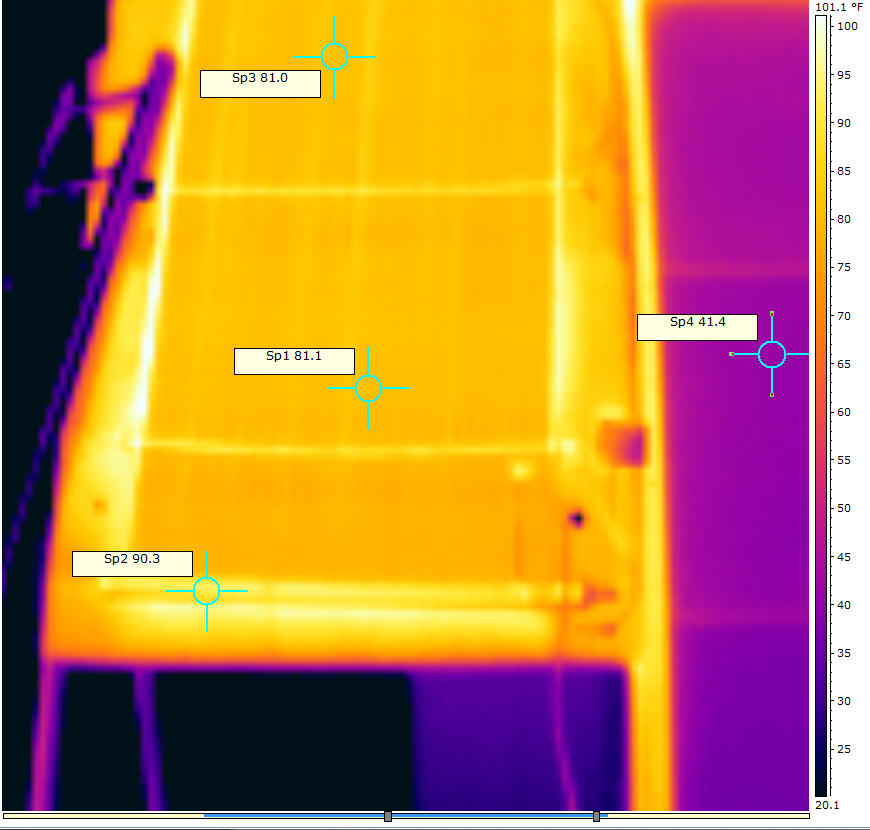
Pool heating collector with no glazing.
The above IR pictures 12:25 pm show the pool heating collector without
glazing.
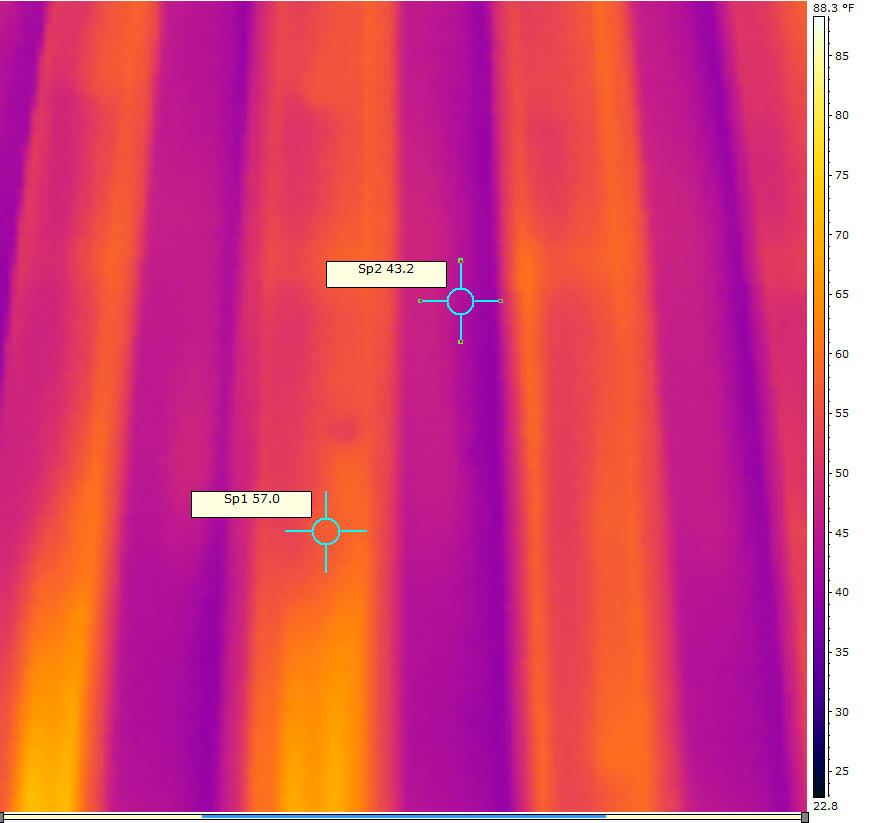
So, the glazed collector was running with glazing temperature of about 50F,
while the unglazed collector was about 81F. One would think that would
make more of a performance difference than it did.
Note that the glazing temperature of Solar Shed collector to the right is
substantially cooler. The Solar Shed is glazed with twinwall
polycarbonate, and the tank temperature at the time was 102F, so even though the
Solar Shed collector tank temperature was 27F warmer, the glazing temperature
was about 8F cooler than the glazed pool collector, and about 40F cooler than
the unglazed pool collector.
Performance
Green dashed -- ambient temperature (F)
Teal solid -- sun (w/sm)
Purple dash-dot -- Absorber surface temperature (F)
BlueGrn- dash -- Collector supply temperature (F)
Red solid -- Collector return
The heavy arrows show times when the collector had the
glazing on.
The effect of the glazing is modest to say the least.
This was a good day for the collector to operate with no glazing as there was
good sun, and the wind was nearly calm, but even so, the glazing appears to do
very little the way its installed.
Glazed Collector
Not Glazed Collector
Treturn - Tsupply
Tcol surface - Tabsorber
avg
Treturn = Tsupply
Tcol surface - Trabsorber
avg
11:50 AM
3.2
7.6
12:19 PM
3.1
5.2
The sun was up about 4% between the glazed at 11:50 and not-glazed at 12:19,
so that favors the not-glazed just a little -- perhaps by about one tenth
degree.
So, the glazed did roughly 5% better on heat production.
If you use this calculator to get the efficiency and heat output for a
typical unglazed collector and a glazed collector:
Unglazed:
47.4% efficiency, and 171 BTU/sqft heat out
Glazed:
59% efficiency, and 212 BTU/sqft heat out
So, the the commercial glazed is about 24% more efficient than the commercial
unglazed.
This is using a Fafco unglazed and a Heliodyne glazed with black paint absorber.
Its interesting that the unglazed collector in the calculator shows a good
47% efficiency for these conditions.
How Does Our actual efficiency stack up to what would be expected:
Heat in = (378 BTU/sqft-hr)(40 sqft) = 15120 BTU/hr
Heat out = (4.4 gal/min)(60 min/hr)(3.1F)(1 BTU/lb-F) =
8184 BTU/hr
Efficiency = 8184/15120 = 54%
So, the efficiency of the unglazed panel agrees pretty well with what the
calculator says (54% vs 47.4%).
I'm not sure how they do the official efficiency test on pool heating collectors
-- it may be done with some wind.
What to Do About Not Getting Expected Efficiency Increase for Glazing?
We are only getting about 5% more heat output with the glazing than without
it, while we might expect as much as 25% under these conditions for good
glazing.
So, what can we try to get it closer to the 25%?
The glazing as tried has a lot of defects -- I guess fixing them and seeing
what happens is the obvious way to go?
Try these improvements:
- The valleys in the corrugations now touch the absorber
-- space them off the absorber.
- There is a lot of ventilation area all the way around
the glazing on the edges -- As a way to see the glazing potential, seal this all
off so there is no ventilation.
- There is space between the collector absorber and the
"roof" -- close this off.
- The manifolds are exposed for heat loss -- cover them
with the glazing.