Search
The Renewable Energy site for Do-It-Yourselfers
The New Pump
| One of the things that has been a problem on the
$1000 solar water heater design is finding a
pump that is in keeping with the project $1000 budget, but at the same
time is reliable, and long lived. There are good pumps out there
for solar water heating systems, but the prices tend to run in the $250
and up range, and this seems a lot for a $1000 total system budget. I
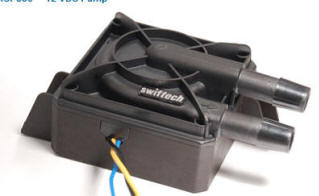
am trying a SwiftTech MCP350 pump. The pump is actually intended
for cooling the processor on over clocked PCs. The pump is
very compact, and holds the promise of providing a very long and trouble
free life (but this is yet to be confirmed) Price is about $55.
See details below. |
|
SwiftTech MCP350 specifications:
Note that there is also an MCP355
model with greater lift and flow than the MCP350.
This is from the
www.swiftnets.com website:
| |
Nominal voltage |
12 V DC |
| |
Operating voltage range |
8 to 13.2 VDC |
| |
Minimum startup Voltage |
9 VDC |
| |
Nominal power (@ 12 V) |
8.3 to 12 W |
| |
Nominal current (@ 12 V) |
0.69 to 1 A |
| |
Nominal head (@ 12 V) |
10.8 ft (3.3 m) |
| |
Nominal discharge (@ 12 V) |
~ 116 GPH (440 LPH) |
| |
Connection size |
3/8" barbs (10mm) |
| |
Maximum pressure |
22 PSI (1.5 BAR) |
| |
Temperature range |
Up to 140°F (60°C) |
| |
Electrical connector |
Molex 4 pin |
| |
Weight |
7.3 oz (207 gr.) |
| |
Our noise measurement (non lab environment)
|
24 ~ 26 dBA in a quiet room @ 2' |
| |
Motor type |
Electronically commutated, brushless DC,
spherical motor |
| |
Pump MTBF (Mean Time Between Failures) |
50,000 Hours |
| |
RPM Signal |
Single wire on 3 pin connector |
| |
RoHS |
Compliant |
|
 |
I believe that this pump is made by Laing, and uses their highly respected
electronically commutated, spherical motor design -- the same type of drive uses
in their EcoCirc solar pumps.
It is a 12 volt DC pump, so a small power supply is needed -- I use a 2 amp
wall wart type supply from Radio Shack.
The maximum fluid temperature for the pump is 140F, which goes well with the
design of the $1000 solar water heater, and is another benefit to limiting the
maximum storage tank temperature to 140F.
The maximum lift of the pump is 11 ft. So, this limits the
distance from the water level in the storage tank to the top of collector to no
more than 11 ft. It works find in my system, where the vertical distance
is about 8 ft.
Note: that there is a very similar MCP355 model that with a max lift of
15 ft, and somewhat higher flow rates.
The power consumption is only 10 watts! -- the total consumption on
mine including the wall wart is 13 watts.
The small, 3/8inch barbed fittings are a bit of a pain to adapt to, but
that's life.
The pump is available from a number
of internet suppliers who sell water cooling equipment for PCs -- I paid $55 for
mine.
So, what is the life likely to be?
I don't know. The
Laing D5 pumps
which use a similar electrically commutated spherical motor say "The brushless
motor has a lifetime in excess of 50,000 hours when operated at nominal
voltage...". Maybe the SwiftTech, which seems to be related to
the Laing, will do similarly, but hard to say. If it did achieve the
50,000 hour life, at 6 hours a day this would be more than 20 years!
My MCP350 is going on one year, and
doing fine.
| |
Note that there is also an
MCP 650 which appears to be similar to the 350, but with a higher
flow rate -- so, if you have more collector area, this might be an
options. (Thanks to Matt for pointing this out) |
A couple links on Laing pumps:
http://www.ober-read.com/laing_ddc.htm (this one looks externally
identical to the MCP350)
http://www.ober-read.com/laing_new_d4_page.htm
http://www.lainginc.com/pages/dc_ph.htm (These pumps can be
driven from PV panel and have built in MPPT)
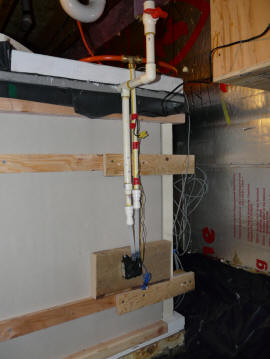
Installation
Since my old pump was a submersible,
and the SwiftTech is not, I had to redo the pump plumbing. The following
pictures show the new arrangement.
The pump is not self priming, and the
instructions are quite adamant about not running it dry. So, you need to
make sure that the pump always retains its prime. This means mounting the
pump below the water level of the tank and making sure that the pump plumbing
does not drain or run dry. I used a U-tube arrangement to mount the pump
just outside the tank, and well below the tank water level. This
arrangement is used on a lot of solar drain back systems, and appears to be
working fine.
|
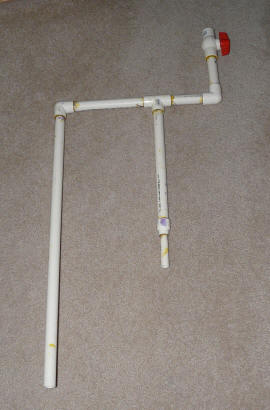
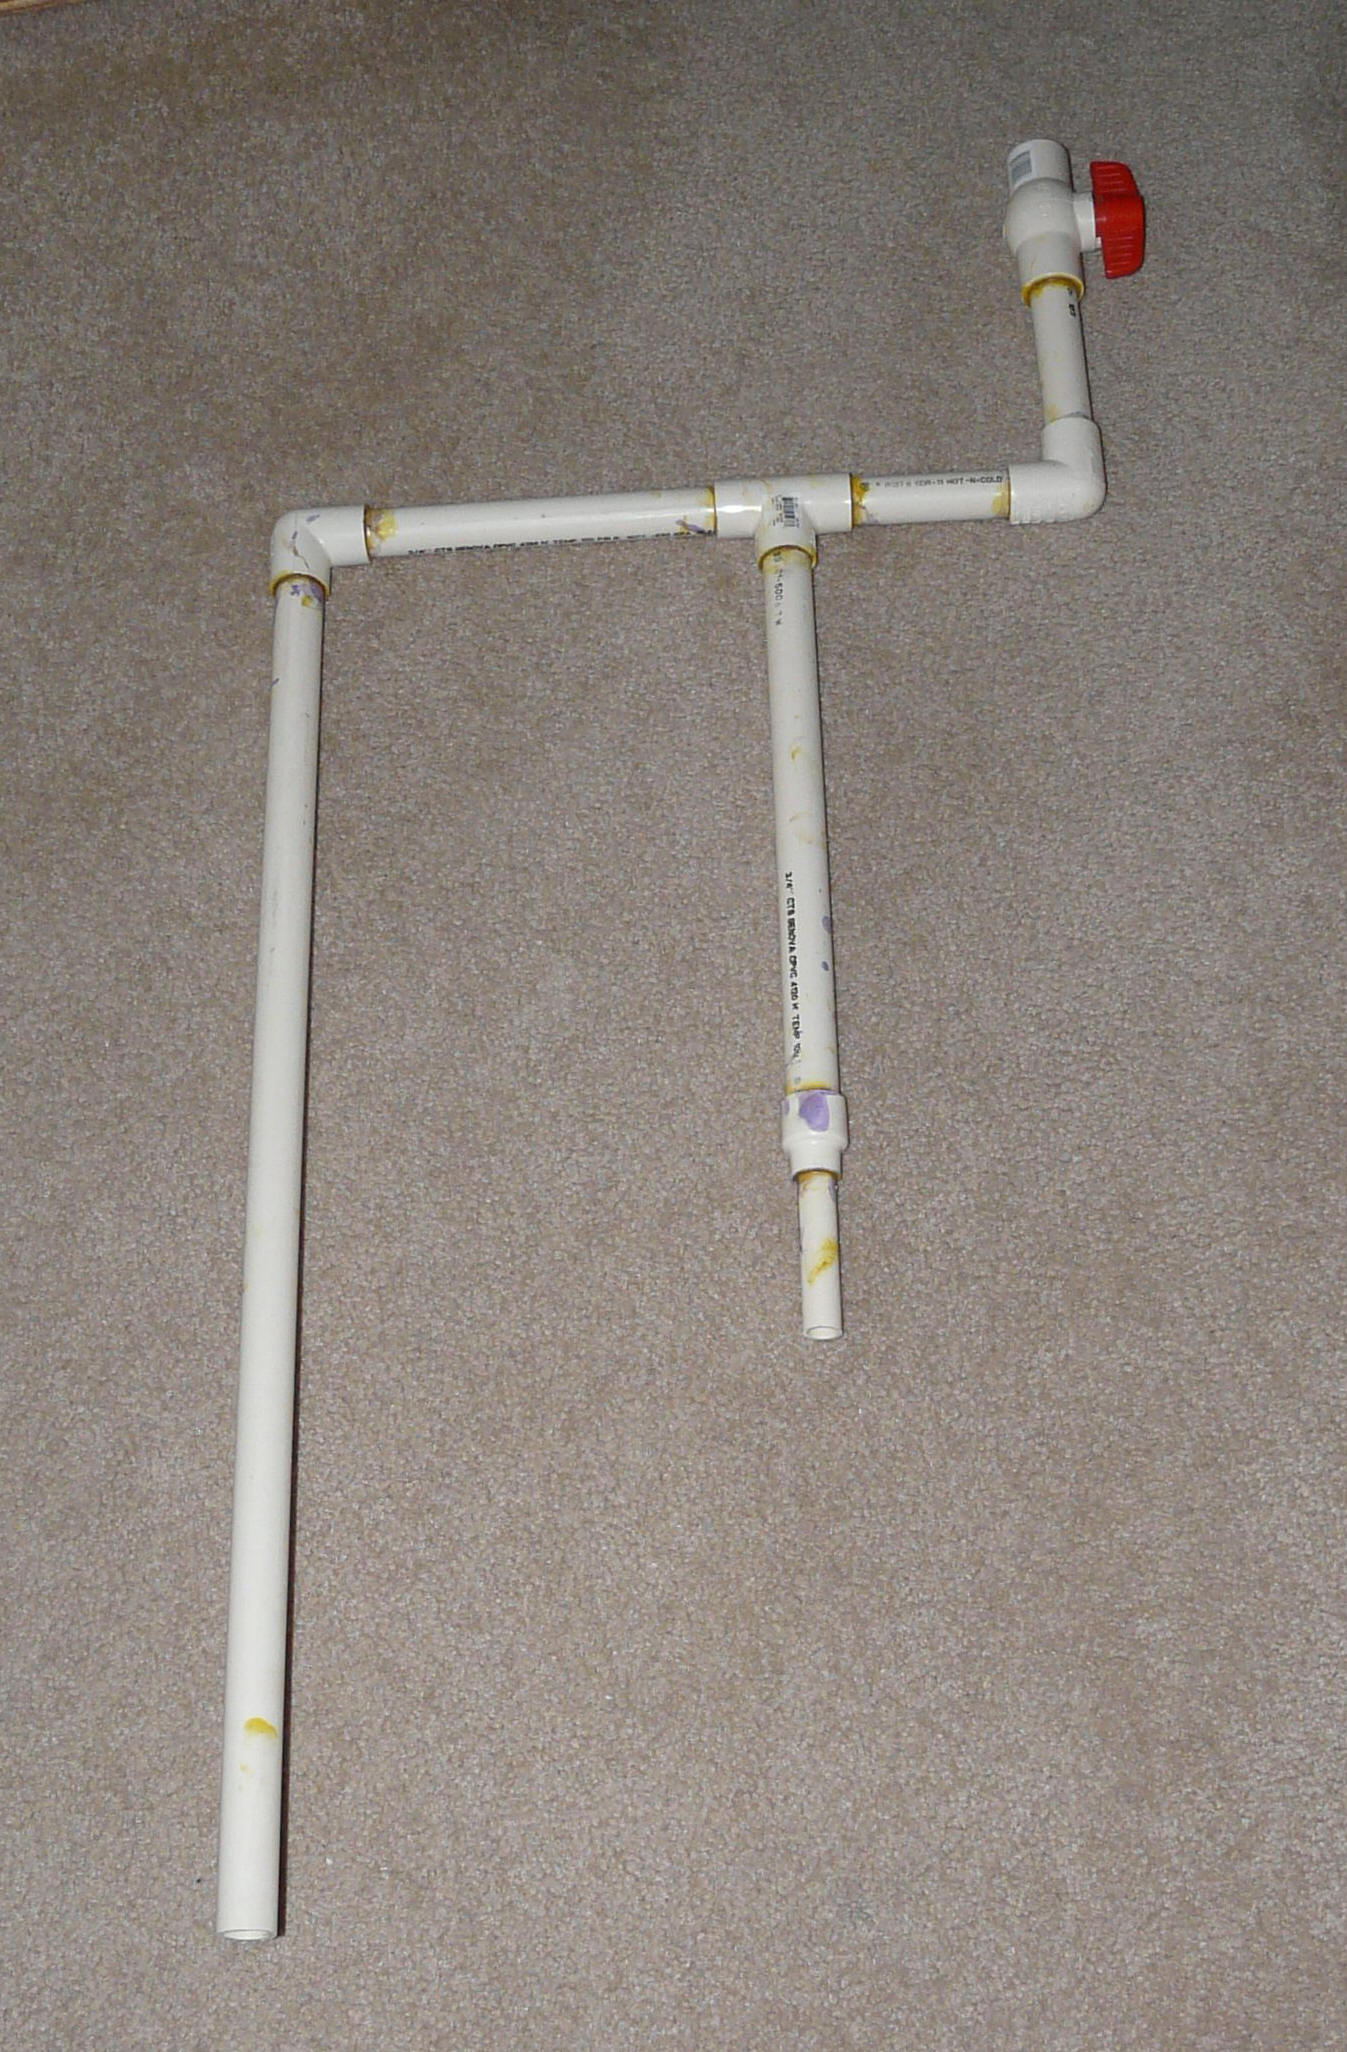
The U is made from 3/4 and 1/2 inch
CPVC pipe.
The valve at the top allows for
priming the pump and U tube.
The left vertical goes inside the
tank, and the right vertical goes
to the pump outside the tank. |
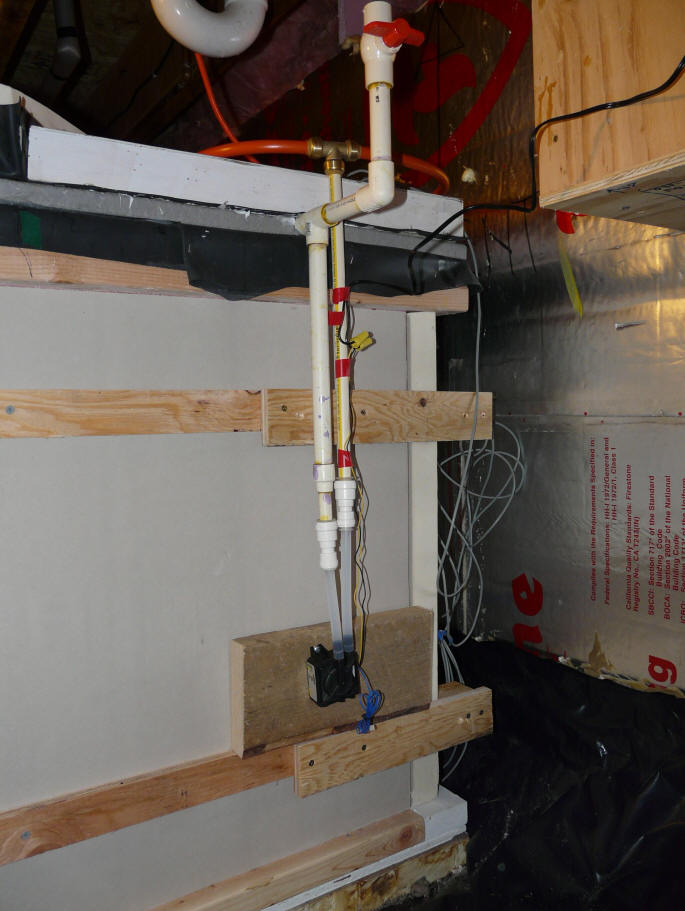
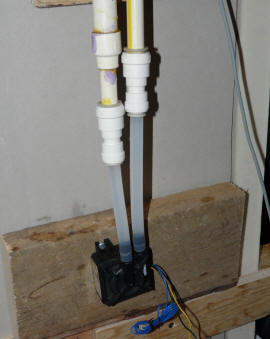
The pump installed.
The pump input is on the left, and
is fed by the U tube with water from
near the bottom of the tank.
The pump outlet is on the right, and
feeds the two orange PEX tubes that
come connect to the bottom of the
two halves of the collector. |
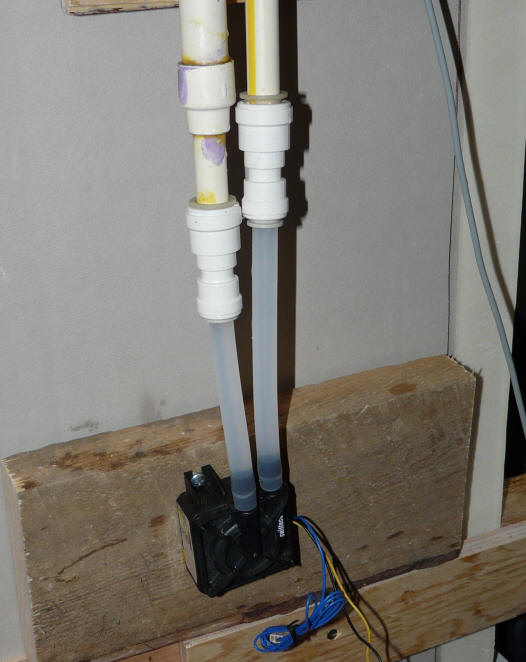
The somewhat awkward, but
functional adaptor arrangement to
go from the CPVC pipe to the 3/8
inch tubing that pushes onto
the pump barbed fittings.
The connections to the barbed
fittings should have clamps, which
I will add soon. |
The pump is supplied by a U-tube that
takes water from near the bottom of the tank to the pump inlet. The U-tube
allows the pump to be located below the water line of the tank. The U-tube
and pump remain full of water after a drain back of the collector, so the pump
always starts with a prime. The valve extending off the top of the U-tube
allows the U-tube to be primed for the initial startup or after maintenance.
The fittings on the pump are 3/8 inch
barb fittings, so you have to figure out a way to adapt from the 3/4 inch U-tube
to tubing that will push over the barb fittings. I used a 3/4 by 1/2 CPVC
adaptor to step down to half inch CPVC, and then a SharkBite style connector
that Lowes sells to go from the 1/2 inch CPVC to the 3/8 tubing.
On the outlet side, the same kind of
adaptor is used to go from the 3/8 tubing to half in CPVC, and then a SharBite T
is used to go to branch to the two half inch PEX lines that go to left and right
halves of the bottom of the collector.
The connections to the barbed
fittings should have clamps, which I will add soon.
Maybe someone has a better way to
do this?
The pump is just lightly screwed to a
block of wood to keep it in position.
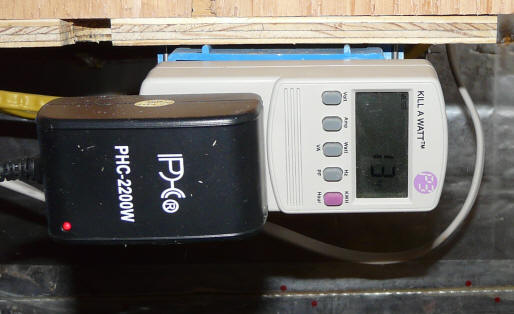
At 13 watts, the pump would pull a
bit over 1 amp. I used a 2 amp supply just to account for start up surge.
The supply I used is a regulated, 12
VDC wall wart style supply that Radio Shack carries.
In hooking up the pump, the yellow
lead is the +12 volt, and black is the negative.
So Far
The pump has about 8 months of daily
operation on it with no problems.
It started up fine the first time. I tried several drain backs and restarts with no drama.
The measured flow rate on my system
is 1.7 gpm. This is 0.035 gpm per sqft of collector for my 50 sqft
collector, which is (I think) just a touch on the low side, but OK. They
do offer a larger model.
The pump and wall wart together use
only 13 watts when pumping! -- about 0.5% of the solar energy being
collected.
I will report on any problems that
come up as time goes on.
While I have high hopes for this
pump, it is not really intended for this service, so some caution is in order.
I should also mention that the
original March pump I was using is still working just fine -- I just wanted to
try this pump because it fits the project budget better.
Gary November 11 & 12, 2008