
Search
The Renewable Energy site for Do-It-Yourselfers
Building Large Cylindrical Solar Heat Storage Tanks
|
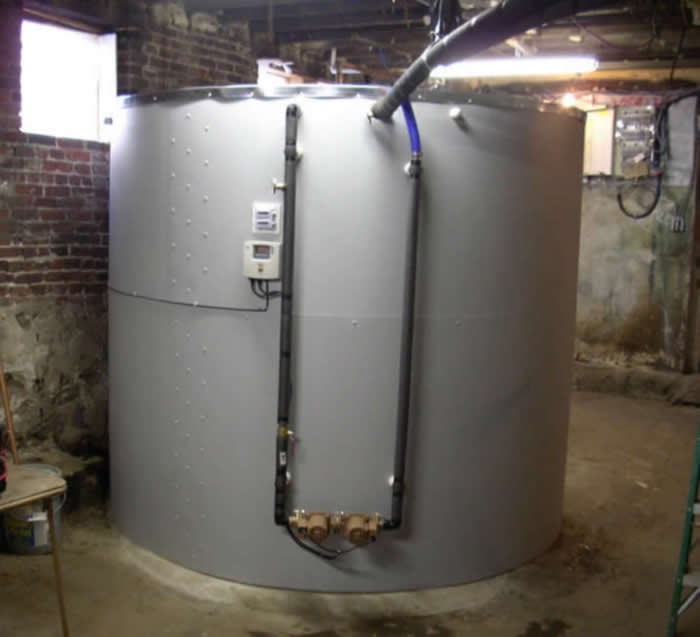
Alan Rushforth of Rushforth Solar builds large (4000+ gallon) cylinderical tanks for storing heat generated by an array of solar thermal collectors.
The tanks are made from flat aluminum sheet that is wrapped into a cylinder with a bolted lap joint to join the two ends. The tanks are then lined with insulation and an EPDM rubber liner.
The end result is a structurally efficient tank that uses a minimum of material and has a long life.
Alan gives a fairly detailed description of how he goes about building these tanks below.
Thanks very much to Alan for providing this material!
|
|
From Alan
I have locally built insulated solar drainback tanks up to 4,500 gallons. There are some photos at www.rushforthsolar.com. The bigger you go, the more the physics ‘push’ for that tank to be round. If you can shift from thinking about wood to a sheet metal ring, then the structure becomes a LOT simpler, and having a simple, efficient, long lasting structure is a very good start. Admittedly the round aspect may make some other portions of the project more challenging but still doable. To build big tanks, I use 48” aluminum coil stock .050 thick which I ordered in bulk coil, but you hopefully can track down some aluminum or steel sheet metal locally. When I did the hoop stress calculations, I had a factor of safety typically way over 4 (and I read in an Alcoa manual 4 is recommended for tank applications that can burst).
I lap the joints 10 inches and run 3 rows of small bolts to create a continuous ring. Once I have the ring the next step is to install a first layer of 1.5” foam around the inside wall. (score it every 4” or so, so it will ‘bend”). I have found the last pieces can be cut an inch or so wider than seems will fit, then one creates a little V-peak and ‘pops’ it into to place so the foam compresses itself all around. It helps to have 2 people for these steps – one in and one out. Then I push a pre-cut round 3” foam floor into place which rounds out the tank very nicely. Then I install a 2nd layer of 1.5” foam around the inside wall, again scored every 4” or so with last pieces v/popped/compressed into place. Then the top foam edge is trimmed along the top as needed.
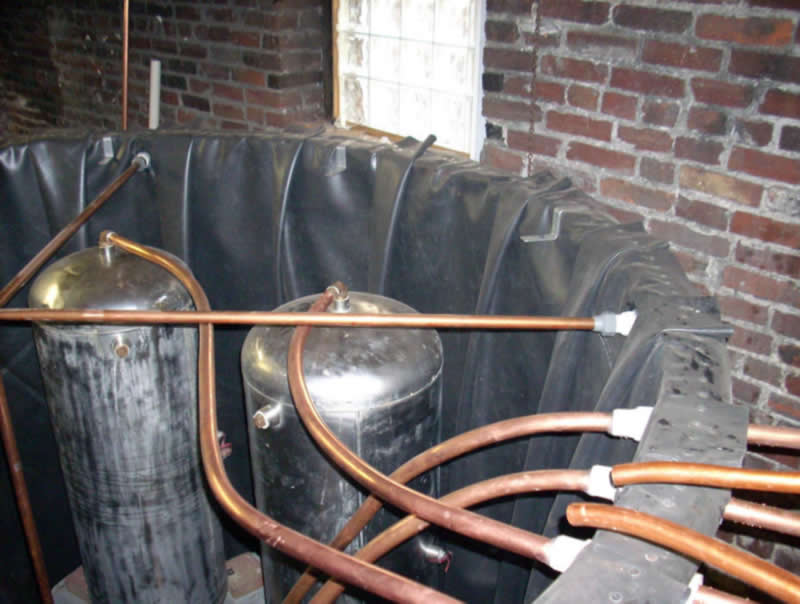
Then comes the liner. I lay the EPDM out in the back yard, to draw an inner circle with a lumber crayon around the tank floor perimeter, and then to draw criss-cross lines cutting it into 4 (or better 8) pie shape pieces. When you are installing the liner, these crayon lines help you center the liner and then starting ‘pie cut lines’ help you get 4 or 8 initial pins in place at 4 or 8 equally spaced points around the rim. For this part you need to put on your upholsterer cap if you want the folds to be nice and neat and even. Before doing that, I have precut the EPDM. To pin the liner into the top of the foam, I use 3” stainless steel nails. When I am done folding/pinning the liner all around the top of the tank, the liner (which was pre-cut a couple inches oversize) will over hang the tank a bit. Then I trim the liner even with a sharp knife
Building the lid is probably the trickiest part. The technique I use is to use 3” iso foam (available from a good commercial roofing supply) for about $35/sheet. This 3” foam gets cut in a circle with a slight taper on the cut (like a cork is tapered). Let’s say your tank is 8’outside diameter. After 2 layers of 1.5” foam you inside diameter is about 7’6”. After folding and pinning you EPDM liner, the i.d. od the tank is maybe 7’5.75”. I would cut the top of the ‘cork’ about 7’5.5” inside dia. (I use a jig saw with long blade). Then I laminate EPDM onto the top and bottom of the lid. One could probably use contact cement (like roofers use). I use regular 1 part can foam, spray it out on the foam, roll it quickly with a cheap roller on a pole, then lay the EPDM over and roll back and forth with a linoleum roller for 15 minutes while the foam cures. The top EPDM should overlap 4” or so. Then flip it and line the inside of the lid. I wrap the liner down the 3” tapered thickness of the big ‘cork’. At this point the inside liner of the lid is flat against the top liner of the lid (top liner is mostly just for show – to make the tank look adequately finished).
This next part is a bit tricky. I lift up the edge of the inner liner EPDM, squirt a line of foam around the edge under the EPDM, press the EPDM back down along the edge, add roof nail pins through the edge into the foam. The once that is done all around, quickly wrap a 2” truck ratchet strap around the perimeter of the ‘cork’ and tighten it, to hold the inner liner EPDM tight against the 3” slightly tapered sides of the ‘cork’ while foam is curing underneath, and add a row of brick weights around the perimeter to hold the 2 layers of EPDM flat against each other until the foam sets up
At this point, if you did it right, you have a wonderful sturdy 7’5.5” round lid with lip, ready to lay over your tank and jam into place. If you cut the EPDM for the lid right, it will overlap the tank a bit once jammed in place, and you just trim that with a sharp knife.
There are lots more details that could be expounded upon, like top cross brace tubes and PVC sleeves … but above is a starting point
Hope that might be of some help.
Alan Rushforth
More on Alan's large tank projects here:
Rushforth Solar Tanks page ...
Rushforth Solar Projects page...
Large Thermal Storage Tank with Immersed Tank Heat Exchanger...
Gary
December 17, 2013