Search
The Renewable Energy site for Do-It-Yourselfers
ProMaster Camper Van Conversion -- Galley
|
This page covers the design and build for the galley area of our RAM ProMaster camper van conversion.
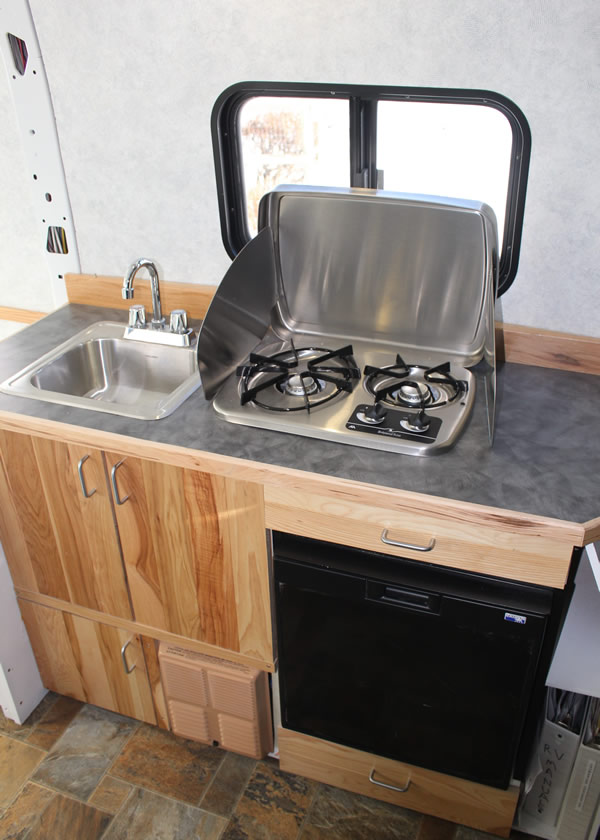
The galley includes an efficient electric fridge, a small sink, a propane stove, and storage for pots, dishes, food...
Go back to the main camper van conversion page...
|
|
| |
Important Update
The material on these pages describing our camper van conversion has been moved to our new new site dedicated to efficient RVs and camper vans.
The new site covers all the material here and adds a lot of new material on other camper van conversions, camper van design and build, resources for people converting vans, other efficient camping vehicles, new ideas in efficient RVs and camper van travel hints.
The new site is here...
I'm leaving these pages here as you may have bookmarked them and the Comments section has some good suggestions, but I suggest that you go to the new site -- I won't be updating this material anymore.
Thanks to all the people who read these pages and especially to the people who left comments and suggestions! Feedback on the new site is very much appreciated.
Gary
|
|
Table of Contents
Construction...
Base Cabinet...
Counter top...
Sink install...
Stove install...
Fridge install...
Doors and drawers...
Attaching galley to van...
Cost, Weight, Time...
Comments...
Construction
Base Cabinet
The galley cabinet is constructed from MDO plywood. It provides a home for the fridge, stove, sink, and furnace.
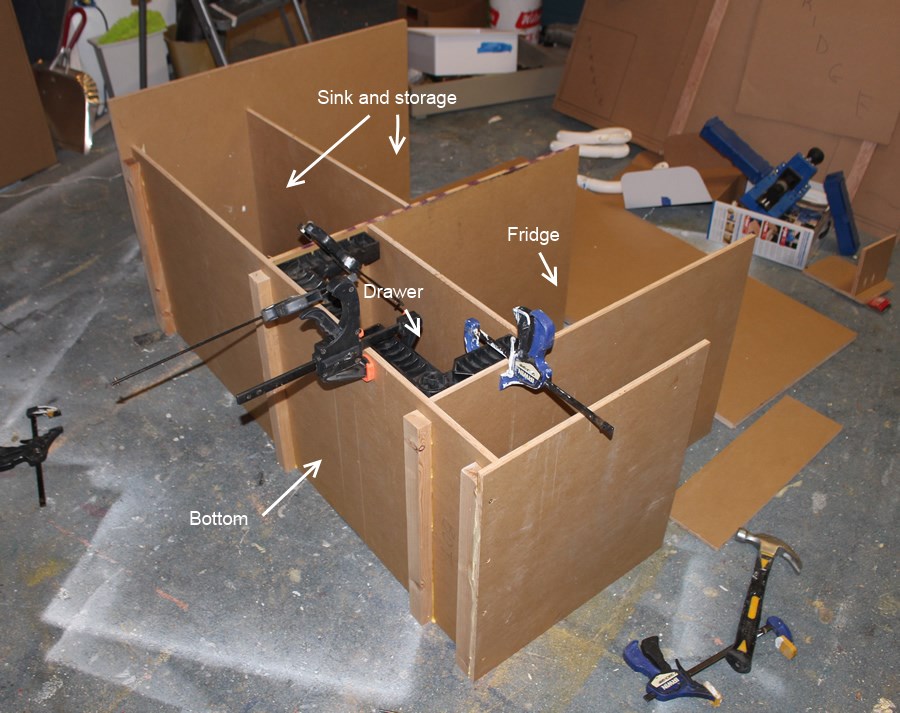
Some pictures of the cabinet being built in the shop.
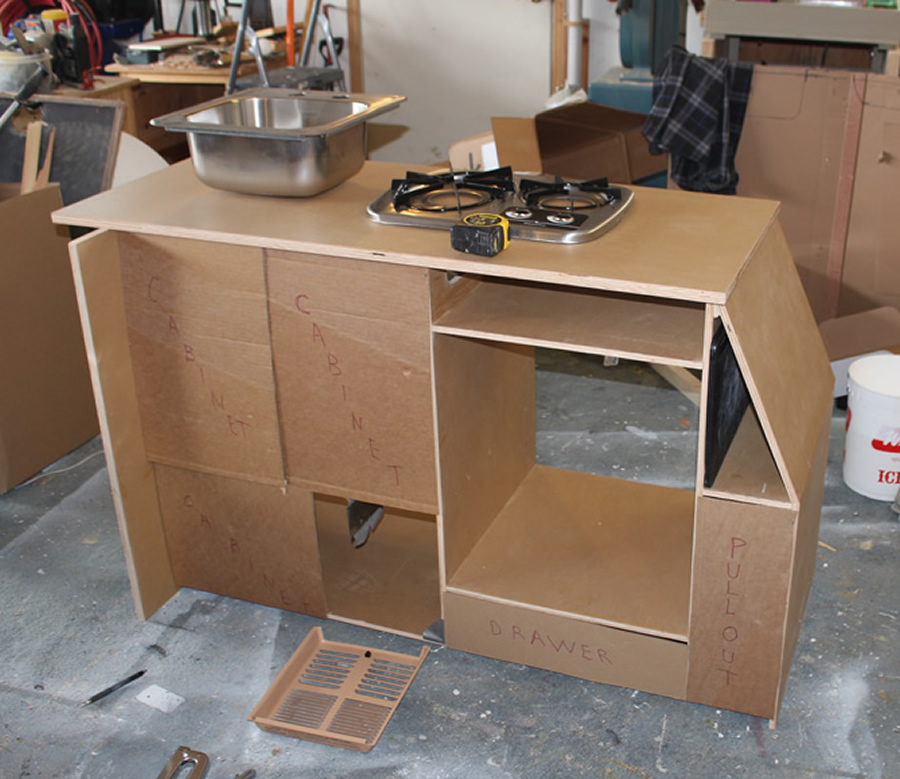
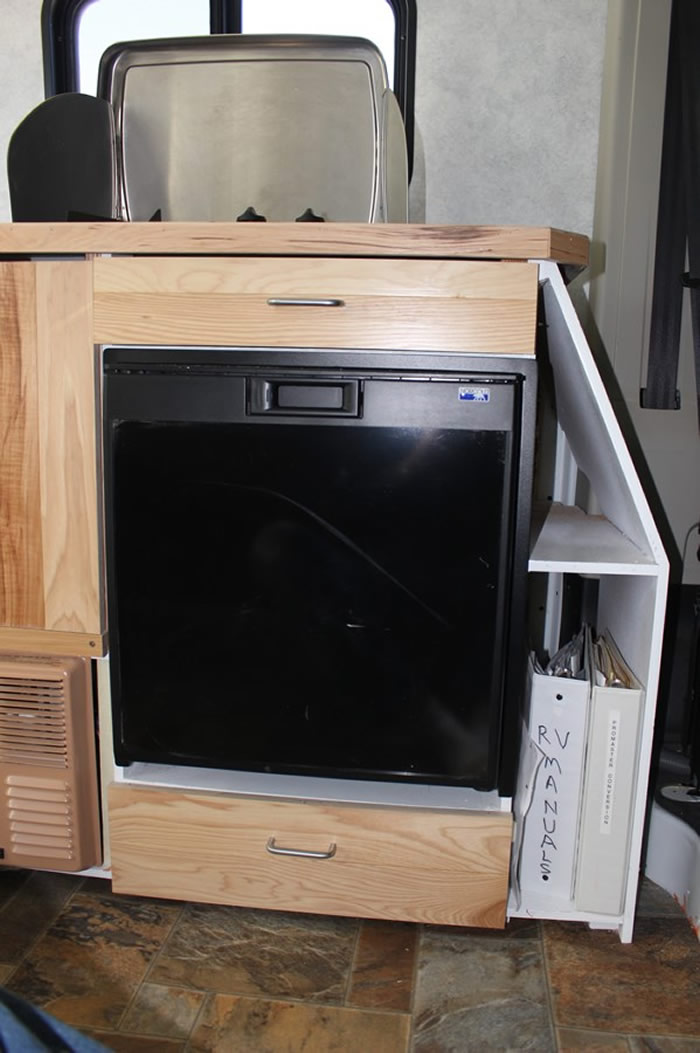
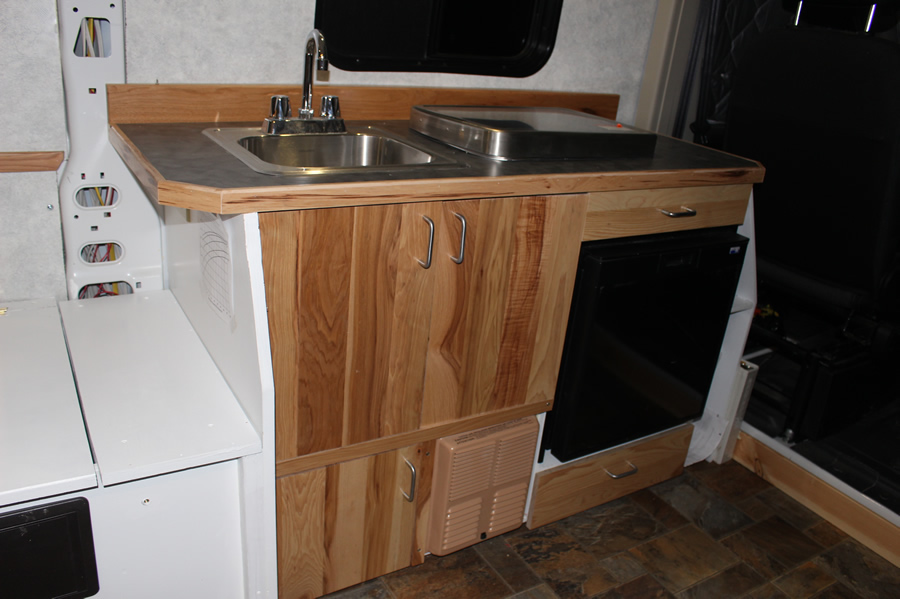
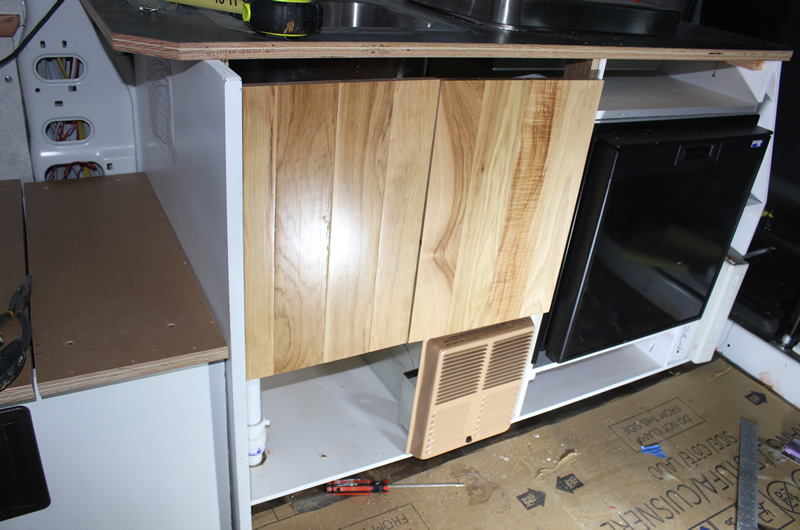
This is what the base cabinet looks like with the locations of things mocked up with cardboard doors.
The big hole on the right side is for the fridge.
The galley space to work with was limited, so it took some doodling to get all the essentials in. We did consider having the fresh and grey water tanks in the cabinet to make things really simple, but it seemed like that would take up most of the available space, so we elected to place these tanks elsewhere. For now, we don't plan to have an overhead cabinet, so we wanted to try to get everything in this cabinet.
Gluing up the pieces. The bottom sits on the 2 by lumber to get the
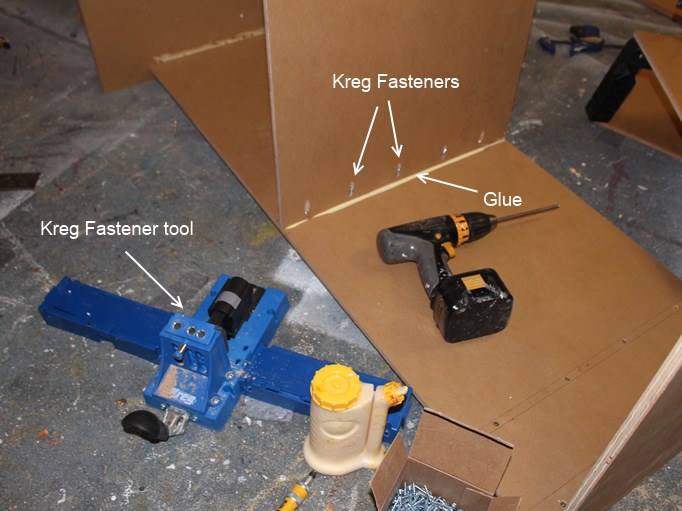
Most of the panels were put together with Kreg fasteners and glue.
|
 |

Finished base cabinet.
Counter Top
The counter top is a 3/4 inch piece of the MDO plywood with Wilson Art (Formica like) counter top material contact cemented to it.
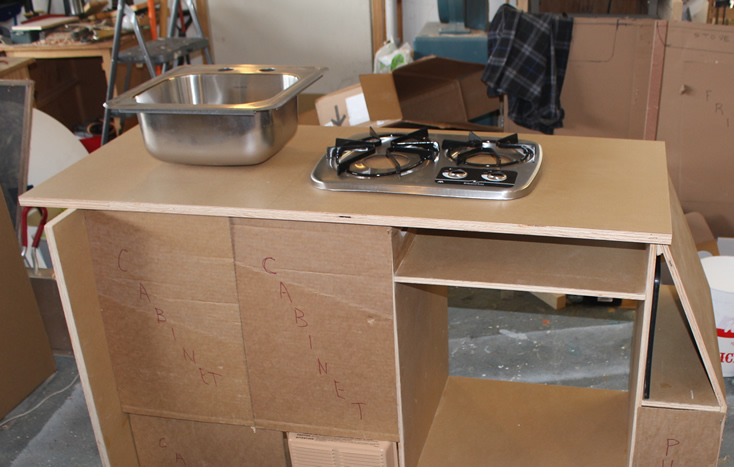
Getting the layout of the sink and stove on the counter top.

Cutting out for the sink and stove.
|
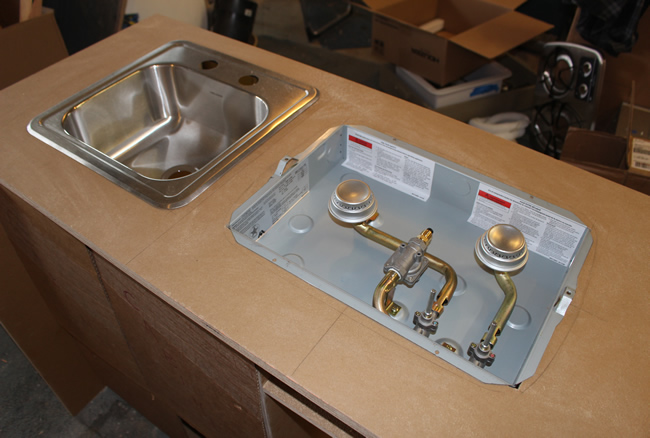
Test fitting the sink and stove to the cutouts. |
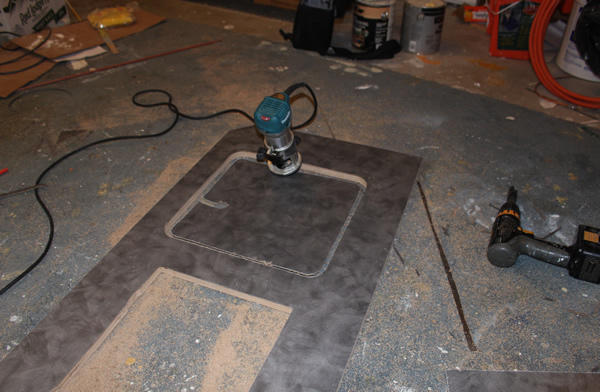
The counter top laminate has been contact cemented to the plywood, and the cutouts for the sink and stove are being made in the laminate by just tracing around them with the router
bit with the ball bearing follower. |
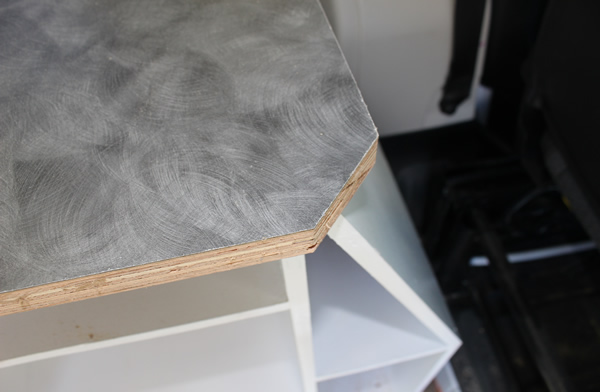
Trimmed the edges at 45 degrees to reduce injury possibility.
|
I used the same Hickory flooring that was used to make the cabinet doors and drawer fronts to do the edging around the counter top.
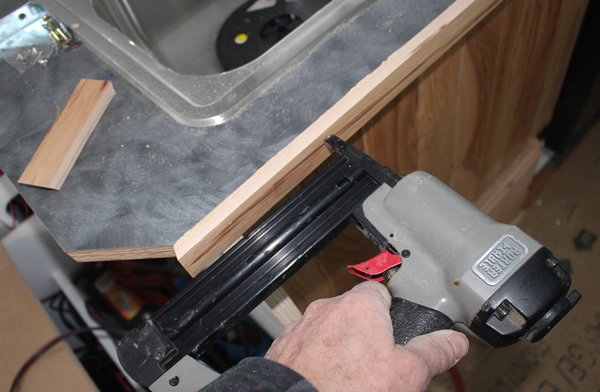
Installing the Hickory edges to the counter top.
|

Rounding over the edges on the counter top edge trim.
|
The backsplash is also made from the Hickory flooring:
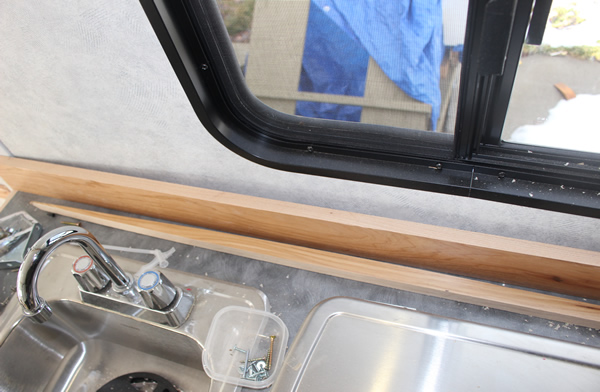
The curve of the wall paneling under the window required cutting a curved filler
board to fill the curved gap.
|
Gluing the curved filler to the straight backsplash piece.
|
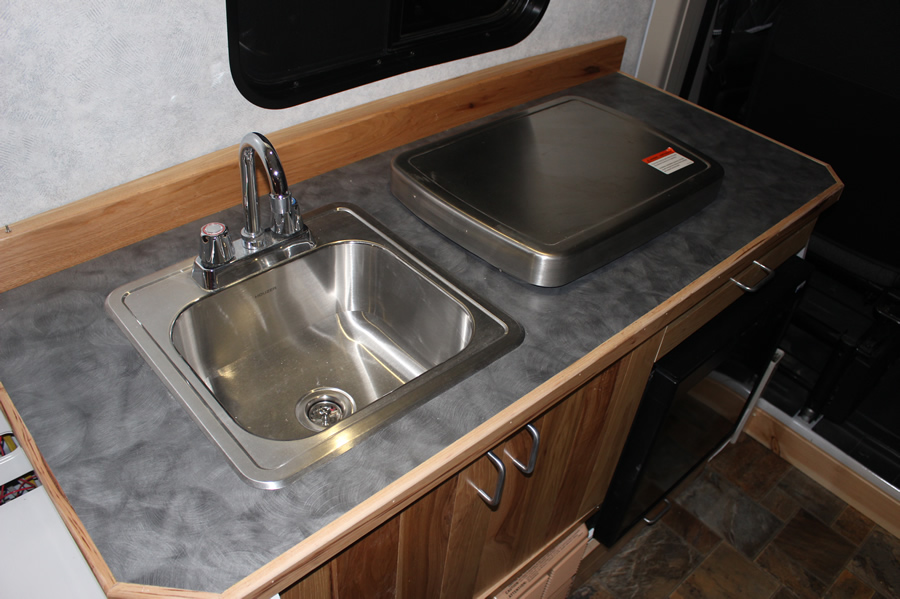
Finished counter top.
Sink install
The sink is compact and is made for RV's or to use as a bar sink. The sink and faucet were offered as a package.

Some pictures of installing the sink:
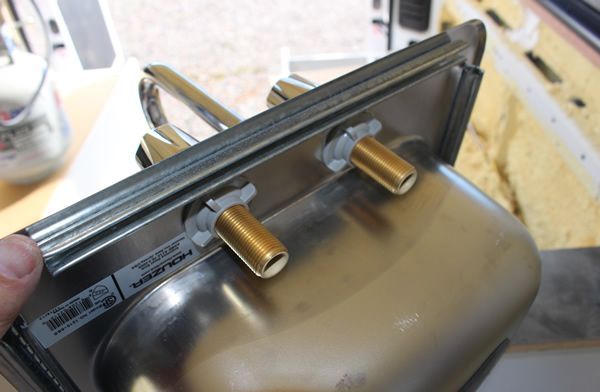
Its easier to mount the faucet and drain before installing the sink in the cutout. |
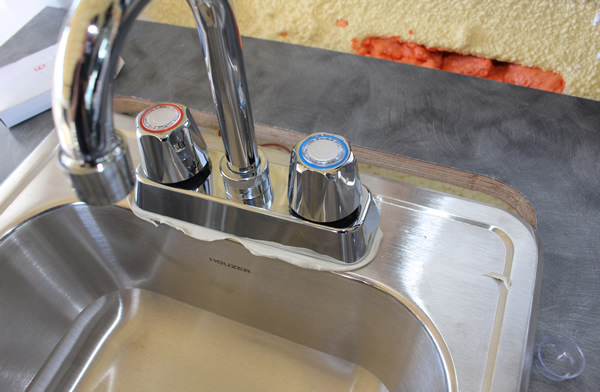
Plumbers putty under the faucet base.
|
 |
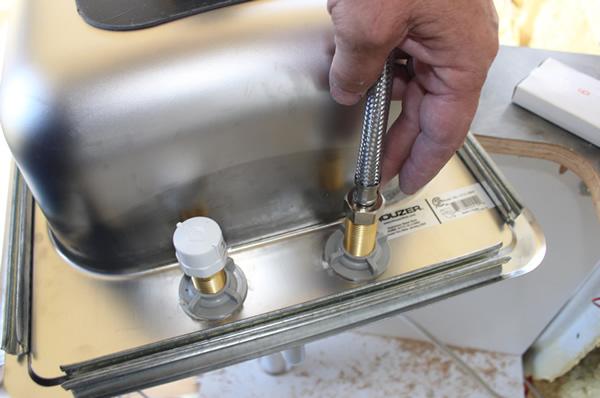
Hooking up the cold water supply that connects to our fresh water tank pump. Since we
don't have hot water, I just capped the hot water faucet connection with a PVC threaded cap.
|
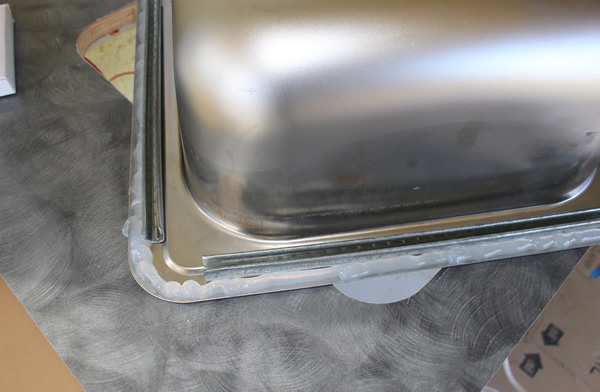
I used silicone caulk around the rim of the sink before installing it in the cutout.
The sink mounts from the underside with clips that they provide and that go in fairly easily.
Stove install
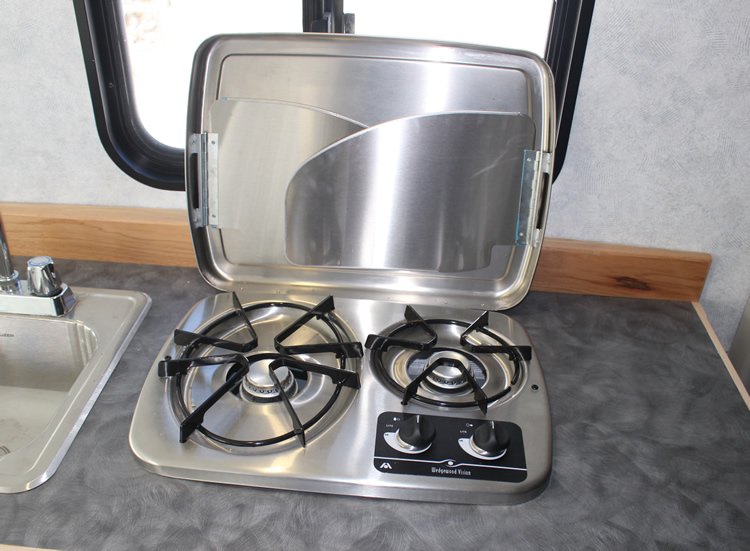
The stove is a 2 burner Atwood that appears to be built well and works fine in the bit of testing we have done. We also got an optional stainless steel cover made for the stove that provides some counter top space when the stove is not in use. The stainless steel cover is nice and functional, but does not fit quite flat on the counter top.
The Stove does not have any kind of auto ignition system, so you have to manually light the burners. Still looking for a good pizo-electric lighter gadget if you know of any.

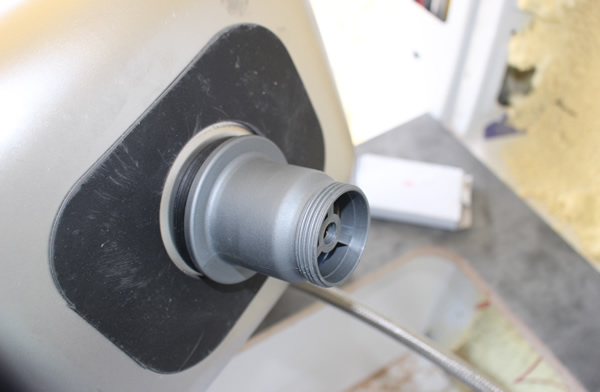
The stove base fits in a cutout in the counter top. The 3/8 copper propane line stove as shown in this picture with a flare fitting.
Be sure to test for leaks. There is a rubber bushing where the copper line comes into the stove base that was not installed when this picture was taken.
Fridge install
The fridge that we selected is the Norcold NR751. It is a 12 volt DC refrigerator that that uses the efficient Danfoss BD35 compressor for low power use. Most of the RV fridges use quite a bit of power, but the power usage of this fridge makes it feasible to use with solar power only for extended periods -- unfortunately this comes at a fairly steep price -- $630.
The capacity is 2.7 cubic feet and it has a separate freezer. This was about as large as we could fit in the galley cabinet -- should be plenty for us.
The fridge is easy to install as long as you make the cabinet opening the right size for it to slide into. It just slides in and is attached with 4 screws near the front.
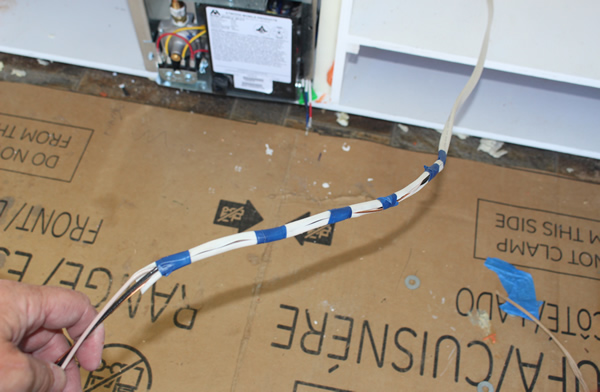
The electrical hookup is also easy, it just needs a dedicated 12 volt DC circuit with a 15 amp fuse. They want you to twist the supply wires together for the first few inches to prevent electrical interference (not sure is this is to protect the fridge from the van or the van from the fridge)
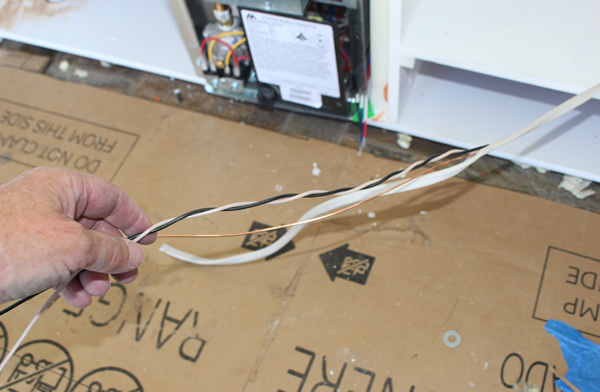
I opened up the sheathing on the Romex, twisted the wires, and then taped the sheathing back on.
|
 |
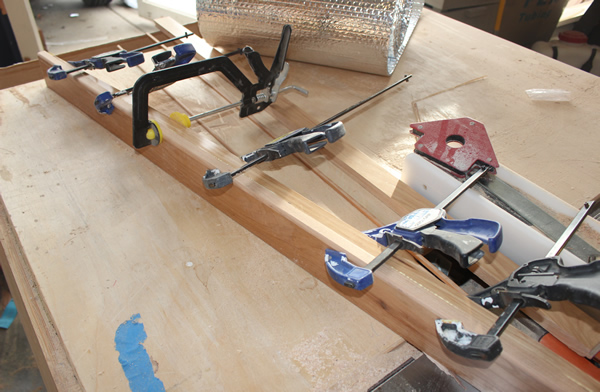
They recommend installing the fridge away from heat sources like the furnace and stove, and since we really could not do this and get everything in the galley cabinet, I installed rigid polyiso insulation panels between these warm items and the fridge.
The pictures below show how the insulation panel was installed between furnace and fridge.
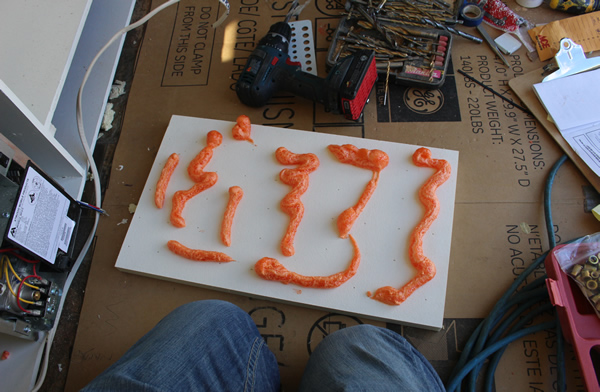
Applied Great Stuff polyurethane foam to the insulation panel to glue it in place. |

Clamping the insulation in place until the Great Stuff cures.
The furnace
is on the left and fridge compartment on the right in this picture.
|
Doors and Drawers
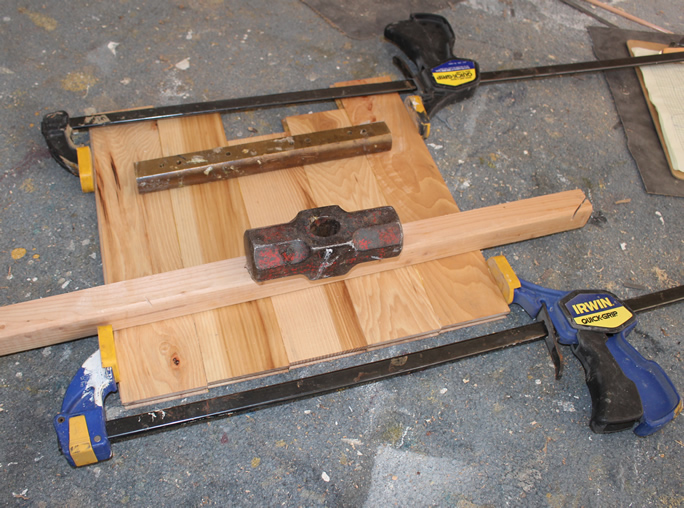
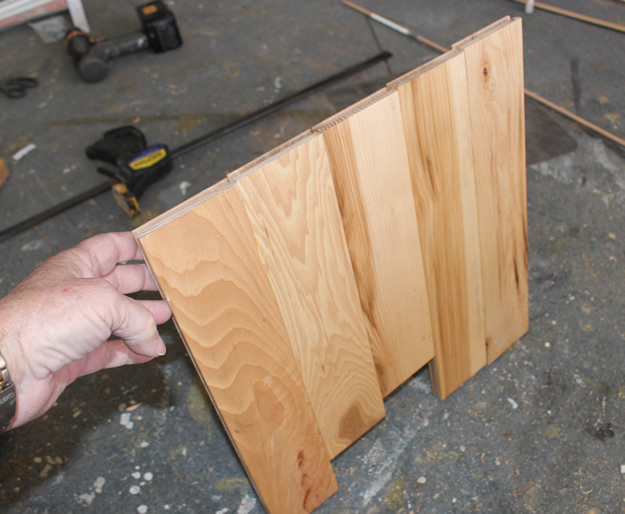
We both like the look of Hickory and thought it would be nice to make the cabinet doors and drawers out of Hickory. In looking around for some suitable source for the Hickory, I ran across bundles of Hickory flooring the Home Depot sells, and decided to use it.
I took the about 3 inch wide tongue and groove floor pieces that were about 3/4 inch thick with grooves on the back and surface planned them down to about 5/8ths leaving the prefinished tops intact. I was prepared to rip off the tongues and grooves and edge glue the pieces together using biscuits, but found that just edge gluing them with the tongue and groves still in place worked fine. So, I just edge glued enough pieces together for each cabinet door and each draw front, and them cut them down to the exact size needed. Not sure if this is the simplest way to get to Hickory doors, but it worked OK and was not too expensive.
Also ended up using the Hickory for the trim around the counter top and the backsplash board.
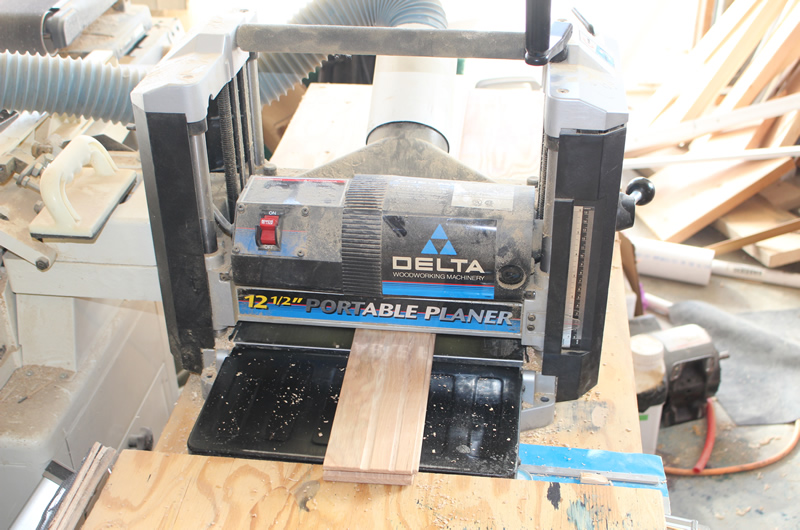
Surface planning the Hickory down to make a flat back side at 5/8ths thick.

Cutting the edge glued pieces down to door size needed.
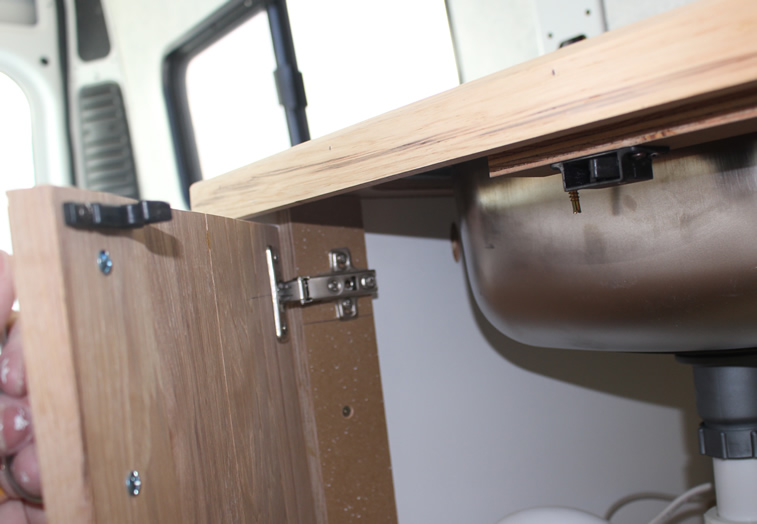
I used the European style hinges -- they have some adjustment to easily get the fit just right, which is nice.
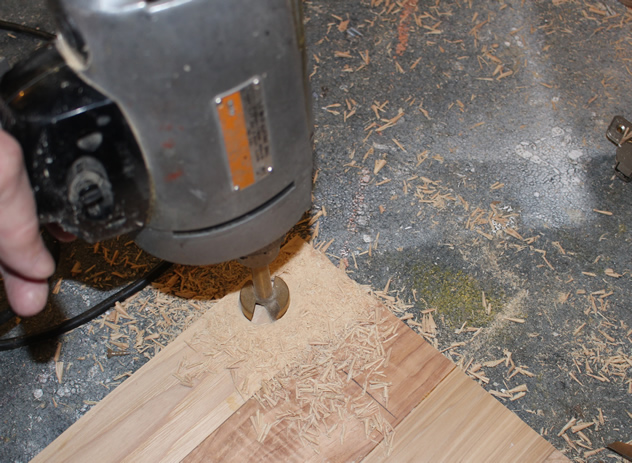
Drilling the holes to house the European style hinges.
|
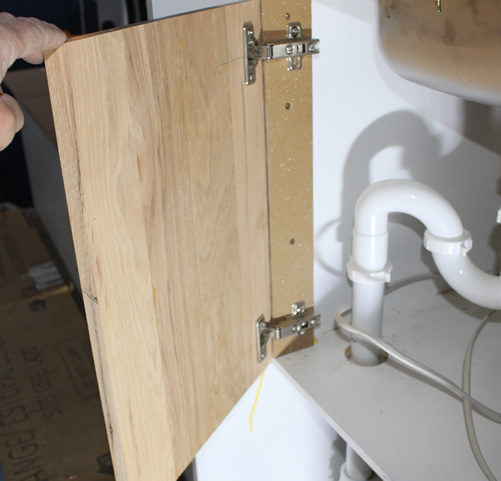
Hinges mounted on first door.
|
First couple doors in place.
The door boxes are made from a simple box of half inch Birch plywood. I just made a bottom piece and then glued and mailed the sides to the bottom. Using dadoes in the sides to slide the bottom piece into would have cost us about a half inch of drawer depth that we just don't have. The Hickory drawer fronts are glued and screwed to the plywood box -- being careful to get the alignment just right.
I used heavy duty, self closing drawer slides from Home Depot.
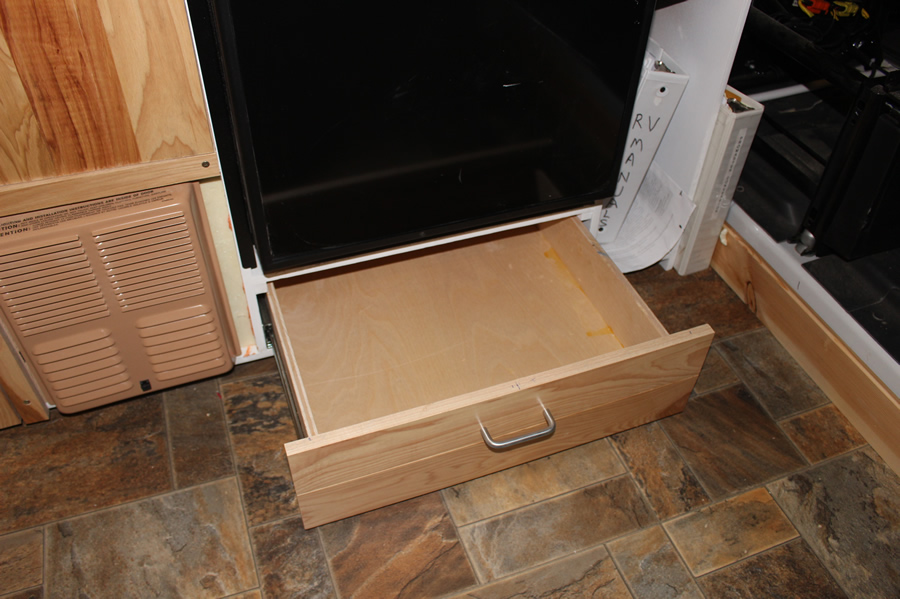
The drawer above the fridge is very shallow, but should be just deep enough for silverware and knives.

Keeping the doors and drawers closed:
A way is needed to keep the doors and drawers from opening as you go around corners.
I've bought and installed one of these "Push Latches" from RV Designer that holds the door in place with a few pounds of force. I'm not sure whether it will be adequate or not, and still considering other ways to hold things in place.
One of the RV Designer lataches installed -- they do work pretty well, just not sure if its enough force.
Attaching Galley Cabinet to van
The galley cabinet is attached to the van side wall and also bolted through the floor.

The upper outboard part of the galley cabinet is attached to the van sidewall longeron using rivnuts in the longeron and
bolts through the cabinet end walls. This is done at both the forward and aft ends of the galley cabinet.
I have not completed the bolting of the galley cabinet through the floor yet, but plan to do this before using it. It will be done in the same way as the bed platforms are bolted down.
Cost, Weight and Time
| Item |
Cost ($) |
Weight (lb) |
| base cabinet |
$70 |
72 lb |
| Counter top |
$50 |
5 lb ? |
| Cabinet and drawer fronts (Hickory) |
$80 |
22 lb |
| Drawer boxes |
$20 |
11 lb |
| Stove and cover |
$170 |
12 lb? |
| Fridge |
$630 |
50 lb |
| Sink and faucet |
$100 |
7 lb ? |
| |
|
|
| |
|
|
| Total |
$1120 |
179 lb |
I did not keep good track of the time that went into the galley cabinet -- If I had to guess, I'd say a half day to do the base cabinet + a half day to do the counter top and cutouts + a bit more than a day to do the cabinet doors and drawers + maybe another half day for painting and odds and ends -- say the equivalent of 3 full days.
Comments
Commnets, suggestions, questions are most welcome Comments and Suggestions...
Go back to the main camper van conversion page...
Gary December 3, 2014