Search
The Renewable Energy site for Do-It-Yourselfers
Solar
Horse Tank -- Version 2
Livestock watering tanks will
develop a layer of ice in cold weather, and then progress into a solid
block of ice if not tended to. The usual solution for this is to
use an electric stock tank heater. These are thermostatically
controlled heaters that turn on when the stock tank water gets near
freezing. The heaters do a good job of preventing ice, but they are terrible power hogs.
|
Typical stock tanks have a
large exposed water surface that loses heat by both convection and
evaporation. They also have highly conductive
single wall sides and bottom that are in direct contact with cold air or
cold ground. If you set out to design a tank to maximize heat
loss, you could not do much better than a typical galvanized or plastic
stock tank -- they are awful. The result is lots of energy
consumption, high electric bills, and high CO2 emissions.
|
NEW
Our Solar Stock Tank featured in the October issue of Mother
Earth News...
 |
We measured the electricity consumption of the heater on
the old tank during
mild winter weather at 8.5 KWH per night -- this is with night lows in
the 15F to 30F area, and highs in the 25F to 40F area. I would
guess that with "real" winter weather you could see 30 KWH per day
-- this will cost $3 a day and generate 45 lbs of CO2 a day.
The material below describes
the latest version in a series of insulated and solar heated
stock watering tanks that require little or no supplemental heat to be
free of ice. Complete construction details are included.
|
|
History leading to the tank design
The table below shows the original
prototype and several follow-on designs built by Build It Solar readers. They
all work well, and in reviewing them you may find ideas in that will fit your
situation.
Here are some
other schemes (both commercial and
homemade) that are being used to minimize ice problems ...
Our New Tank
This design is based on the ideas
and lessons from the all of the above designs, and from Lori's (my neighbor with
horses) ideas on horses and their interesting habits.
The changes from the prototype
include:
-
Using a galvanized stock tank
as the base
A lot of people already have these, they are durable and not to
expensive, and the metal wall painted black on the outside makes a good
solar absorber. They seemed to work out well for Steven and CS in their
tanks.
-
Double glazing
I used two layers of the SunTuf polycarbonate glazing for the south wall
of the enclosure in front of the absorber.
This should about cut the night time heat loss in half, while only cutting the
solar gain by about 10%.
-
Nice simple framework
The rectangular 2X4 framed plywood covered box is easy to build and easy
to install insulation in.
-
Lid over tank with horse head
size opening for drinking.
The lid over the tank helps to cut down the heat loss from the open
water.
The idea of a floating insulation lid was not tried, as it was thought
to be to susceptible to damage.
The water surface is still a high heat loss area, and while the
partial cover helps, I'm sure that performance could be improved if the
top water surface could be better insulated. Any ideas?
I think that the end result is easy
to build, durable, and will handle the ice problem without supplemental heat in
all but the most extreme weather.
Performance
We measured the consumption of the
electric heater on the old tank (a bare galvanized tank) during mild winter
weather at 8.5 KWH per full day -- this is with night lows in the 15F to 30F
area, and highs in the 25F to 40F area. I would guess that with "real"
winter weather you would see 30 KWH per day -- this would cost about $3 per day
and result in about 50 lbs of CO2 emissions.
Lori's experience with the new tank
so far is that it is fine with no heater almost all the time. On
cold mornings there may be a very light skim layer of ice that is easily broken
with a small push from a finger. If you do get this ice in the morning, it
usually goes away completely later in the day.
There have been a couple of occasions
over the full winter when several days of -10F or worse type temperatures required
the use of the heater for a couple days. Even in these circumstances, the
insulated tank greatly reduces the heaters electricity use.
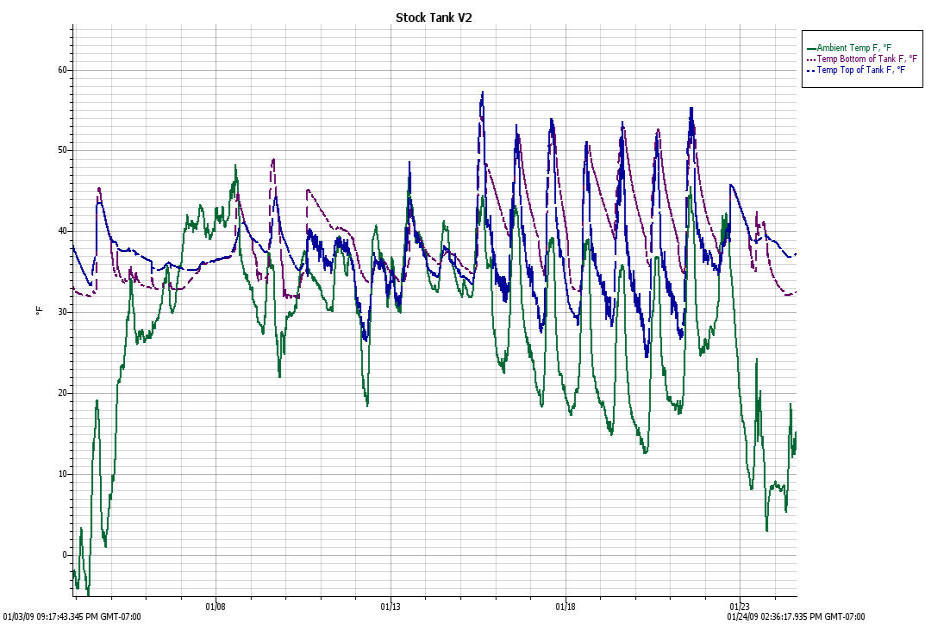
This is a sample plot for a few days
showing ambient temperature, and the temperature near the top of tank and near
the bottom of tank.
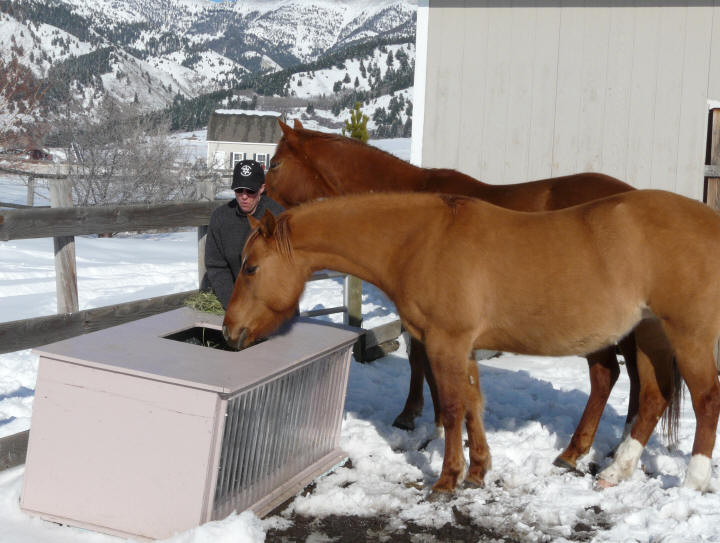
Customer Acceptance
The horses seemed to take the new
tank in stride with no problems. Lori thought they might have a problem
sticking their heads into the fairly small opening, but they took to it with no
problems.
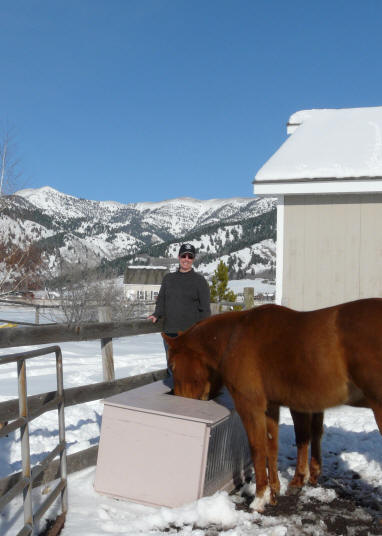
Lori, Princess and Darby
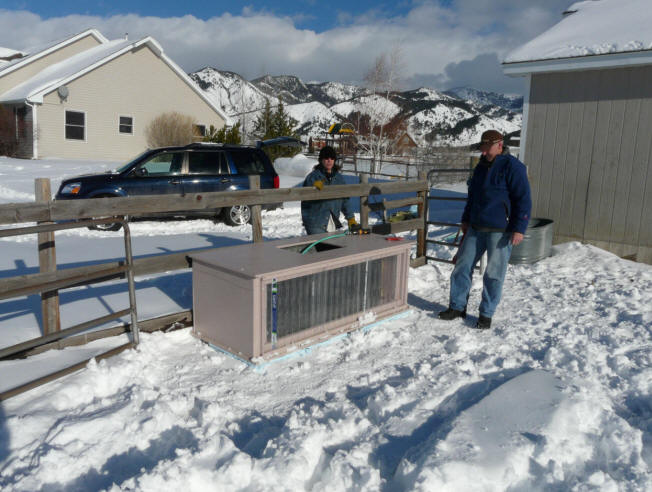
Construction
The pictures just below provide an
overview of the tank construction.
Go here for much more step-by-step detail on the tank
construction ...
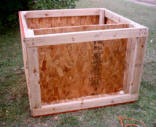
1 - Build the frame for the
insulated box that encloses the tank
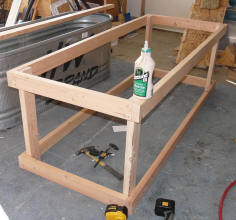 |
The box that encloses galvanized stock tank is framed
with 2X4's. |
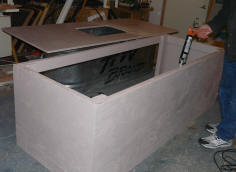
2 - Cut and attach the plywood sides
to the box
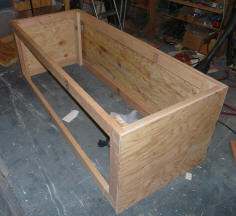 |
Cut out and attach the plywood sides and back of the
box. The front is left open for the collector glazing. |
3 - Cut and fit the Top and Bottom
of the box
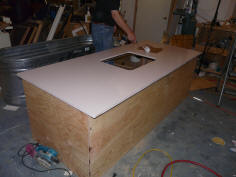 |
Cut out the top and bottom panels for the tank. The
bottom is installed at this time, and the top set aside to be installed
as the last step.
The top has the hole to allow the horses access to the water. |
4 - Paint and seal the box
 |
All of the box enclosure parts need to be protected
with exterior paint. All the seams should be caulked to reduce air
infiltration. |
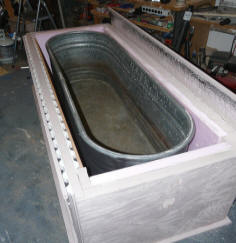
5 - Install insulation board
 |
The insulation board is cut out and fitted to the
bottom and sides of the tank. |
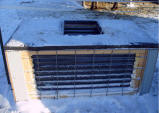
6 - Install the glazing
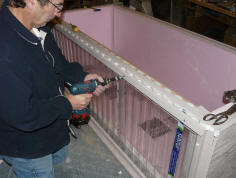 |
The two layers of SunTuf polycarbonate glazing are
fitted to the front opening of the box. SunTuf is a highly transparent
and very tough polycarbonate glazing. |
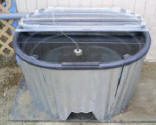
7 - Install the galvanized tank and
the cover
 |
Place the galvanized tank in the box. Add the cover.
Add water.
|
First fill.
Go here for much more step-by-step detail on the tank
construction ...
Potential Design Improvements
The tank is doing quite well in its
current incarnation, but there are always things that might be improved -- here
are some candidate design improvements.
Glazing Protection:
While
Lori's horses don't seem to be interested in damaging the SunTuf glazing, and
the polycarbonate is pretty tough, you might want to consider protecting the
glazing if you think your stock are likely to damage it. The hog panels
that CS used on his tank seem like a good way to go.
Draining:
The tank is difficult
to drain. I plan to add a drain pipe and valve that goes through an
insulated hole in the outer enclosure and connects to the threaded drain plug on
the stock tank.
Better Lid:
A lid design that
allowed the tank water surface to be better protected from exposure to cold, and
is stock proof would be a good improvement. This is the only major
remaining heat loss, and reducing it would probably eliminate the need for any
supplemental heat even under extreme conditions.
Update: September, 2, 2013
This appears to be a good improment on the lid design that reduces heat losses and is simple to do...
Rachel also reports that she covers the drinking openings at night and then takes the covers off in the morning. This should be a very good reduction in heat loss fromt the drinking hole.
Insulation Levels:
The 2 layers of thick foam board insulation
on the bottom, sides, and back may be overkill.
The R value on the bottom,
sides, and back with 4 inches of extruded polystyrene is about R20.
The heat loss with an outside temperature of (say) 10F, and a water temperature
of 40F is about (42 sqft)(40F - 10F)/ (R20) = 63 BTU/hr or 1500
BTU/day.
The 1500 BTU/day heat loss would cool
50 gallons of water by (1500 BTU/day) / ((50 gal)(8.3 lb/gal)(1 BTU/lb-F))
= 4 F a day from heat loss through the bottom and sides.
The heat loss through the front out
the double glazing is about (10 sqft)(40F - 10F) / (R2) = 150 BTU/hr
or 3600
BTU/day -- so the heat loss out the front double glazing is twice
that of the heat loss out the back and sides. The heat loss from the top is hard to
calculate, but is probably at least as much as the front. This probably argues that
the insulation on the back and sides could be cut back some without effecting
the performance of the tank a lot.
So, if you wanted to cut the budget a
bit for building the tank, I think it would still perform quite well with one
layer of 2 inch extruded polystyrene all the way around. Be sure that all
of the 2X4 frame gets some insulation on the inside -- don't let the 2X4's
bridge heat into the box. Another way to save some money on insulation
would be to use rigid foam board under the tank but use fiberglass insulation
around the sides and back.
Note that if the heat loss out the
glazing seems like a high price to pay for the solar gain, the gain for just 1
hour of good sun makes up for the heat loss through the glazing for a full day.
Insulating Covers:
If you visit the tank location fairly often,
the overnight heat loss could be cut drastically by: 1) placing an insulated cover
over the drinking opening at night, and 2) placing an insulated cover over the collector
glazing at night. This could be done when very very cold nights are
anticipated. Even doing just the insulated cover over the drinking
opening would probably help quite a bit. Do horses drink at night?
In Shaded Areas, Eliminate the Solar
Collector:
If the location for the tank gets
little or no sun, then just use insulation all the way around the tank.
This should still reduce the ice formation problem significantly. The
water has a lot of thermal mass, and has to be cooled from around 50F down to
32F for ice to start forming. If the heat loss rate is reduced by using
insulation, it will take some time for the water to cool enough to form
significant ice.
Use the tank with a heater:
Note that the tank could be used with
an electric stock tank heater in extreme cold weather. The added
insulation should greatly reduce the power consumption of the heater. If you think you might want to
be able to use an electric heater, then allow for the heater cord in the construction.

Wow! -- carrots
Gary & Lori March 15, 2009