Search
The Renewable Energy site for Do-It-Yourselfers
Bimetalic Spring to Power Stagnation Vent -- Simply Solar
This is a look at using a bimetallic stri or spiral to open a vent in a solar collector when the temperature in the collector goes over a level that might cause damage tot he collector. The combination of an upper and lower vent in the collector would allow thermosyphon air through the collector, pulling in cooler outside air to bring the collector temperature down.
Contents:
Understanding the Bimetallic Spring Automatic Foundation Vent
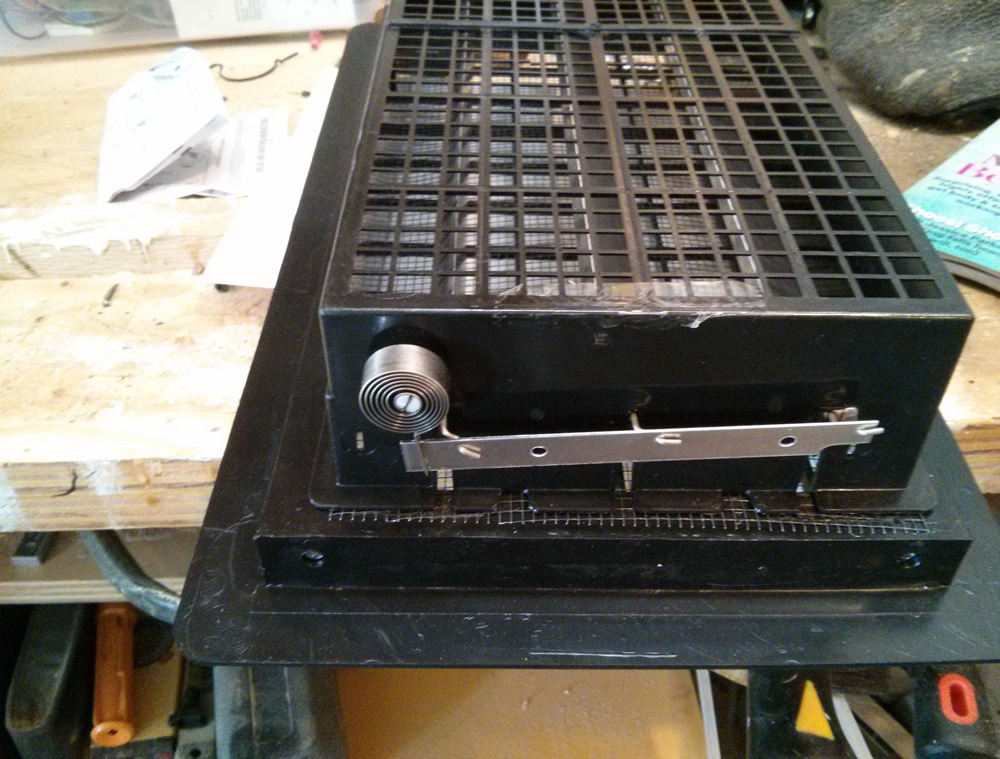
This is a look at using all or part of an automatic foundation vent to provide stagnation venting for a solar air heating collector. The idea being that the bimetallic spring opens the vent and keeps the collector from getting to temperatures that would damage the collector.
The picture below is the automatic foundation vent that I took apart to see how the bimetallic spring that powers it actuates the vent vanes.
The way it comes, it is closed at 40F and open at 70F. We would like it to be fully open at 240F or so and close below 150F or so.
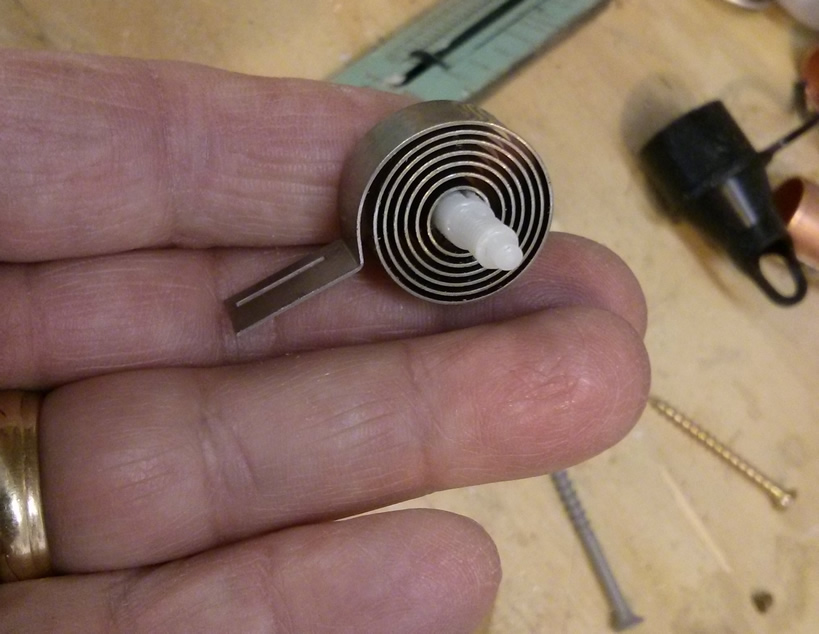
The bimetallic spring is the spiral at the left. It pushes/pullls on the alum bar that actuates cranks (the wire parts going through the bar) which turn the three alum vent plates. The vent plates are open in this picture and you can just barely see the edges of them.
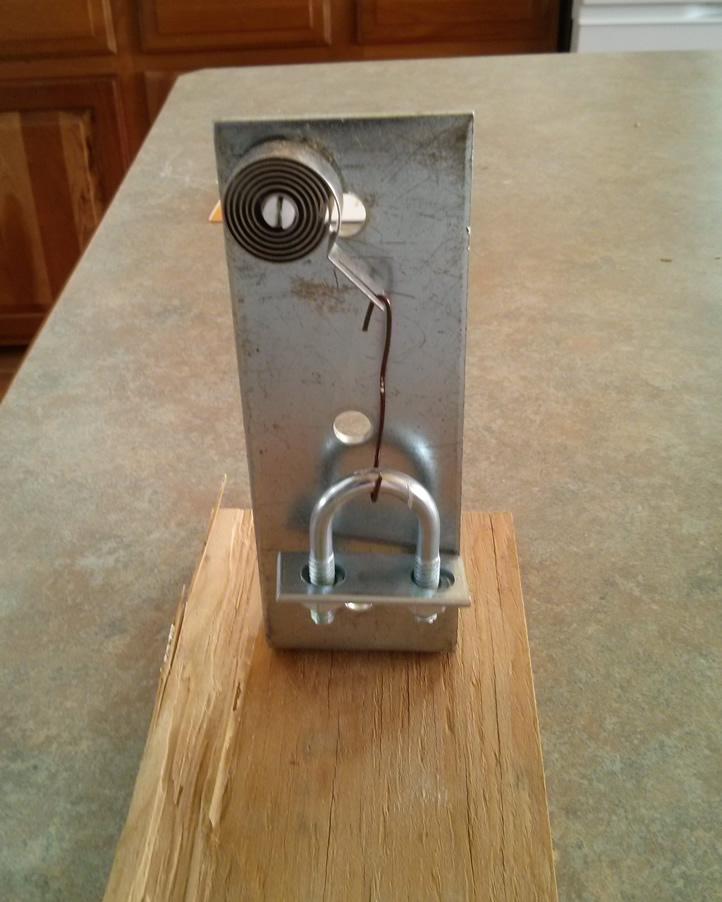
I took the bimetallic spring out and mounted so that I could try it in the oven and see how much it moves and what kind of forces it produces.
Closeup of the bimetallic spring.
This is the spring mounted on a metal plate with a small weight (the U bolt weighing 1.2 oz.) hanging from it. This is at room temp -- the weight gets pulled up as the spring temperature increases.
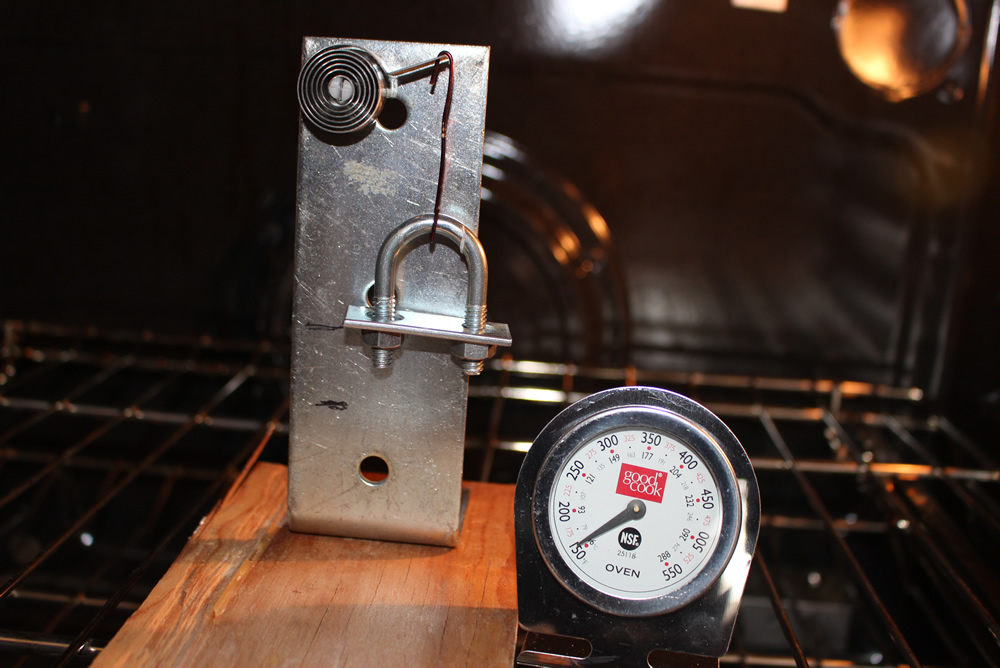
This shows it in the oven at just over 150F. Note the end of the spring has come up (rotated CCW) a fair bit from room temp.
This shows the position of the spring and weight with temp just under 250F. About 80 degs of rotation from the 150F position.
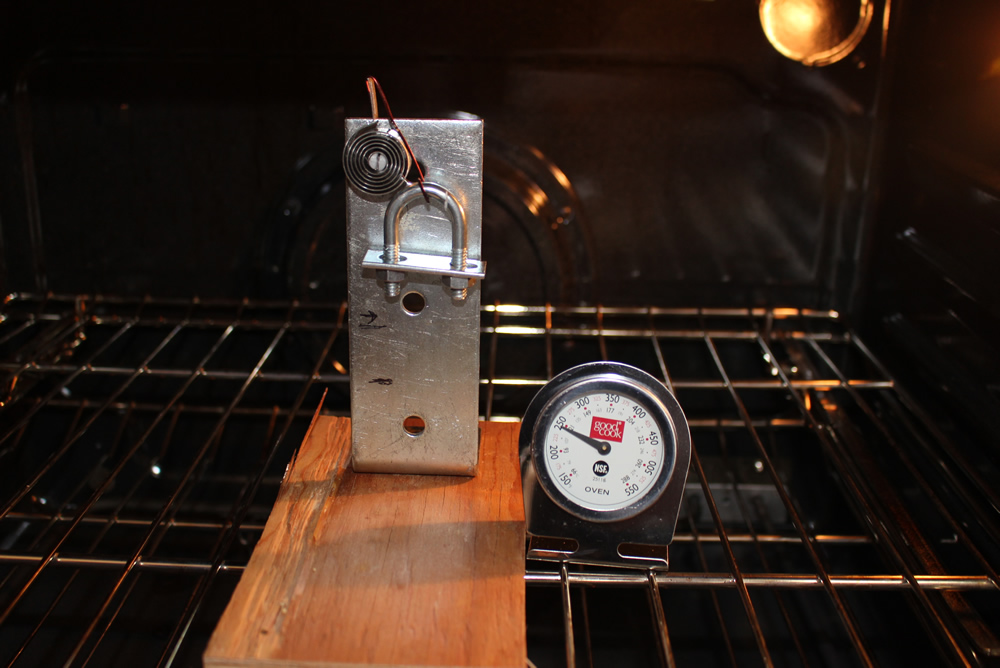
From the 150F position to the 245F position, the weight move up 1 inch. Its starting to bind a bit at this point, so the actual movement might be a little more than 1 inch.
Using a fishing scale, I measured the amount of force needed to rotate the spring through about the same angle as the 150F to 250F rotation, and it is about 12 oz..
So, its seems to me there is some potential here for using a bimetallic spring of about this size to power a stagnation vent.
The vent vane would have to be carefully made to not require much force to move it from closed to open.
The amount of movement available at the spring would be about 1 inch -- this is actually quite a bit more than is used on the foundation vent, and on the foundation vent, the spring is pushing 3 vanes.
I don't think that there is not enough force here to make the vent close hard enough to be a weather proof vent, so, it would have to be protected from the weather with some kind of external cover? Or?
I don't think its worth trying to use the whole foundation vent at the stagnation vent -- its too large, and its made of polyethylene which would probably melt in this application.
So, what is really needed is a place that sells the bimetallic springs alone. I googled around for this a bit, but no luck so far -- maybe someone has an idea on where they could be obtained?
Gary
March 14, 2014
First Try at A Bimetallic Spring Stagnation Vent
This is a first try at a simple solar collector stagnation vent powerd by a bimetallic spring. The vent starts to open when when the collector temperature goes above about 200F, and is fully open at about 230 to 240F. This is adjustable depending on how you mount the spring.
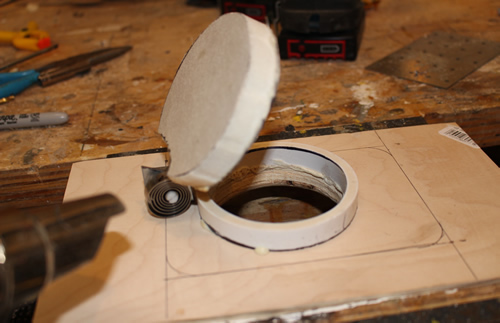
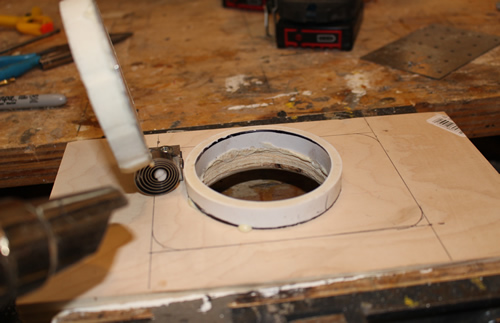
This shows the vent in the closed position.
The vent lid is a 0.018 thick piece of alum with a piece of half inch polyiso glued to it with Great Stuff.
The tab on the bimetallic spring is just glued to the alum with JB Weld (a screw could easily be used).
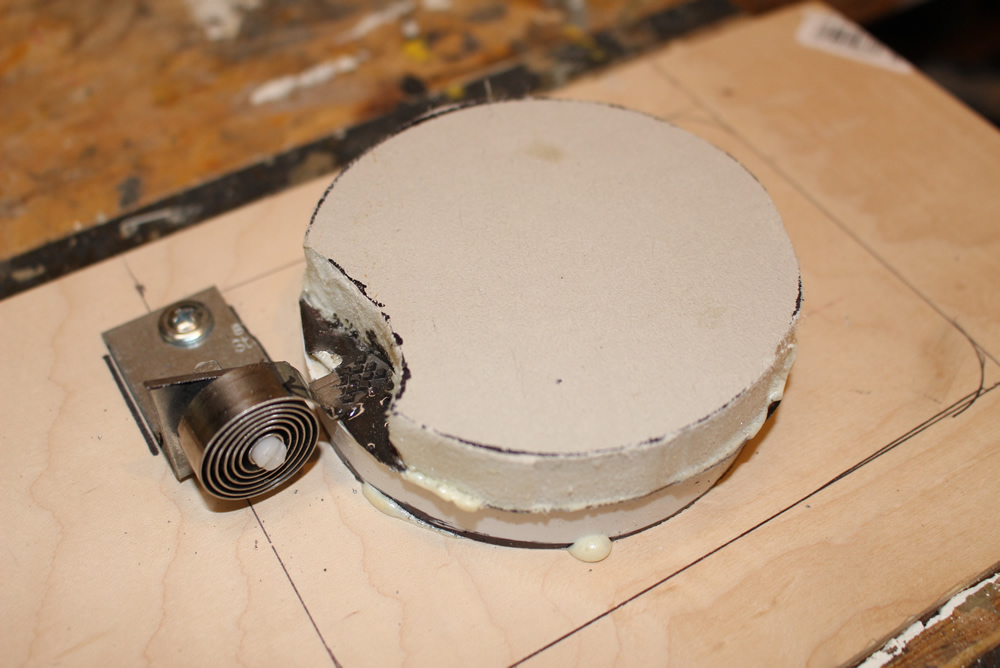
The plywood simulates the collector case. It has a 3 inch hole cut into it, and a short piece of 3 inch PVC pipe cut about half an inch long acts as a spacer to get up to the level of the tab on the spring (see pics below).
The bimetallic spring is mounted on a sheet metal right angle bracket that is screwed to the plywood.
The spring mount bolt (the slotted plastic pin in pic above) is initially rotated about 1/4 turn CW to put some initial down force on the vent. When mounted this way, it takes about a 6 oz.. upward force on the vent to start to open it, and it snaps shut with authority if you open it a little and let go. The quarter turn was a guess based on the oven tests above to try and get the vent to start to open at about 150F.
Putting a heat gun on the spring opens it quickly:
Left pic above is just a few seconds after heat gun is applied, and right picture is maybe 20 seconds of heat gun. Don't know how hot the spring is at this point. The heat gun is just to the left of the spring.
In the oven:
To get a better idea about opening and closing temps, I did a run in the oven.
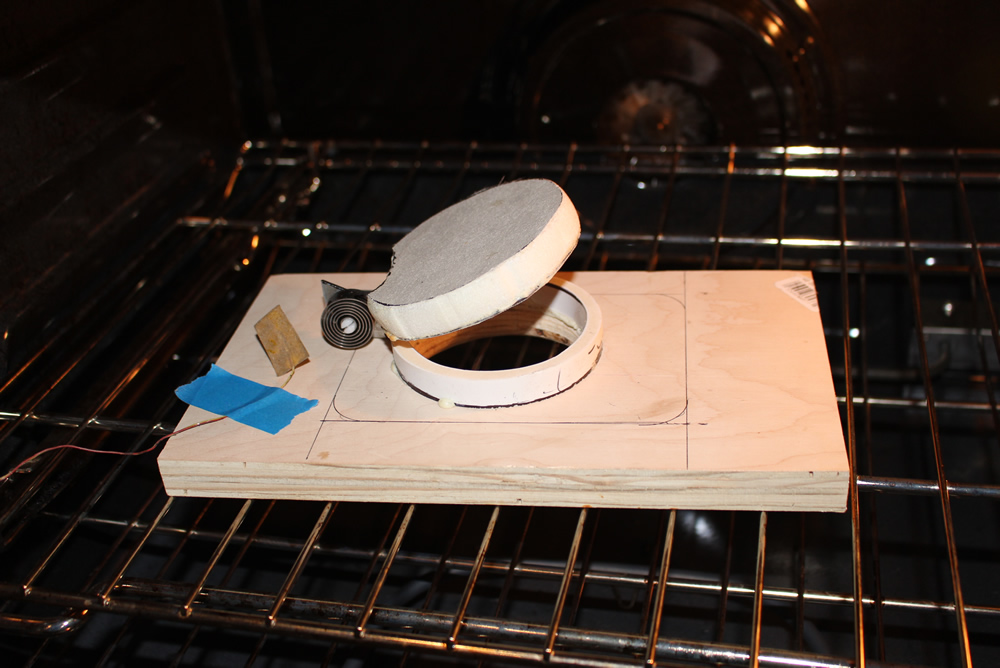
This is the setup in the oven. The thermocouple to measure the approximate spring and air temperature is the tan rectangle near the spring.
I ran the temperature slowly up noting when the vent started to open and how much it was open at several temps as the temp went up. Then let it slowly cool and recorded openings as it went down. The spring (apparently) lags behind the oven air temp and thermocouple temp as the openings for a given temp don't exactly agree on the going up vs going down runs -- but, they are fairly close -- the numbers below are the average of the going up and going down temps.
190F Vent just starts to open
220F Vent open about 20 deg
240F Vent open about 45 deg (enough to provide nearly full flow)
270F Vent open about 70 degs
By the time the vent cools down to about 130 or 140F, it takes about 2 oz.. of force to open it. This may not sound like a lot, but its enough to keep it fully closed even if you rattle it around and for it to snap shut if you open it with a finger and let go.
At room temp it takes a bit over 6 oz.. to open the vent.
The temperature for a given level of vent open can be adjusted by just increasing or decreasing the 1/4 initial pretension of the spring (see above).
Conclusions?
This vent design does work, and maybe with a bit of work to refine the design it could be a reliable and simple stagnation vent that does not require any source of power.
The initial windup or tension you put on the bimetallic spring allows you to adjust when the vent will open -- a nice feature.
This vent design takes up some space inside the collector as the vent lid has to have clearance to open. A louver that is actuated by a lever might be a better choice to minimize this problem.
This kind of vent would require some kind of weather protection -- like a rain cover with an opening pointed down?
This kind of vent would likely be placed high on the collector with a 2nd vent low on the collector so that air can thermosyphon through. The lower vent could probably be open all the time. Both vents should include a screen of some kind to keep the citters out.
I think that the same scheme could be used for a 4 inch diameter vent and would still easily be opened by the bimetallic spring of the size I had. This would give nearly twice the flow area of the 3 inch vent. Or, a rectangular vent could be used.
I still have not found a place that sells the bimetallic springs.
On the downside, this vent takes some time and money to build, and, while its very simple and should be reliable, there is always a small chance it could fail. It also puts some holes in the collector case that would have to be carefully weather protected.
Any ideas on a better design?
Gary
March 15, 2014