Search
The Renewable Energy site for Do-It-Yourselfers
Notes on
Insulating the Attic
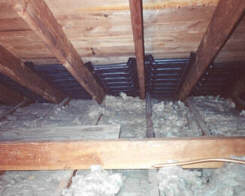
Attic Insulation Options
There are several options for adding insulation to the attic.
If you are starting with an existing layer of fiberglass insulation batts,
you can 1) add another layer of batts going in the opposite direction, or 2) add
blown in fiberglass over the batts, or 3) add blown in cellulose over the batts.
If your existing insulation is blown in fiberglass or cellulose, you can add
more blown in insulation over this.
I prefer the blown in cellulose for several reasons:
- Cellulose has a higher R value per inch than blown in fiber glass (R3.1
per inch vs R2.2 per inch)
- Cellulose retains its R value in cold temperatures, but this study
shows that loose fill fiberglass loses R value as temperatures go down due
to convection currents that form in the FG.
- Cellulose is less irritating to skin and breathing.
- Cellulose is made from recycled newspapers and has a low embedded
energy.
There may be some cases in which due to space limits or other factors you
would want to consider sprayed in foam insulation. This is a high quality
material that does a good job, but pretty much has to be professionally applied.
There are significant differences in both R value and vapor barrier properties
between closed cell and open cell insulation, so be sure to do your homework on
this.
Estimating Your Cost Saving
You can use the
Insulation
Upgrade Calculator to estimate the energy, fuel, and greenhouse gas saving
that will result from insulating the attic. You will likely find that the
payback period is quite short.
As a quick example, lets say that you live in Denver in a house with a 2000
sqft attic. The attic now has 5 inches of blown in fiberglass insulation.
You have a 12 year old gas furnace. What are the savings for adding 10
more inches of blown in cellulose over the existing FG insulation?
The calculator requires these inputs:
Heating Degree Days:
From http://www.degreedays.net the
number of average number of heating degree days for Denver is 6380.
Insulation R values for before and after:
From the Help on R Values page, the R value for the existing 6 inches of
loose fill FG insulation at R2.2 per inch is R13.
Adding 10 inches of loose fill cellulose at R3.1 per inch adds R31 for a
total R of R44. Note that you will also get a substantial improvement
in resistance convection currents forming in the existing insulation and
reducing its effective R value.
Furnace efficiency and fuel cost:
A 12 year old furnace is likely to have an efficiency around 80%. Lets
say you pay $1.80 per therm (100 ccf) of gas -- your gas bill will tell you
exactly.
Running the calculator, you get these results:
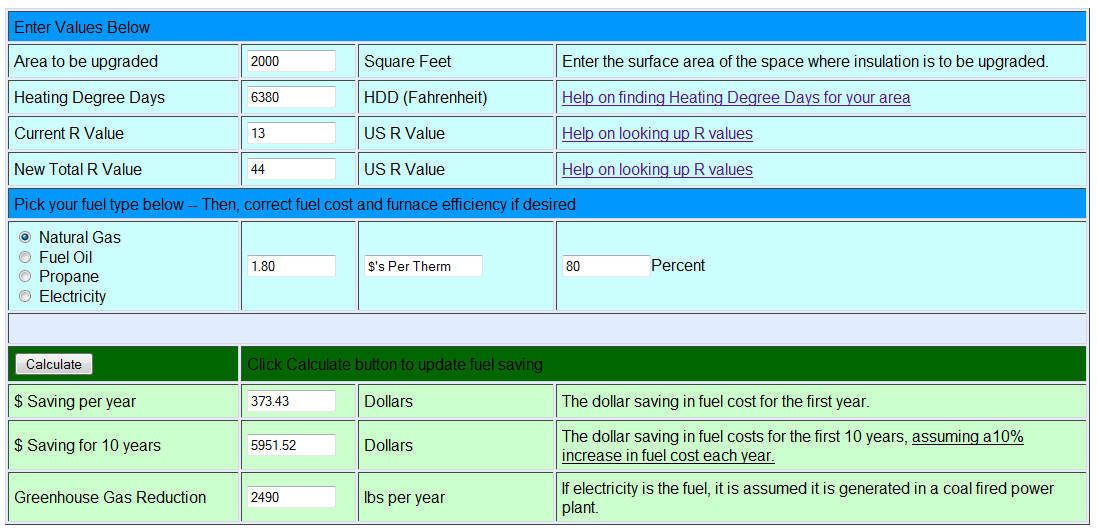
The rough cost of the blown in cellulose is about 1 cent per sqft per R1
added. So, cost for this project might be about (2200 sqft)(R31)($0.01) =
$700. This should qualify for the 30% federal tax credit, and may also
qualify for state rebates.
There are other programs coming along that may offer more financial incentives.
Since most of the Home Depot type hardware stores will loan you the blower
for free, the only significant cost is the insulation.
When you consider the savings for the insulation itself plus the saving for
the infiltration sealing you will do at the same time and add in the rebates,
the payback period for this example is only going to be about 1 heating season!
Of course, you need to run the numbers for your own case, but its hard to go
wrong adding attic insulation.
More help and examples are provided on the calculator page.
Note that if you live in a primarely cooling climate, the savings will be
substantially larger than the calculator predicts in that you will save on both
the heating and cooling bills, but the calculator only shows the savings for the
heating part.
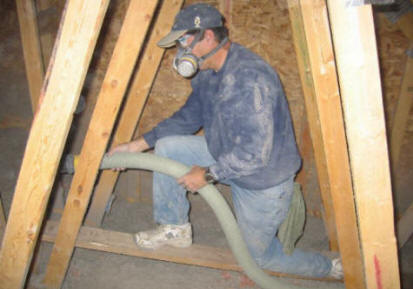
Doing the Job
There are some things that you should take care of before actually blowing in
the insulation. These things are much easier to do before you blow in
another foot of two insulation that you have to wade around in.
- Do all of your air infiltration sealing.
Air flow from the conditioned space up into the attic is a major source of
heat loss in most homes. The air can come up through holes for wiring
and plumbing, cracks, lighting fixtures, bathroom fans, ... -- lots of
places.
This section has how-to's on sealing up these leaks.
- You might have to add soffit chutes so that the thicker insulation does
not cut off air circulation to the soffit vents. These are made from
plastic foam and just staple in each roof rafter bay to provide an air path
from the soffit vent to a level above the final insulation level.
- You may want to provide for some form of walkway that will be above the
final insulation level so that you can still get around in the attic after
the insulation is in.
http://www.diynetwork.com/how-to/how-to-install-blown-in-cellulose-insulation/index.html
http://www.mge.com/images/PDF/Brochures/Residential/HowToInsulateAttic.pdf