Search
The Renewable Energy site for Do-It-Yourselfers
Insulating a Sliding Glass Door
|
This is a small project to cut the
heat loss through our sliding glass door.
The project consists of installing a
one inch thick R-Board rigid insulation board panel just inside of the fixed
panel on the sliding glass door. The new insulation board panel sits
against the Vinyl frame of the sliding glass door, and the allows the sliding
panel slide by it easily. We intend to install this panel in the winter
and remove it in the summer -- it only takes a moment to take the panel in or
out. It cuts the heat loss for the sliding glass door nearly in half, and
saves about $40 of fuel and 200 lbs of greenhouse gas per year.
R-Board is one brand of
polyisocyanurate rigid insulation board made by Atlas. There are a number
of brands of this type of insulation. The R-Board works nicely because it
has a fairly smooth and attractive face sheets that are also fairly durable and
more resistant to fire that the bare insulation (but see warning below).
|
|
Click on images to enlarge
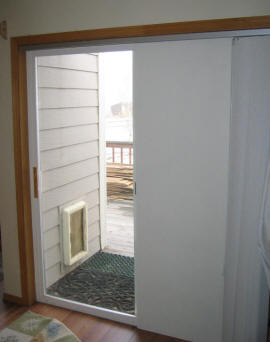
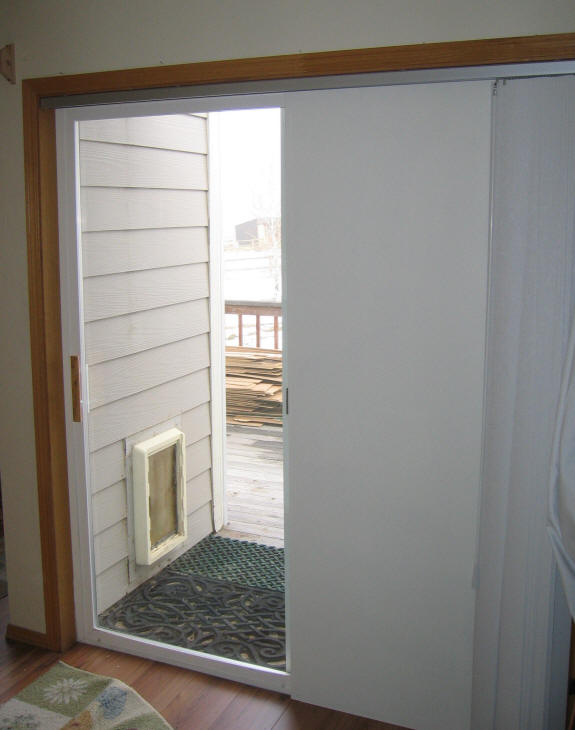
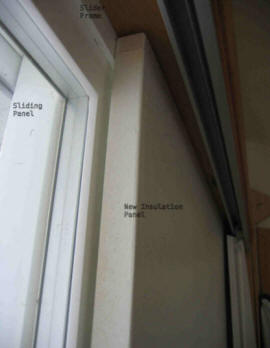
The new insulating panel installed just inside the fixed side of the sliding
glass door. The sliding panel (on the left) slides behind the new
insulation panel. The insulation panel is 1 inch thick
polyisocyanurate edged with wood strips and painted -- it adds about R7 to the
existing windows R2.
Building It
Have a look at the frame on your
slider, and try to find a flat surface that the new insulation panel can seal
against, and still allow the sliding part of the door operate. On ours the
vinyl frame provided this surface nicely.
 This
shows how the insulation panel fits against the Vinyl frame of the sliding glass
door. The sliding part of the door (left) slides behind the new insulation
panel. Weather stripping (not yet installed on this picture) seals
the vertical gap between the slider frame and the insulation panel when the
slider is closed.
This
shows how the insulation panel fits against the Vinyl frame of the sliding glass
door. The sliding part of the door (left) slides behind the new insulation
panel. Weather stripping (not yet installed on this picture) seals
the vertical gap between the slider frame and the insulation panel when the
slider is closed.
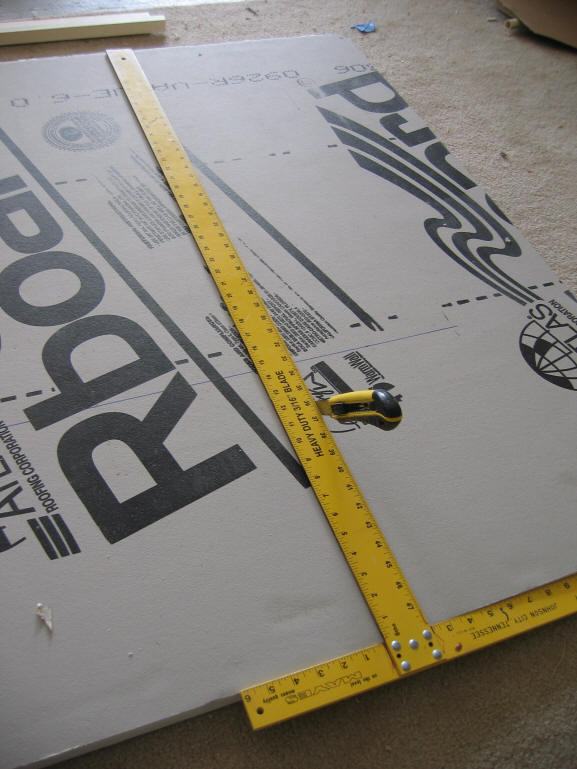
Once you have decided where panel is
going to go, carefully measure the size of the panel, allowing some clearance to
be able to get the panel in and out easily.
I edged the panel with wood strips to
make the panel more rigid, make it easier to handle without damage, increase the
fire resistance of the edges, and to make it look better. If you are going
to use wood edge strips, then subtract the width of these strips when cutting
out the insulation panel.
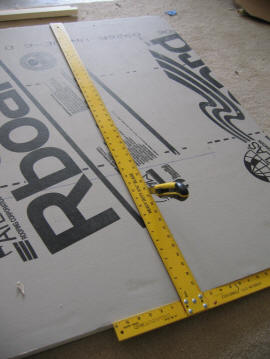
Cut the insulation panel out.
It cuts easily with a long blade razor blade knife as shown below. Use a
straight edge to guide the knife, and do the cut in two or 3 passes, cutting a
little deeper on each pass.
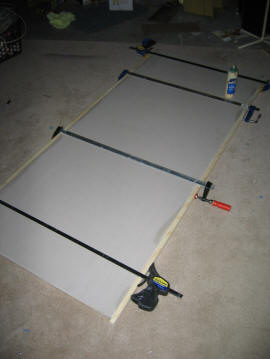
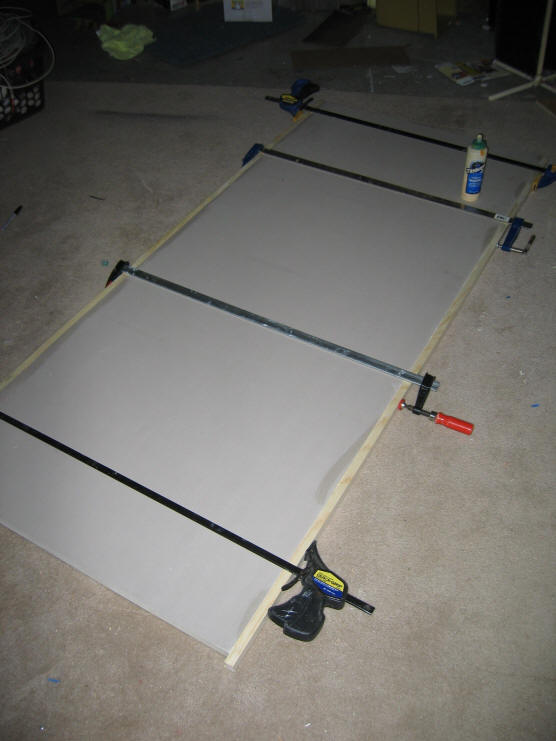
After the panel is cut to size, glue
on the wood edge strips.
Apply glue to both the foam board and
the wood strip. The foam board absorbs some glue, so use a fairly liberal
coating. Clamp the edge strips in place, and wipe off any excess glue.
If you don't have the clamps, you can
tack the edge strips in place with 2 inch finish nails, and then turn the panel
on edge and apply a little weight to the top edge until the glue dries.
Or, you could use a contact cement that does not require clamping.
After the glue dries, sand off any
rough edges and give the panel a coat of latex paint.
After the paint has dried, install
the panel in place and secure it. I used 4 dry wall screws that were just
long enough to through the insulation panel, and into the door frame, but not so
long as to interfere with operation of the slider.
While we had intended to install the
panel in the winter, and remove it in the summer, we just left it up for the
summer. The siding glass door works fine with the panel in place,
and it lets in plenty of light with or without the panel. But, its easy to
remove for the summer if you want to.
Warning
While these insulating panels have
been commonly used to make this kind of interior insulating shutter, be
aware of this fire danger warning printed on the insulation panel:
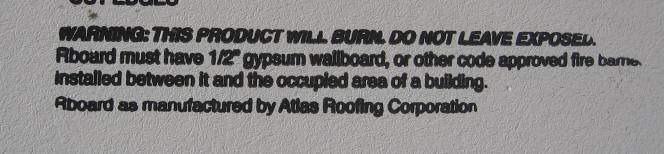
So, make your own judgment on whether you
want to use this material.
Performance
I used the
Insulation
Upgrade Calculator to estimate the saving in heating fuel and in green house
gases.
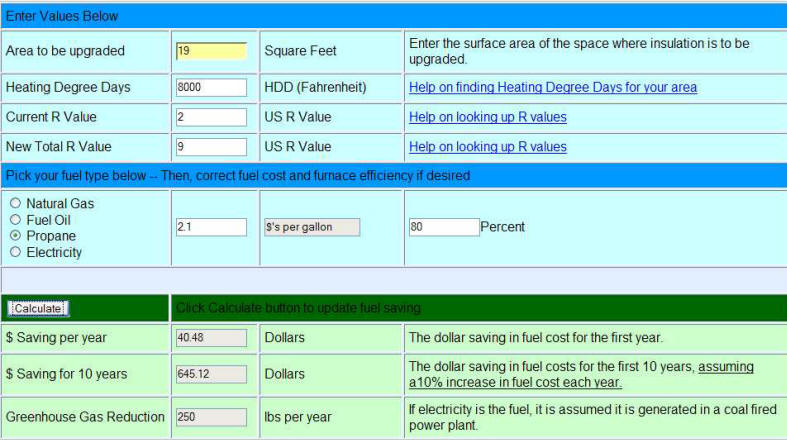
Inputs for the calculator:
Area = 19 sqft (35 by
78 inches)
Current R value = R2.0
(Double glazed )
New R value = (2 + 6 + 1) = R 9
(2 is existing window, 6 is insulation, 1 is new airfilms)
Heating Degree days = 8000 (a
cold climate)
Fuel = Propane at $2.20 per
gallon
Furnace efficiency = 90%
The first year fuel saving is $40,
and the yearly reduction in CO2 is 250 lbs.
For me, the cost was $19 for the
insulation panel plus some scrap wood -- a payback period of one
half year!
Here is the Insulation Upgrade
Calculator Screen:
If you want to do your own
calculation, the
Insulation Upgrade Calculator is here...
Gary 2/707