Kevin, who did one of theearly
$1K solar water heatingsystems
and lives WAY up north in British Columbia has been working on
Solargraphy, which is really fascinating.
He gives a great how-to get started in Solargraphy yourself below.
For more on Solarigraphy see the
Time in a
Can website which has a very nice gallery of Solarigraphy
photos a number of photographers and a good tutorial.
TIME IN A CAN – PINHOLE SOLARGRAPHY
My interest in solar hot water led me one day to a website on solargraphy, the
use of a simple pinhole camera to take ultra long exposures of the sun’s path
across the sky. When they call these ultra long exposures, they really mean it
– often 6 months or more! Not only were these images surreal and artistic, they
also reminded me of the solar site survey that Gary recommends people do before
setting up solar hot water systems. So, I thought I would try my hand at it.
The method, in a nutshell, is as simple as photography gets. Take a container
like a beverage can, poke a tiny hole in it with a needle, and line the inside
of the container with black and white photographic paper (the light sensitive
kind that enlargements are made with). Tape it up so it’s light tight and
waterproof, and set it outside facing south, fastened so it doesn’t move. At
the end of the exposure period, take it inside, take the paper out, and instead
of developing it, just scan it. The image will be negative, so you can turn it
into a positive in Photoshop and adjust the contrast.
Here are step by step instructions. First, the theory:
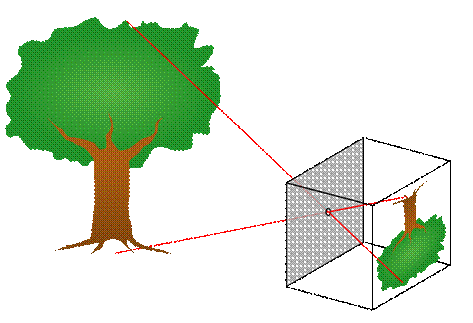
The image captured by a pinhole camera is projected upside down on the back of
the camera.The higher
the pinhole is, the more area above the camera will be captured.
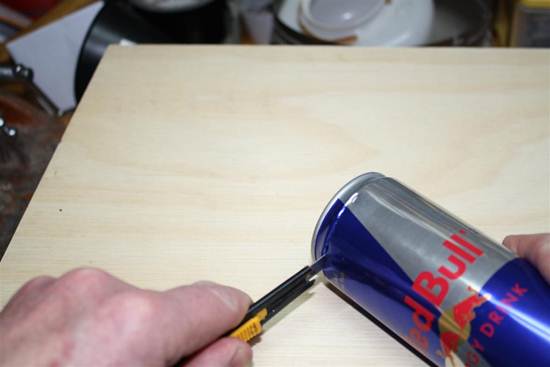
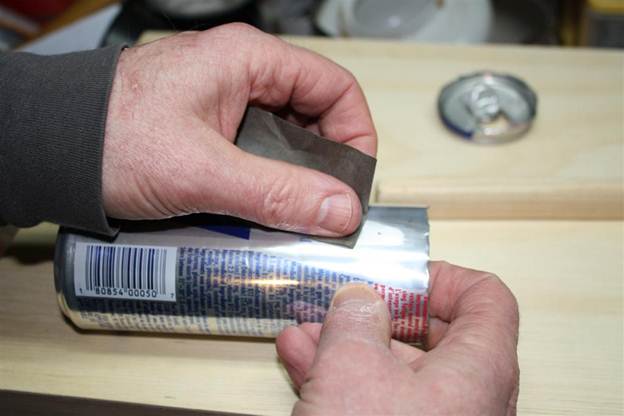
Find a suitable container (bonus points if you find it on the street and recycle
it) and cut the top off carefully.Any
thin aluminum can works well.Find
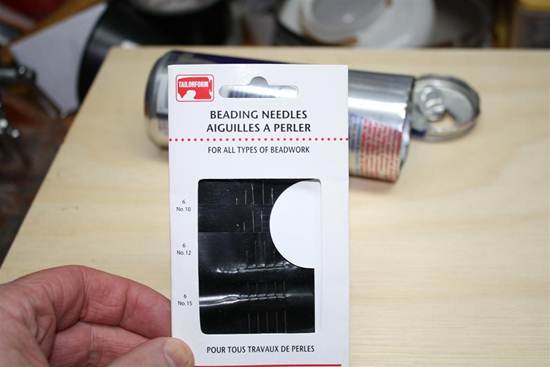
the thinnest needle you can.I
am using beading needles, which are 0.41 mm in diameter.
Cutting the top off.Be
careful of sharp edges.
Beading needles.I
embedded one into a piece of dowel for a handle.
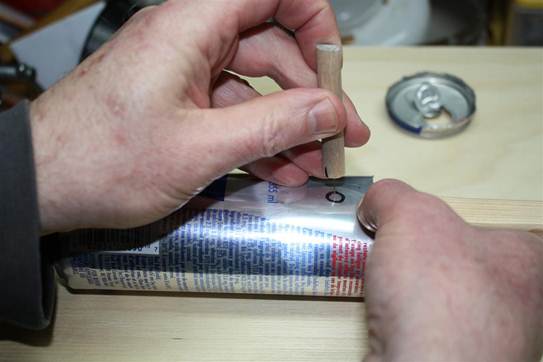
Pick the location to “drill” the hole.If
you put the hole near the top, the camera will get more of its image from high
in the sky (remember that the image is upside down).Using
a block of wood inside the can, very gently push and rotate the needle so that
it makes a tiny dimple on the inside.You
want to avoid “denting” the outside of the can by pushing down too hard.Using
emery cloth, sand the dimple flat.Do
this multiple times, sanding both the inside and outside.The
diameter of the hole you are trying to make depends on the focal length of the
camera you are making (the diameter of the can in this case).A
table of focal lengths can be found here:
For the Red Bull can I am using, the diameter is 55 mm so the focal length is
around 0.3 mm.Since
the needle is 0.41 mm, I need to be careful not to push it all the way through
the can.Use a
magnifying glass to inspect the hole.The
quality of the hole will dictate the sharpness of your image, so it pays to
spend some time here.The
aim is to have both the inside and outside of the metal around the hole as flat
as possible, and the edges of the hole smooth.
Starting the hole with the needle, which is embedded in a dowel for a handle
Sanding the metal smooth
Once the hole is finished, some people spray paint the inside of the can
flat black to eliminate internal reflections. If
you do this, remember to cover the hole with a piece of tape so it doesn’t get
clogged, then take it off.
The next step is to get some black and white photographic enlarging
paper. In this digital age, it
isn’t that easy to find. If you ask
in a store, you are likely to get printer paper for printing photos, which isn’t
what you want.
The next steps need to be done in a makeshift darkroom, such as your washroom.You
can use a red light to help you see.I
use an old headlamp with a red LED.
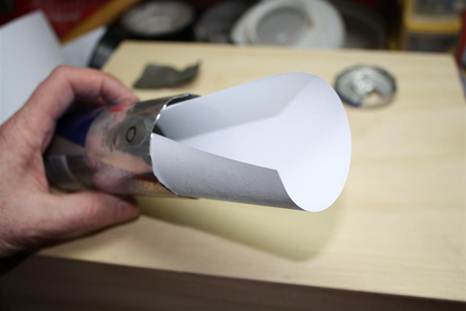
Cut a piece of photo paper to size.It
is best to first make a template out of light cardboard and fit it into your
can, which makes it easier to cut the right size of photo paper while you are in
semi-darkness.It needs
to fit into your can to cover the whole inner circumference except for the part
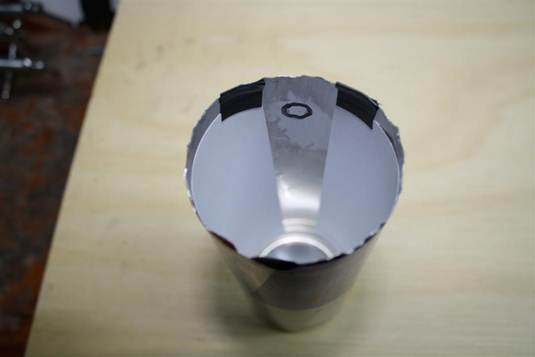
where the pinhole is.To
make the pinhole easier to see, circle it with a black marker.
Ease the paper in, trying not to get fingerprints on it, or else wear light
gloves.
You can hold the paper in place and keep it snug against the can by using small
pieces of electrical tape.
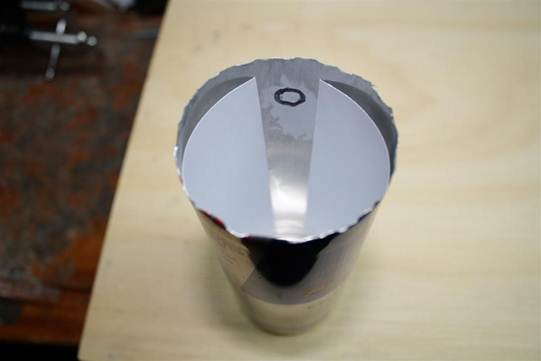
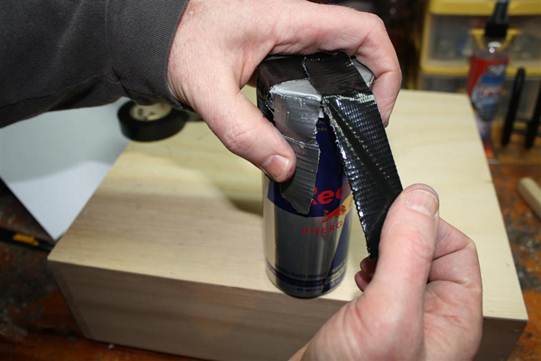
Now put the lid back on the can and tape it up securely. Make sure you put a
piece of tape over the hole so no light gets in until you have it in place
outside
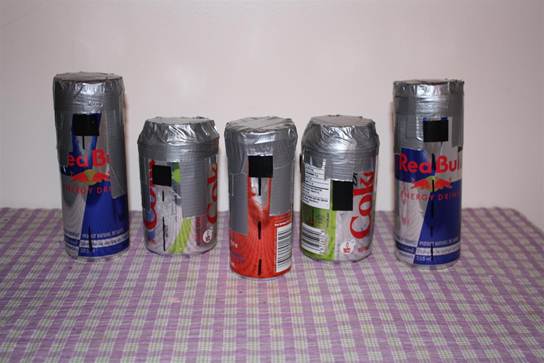
Here are cans ready to set outside.They
can be taped directly to a pole or fence.Make
sure they are secure so they don’t move during their exposure, and don’t forget
to take the tape off the hole!
The hardest part is having the patience to leave the cameras in place for weeks
or months.You may want
to make a trial camera and take it in after a week or so to make sure that your
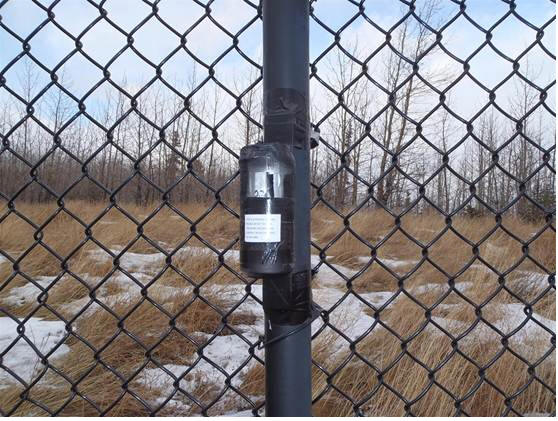
technique works.Here
is one I have fastened to a fence.I
put a label on it explaining what it is, to hopefully avoid vandalism.
Early Pictures -- January 2012
These are the first batch of pictures.
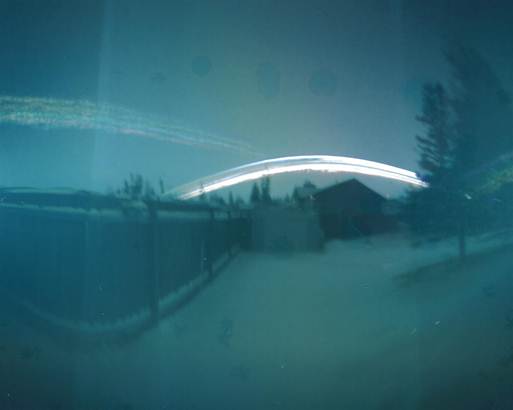
Here is a 20 day exposure, from Dec. 31, 2011 to January 19, 2012. I
live at 550N
latitude, so the sun is very low in the sky in winter.
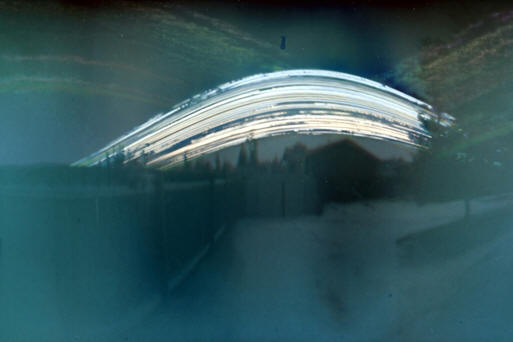
This is a longer 54 day exposure from the same site in my back yard,
next to my
solar panels.
You can see that days with full sun leave a solid line, and each day the sun is
a bit higher in the sky.Partly
sunny days have a broken line, and overcast days don’t have any line.
Latest Pictures -- May 2012
Here are three solargraphy shots that I took recently. I set out a
bunch of tin can cameras in January, and have been taking them in one by
one. The waiting is definitely the hardest part!
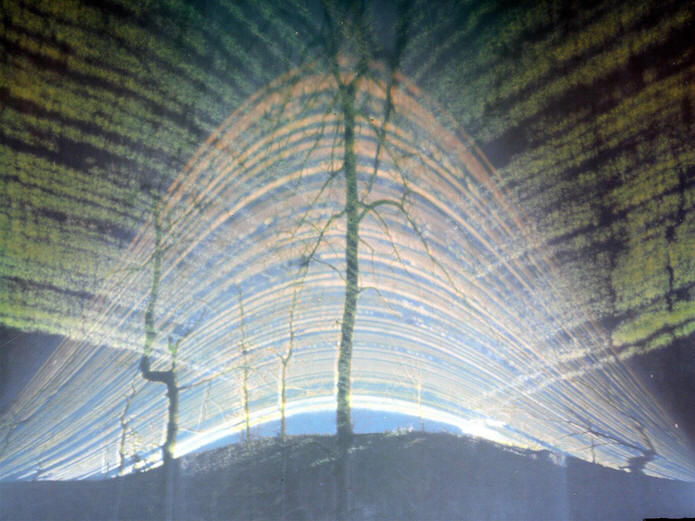
This one was out for 123 days. I purposely put it in a grove of aspen trees for
the effect. You can see radiating lines as well as the path of the sun. These
are caused by reflections inside the can, from the top and bottom I think.
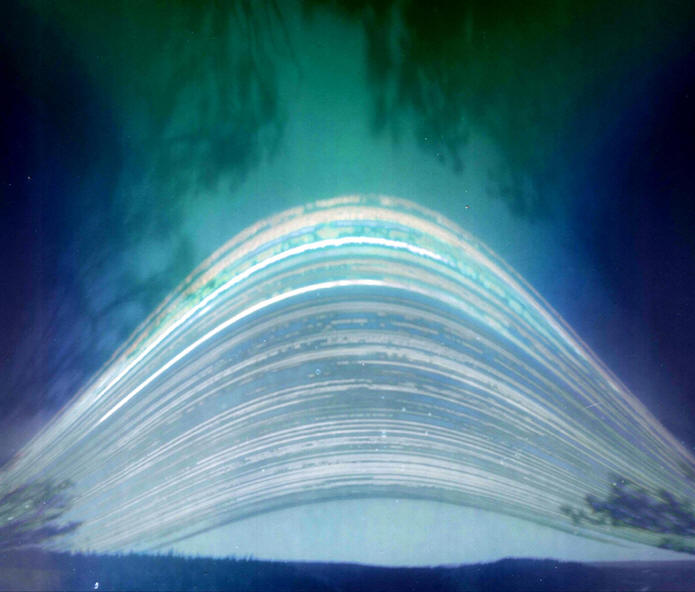
This one was out for 110 days. The inside of this can was painted flat black,
so it doesn’t have the internal reflections. The pinhole “lens” is very wide
angle. This one was mounted on a tree, so you can see branches of the adjacent
trees as well as branches above it.
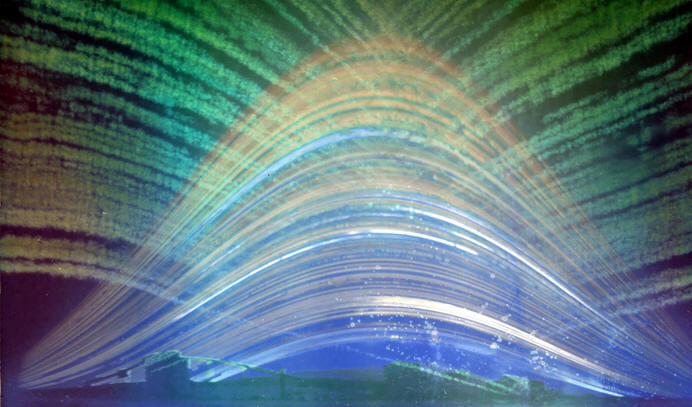
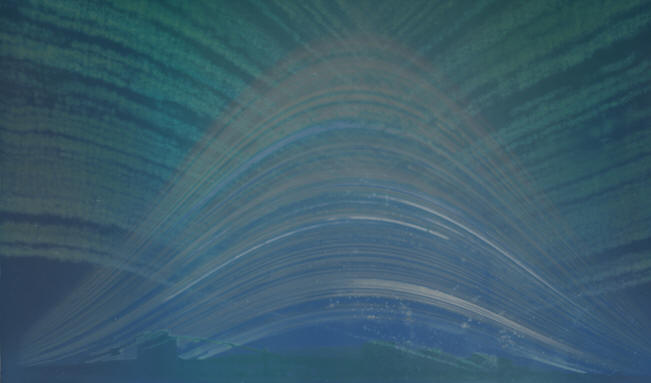
This is my longest exposure so far at 130 days. The features I like about this
one are the buildings and conveyor belts at the bottom, and the colors. Even
though black and white photographic paper is used, the ageing of the chemicals
over such a long time makes some surreal colors. The colors in the original are
subtle, so they were enhanced in Photoshop elements using the auto levels
command. Below is the original image after being flipped and inverted (changed
from negative to positive) in Photoshop Elements, but before being enhanced.

.jpg)