Search
The Renewable Energy site for Do-It-Yourselfers
ProMaster DIY Camper Van Conversion -- Adding Windows
|
We decided to go with windows on each side of the van toward the back in the beds/dinette area, plus a third window in the galley area behind the driver seat. We might eventually add a window in the sliding door, but want to try a trip or two to see if the added window in the door would be a plus or minus.
This section goes over the selection and install of the windows.
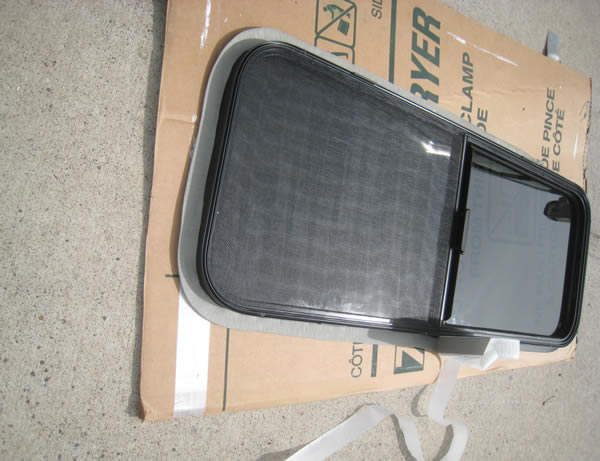
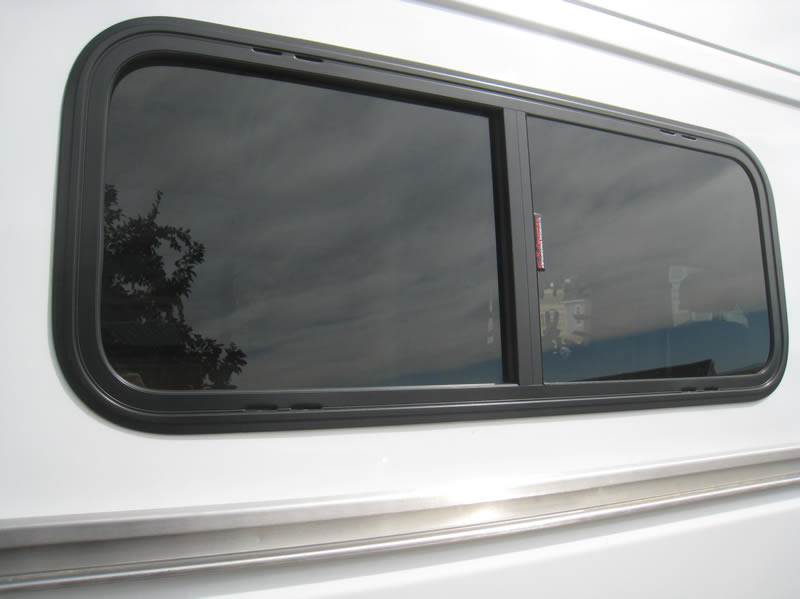
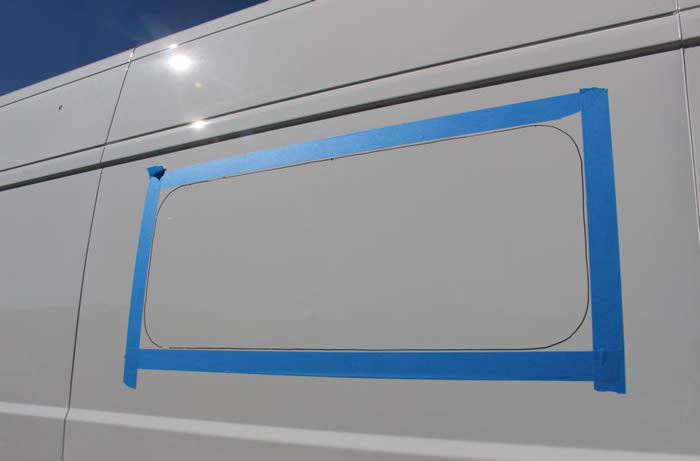
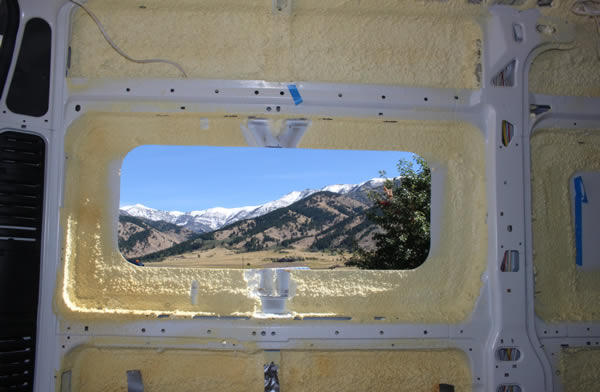
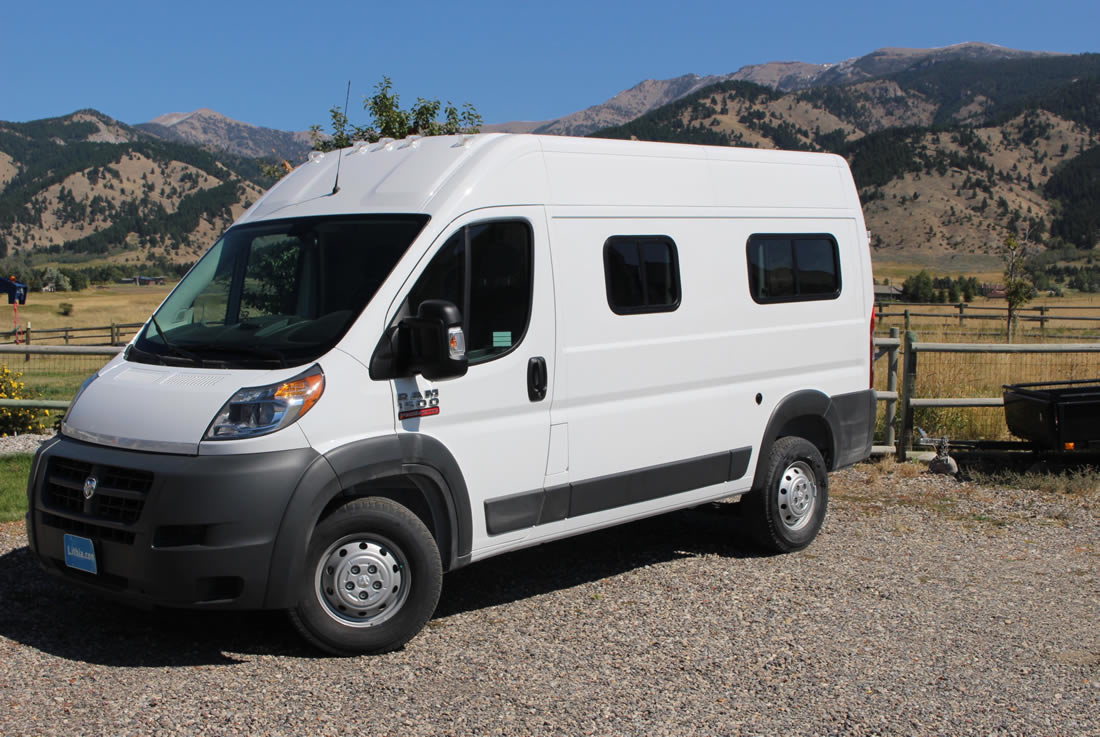
The new windows on the driver side.
Go back to the main camper van conversion page...
|
|
| |
Important Update
The material on these pages describing our camper van conversion has been moved to our new new site dedicated to efficient RVs and camper vans.
The new site covers all the material here and adds a lot of new material on other camper van conversions, camper van design and build, resources for people converting vans, other efficient camping vehicles, new ideas in efficient RVs and camper van travel hints.
The new site is here...
I'm leaving these pages here as you may have bookmarked them and the Comments section has some good suggestions, but I suggest that you go to the new site -- I won't be updating this material anymore.
Thanks to all the people who read these pages and especially to the people who left comments and suggestions! Feedback on the new site is very much appreciated.
Gary
|
|
Choosing the Windows to Use
Our main requirements were:
- Big enough for a descent view
- Opening for ventilation
- Tinted to reduce heat gain and glare
- With screens
There are a limited number of windows (so far) made specifically for the ProMaster -- these are typically curved to match the van side panels exactly and tend to have the same frameless look as the original ProMaster windows. Some examples of the custom PM windows from CR Laurence... For our purposes, these tended to be not the sizes we wanted and are pretty pricey.
KeepOnVanning at the ProMaster Forum found that you can use a non-curved (flat) window on the ProMaster, and the results are good. This greatly expands the possibilities in available. There are RV and trailer replacement and custom windows as well as flat windows made for vans. Ebay and several companies offer quite a large selection of these RV windows. Motion Windows is an example of one company that will make windows to the exact size you want.
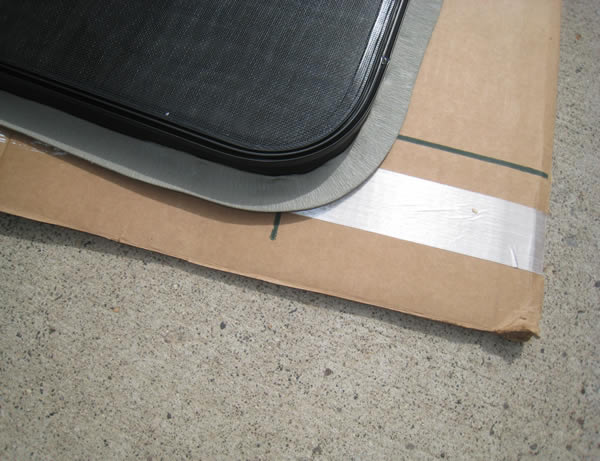
The curvature of the side panels is small and flattening this out with a flat window frame does not result in any significant effects -- picture show curvature:
In the end, we selected these non-contoured (flat) windows from CR Lawrence... The two back windows are the 41 by 17 inch and the galley window is the 25 by 17 inch. We ordered them through DK Hardware from about $180 each.
These windows use a clamp ring on the inside to hold the window in place so there are no external screws.
How the Clamp Ring Windows Work
The sketch below shows how the windows that used a clamp ring to hold the window in place work.
The Window frame goes into the opening you cut in the van wall from the outside. The clamp ring goes on the inside and screws to the frame. The clamp ring screws are tightened to pull the window frame tightly against the van sheet metal.
The the clamp ring is supported by and pushes against the wall (or spacer), and the clamp ring depth has to be matched to the wall (spacer) thickness. Our wall thickness will end up being a bit over 2 inches, so we chose the 2 1/4 inch clamp ring as it was closest to our planned wall thickness.
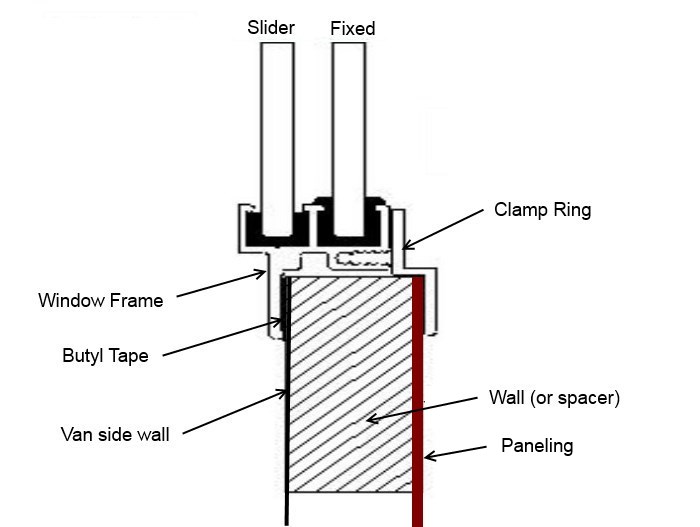
Thanks to Motion Windows for the diagram.
Butyl glazing tape is used between the Window Frame and the van side wall to weather seal the window frame to the van.
The clamp ring design allows the window to be mounted to the van without any screws being visible from the outside.
Installing the Windows
Please read this before you start...
The steps in installing the window are:
- Make a template for cutting the window opening in the van sidewalls.
- Align the template on the side of the van and mark the cutout.
- Remove the van wall stiffeners from the window area.
- Cut out the hole for the window.
- Make the clamp ring support frame.
- Glue the clamp ring support frame to the inside of window opening
- Apply Butyl tape to the window frame
- Place the window in opening and clamp in place using the window clamp ring.
These are covered in excruciating detail below.
The CR Lawrence windows come with no instructions at all, and they have very little on their site in the way of instruction. So, the technique below is puzzled out from some of the other companies (eg Motion Windows) and the experiences posted on the ProMaster and Sprinter forums. Not sure this is the best way, but it does work.
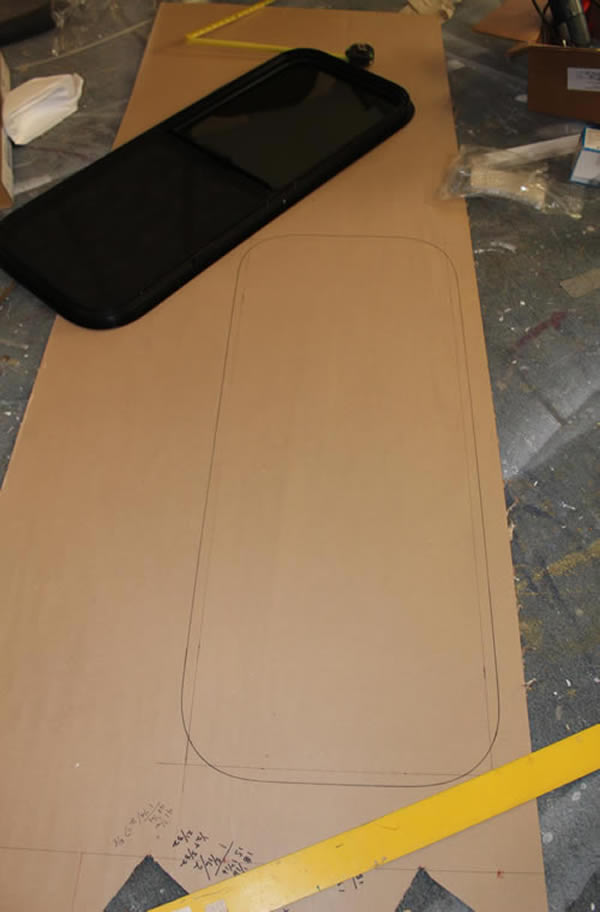
Making the Cutout Template
I made the template for cutting the holes in the van by laying the window frame (without clampring) down on the template material and tracing around the outer edge of the frame. Then I offset the lines inward by the width of the flange on the window frame. The window opening should be a bit larger than the frame -- I aimed for a gap of a bit less than 1/8 inch all the way aorund.
 |
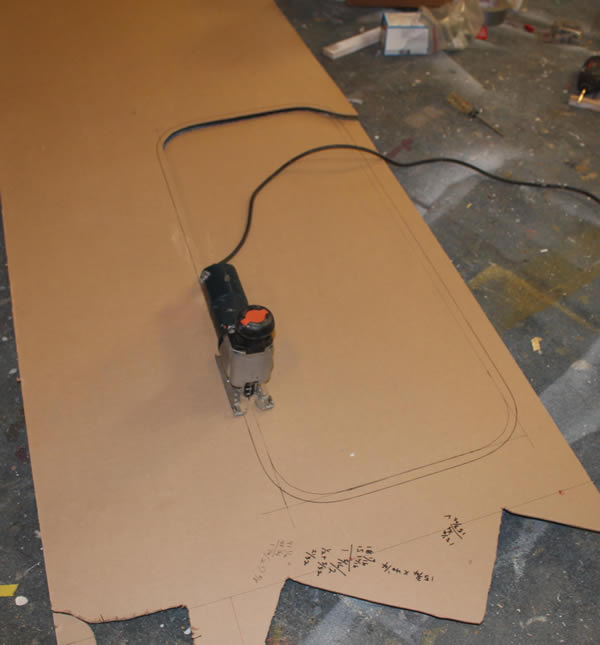
Cutting out the template.
|
The template material I used was a scrap sheet of packing plywood, but cardboard would work OK.
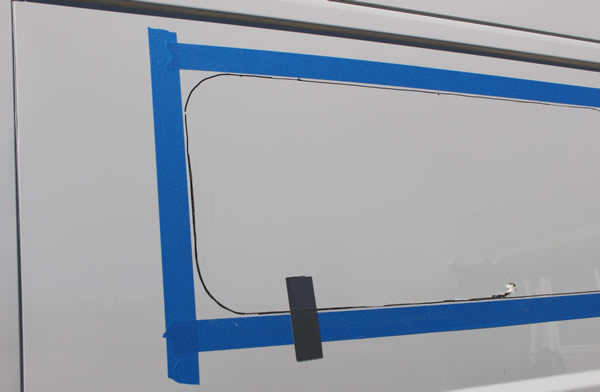
Mark the Window Cutout
You can tape the cutout template up to the wall on the inside and move it around until you think its in the right place. Consider where you will be sitting or laying when you want a view out the window and also any cabinets that you might have to work around. The PM has vertical metal stiffeners that are right in the middle of the largest panels that you might want to put a window in -- it is OK to just remove these stiffeners (see below). I would not cut the main vertical frame that is in line with the back of the sliding door opening, or any of the main horizontal longerons.
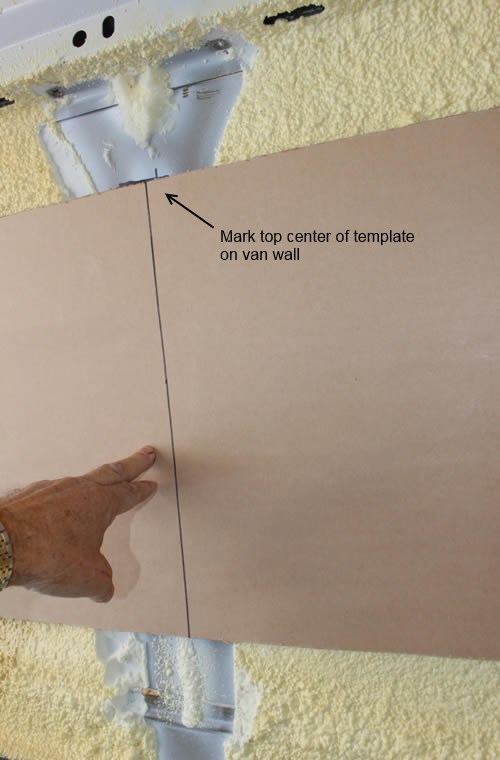
Once you get the template in position, drill a small hole through the van sidewall at the center top of the template. This allows you to position the template precisely on the outside of the van where the cutting is done from.
 |
Drill through the van wall to transfer the template location to the outside of the van.
|
Using the hole you drilled, position and tape the template to the outside of the van. Align the top center of the template with the hole, and make sure that the template is parallel to the horizontal crease in the van sidewall just above the window area (don't use a level to do this as the van may be on a slope).
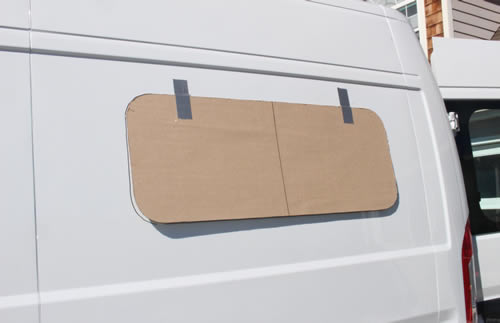
Align the template on the van wall and tape it in place.
|
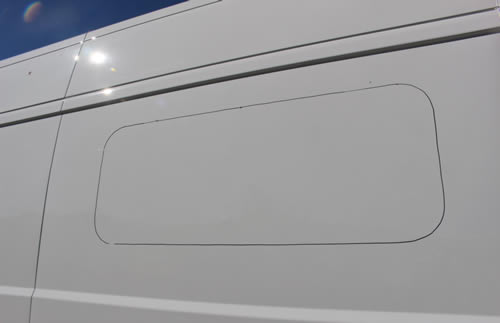
Cutout marked on the outside of van.
|
This is a good time to triple check everything -- BEFORE you cut the big hole.
Apply masking tape around the cutout lines to protect the sheet metal from scratches from the sabre saw.
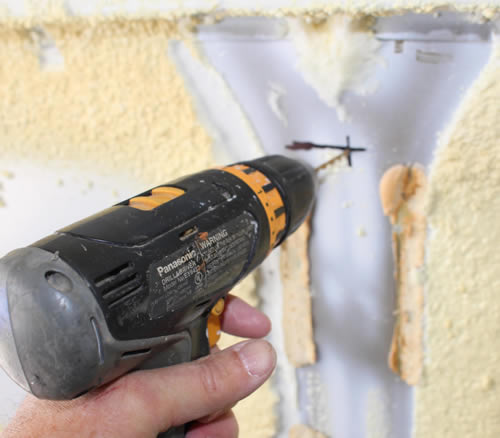
Remove the Wall Stiffeners
The PM has some light weight vertical stiffeners that will likely be right where you want to place your window. I believe that it is OK to remove these, and I took out three of them to install my windows.
Use cold chisel or screwdriver and hammer to cut through he spot welds.
|
Stiffener gone.
|
Cut the Window Opening
This is the moment of truth, so make sure to go back and double check all of your measurements before you start cutting.
An electric sabre saw with a fine metal cutting blade works well for cutting the holes.
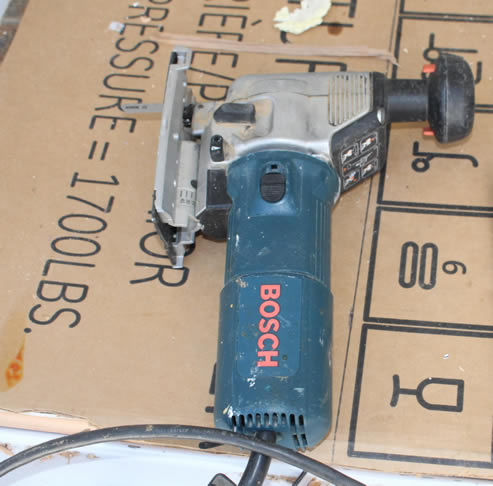 |
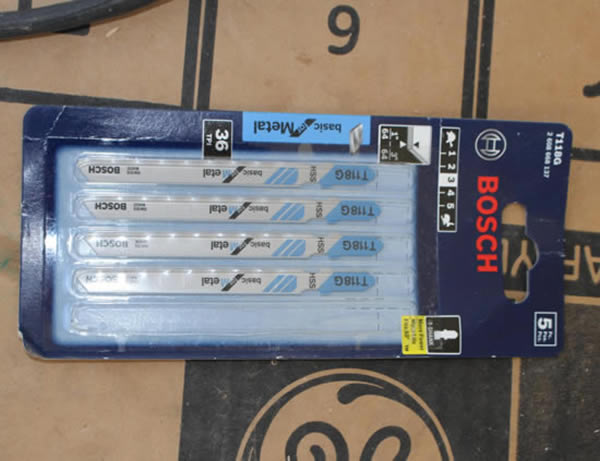
Bosch T118 metal cutting blades for thin metal
-- 36 teeth per inch. |
These blades do a great job -- the cutting is easy and vibration free.
I also tried a air powered metal nibbler, but I think the sabre saw is just as fast and easier to get a good accurate cut.
Before you start the cut, set up something inside to catch the metal filings that the cutting produces.
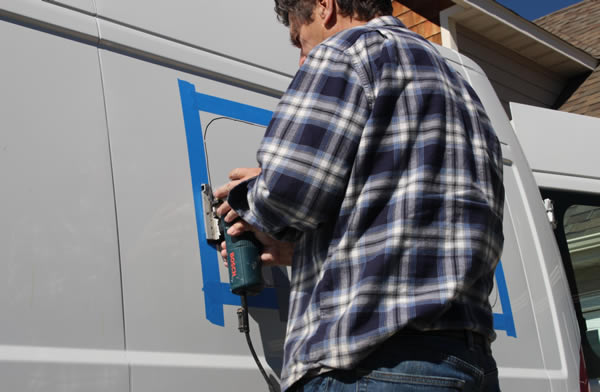
Cutting up the side.
|
I started on bottom and cut around each side.
The black tape was applied after passing this point with the saw to dampen vibration. |
When the panel started to vibrate a bit, I put some duct tape across the cut section to steady it.
Three sides done -- working on top
|
Finished cutout from inside
|
After starting the top of the cutout from each side, I put some duct tape across the cut area to steady the metal and keep it from falling out.
I was thinking that the cutting out process was going to be difficult and time consuming, but it went quite easily and pretty fast -- I think having the right blade and a descent saw makes it pretty easy.
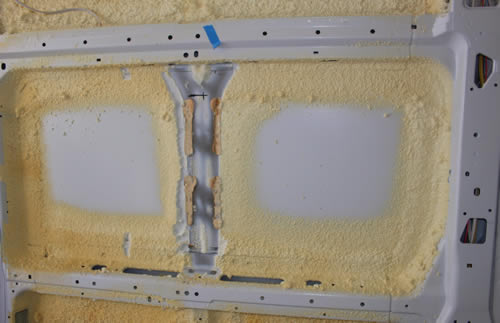
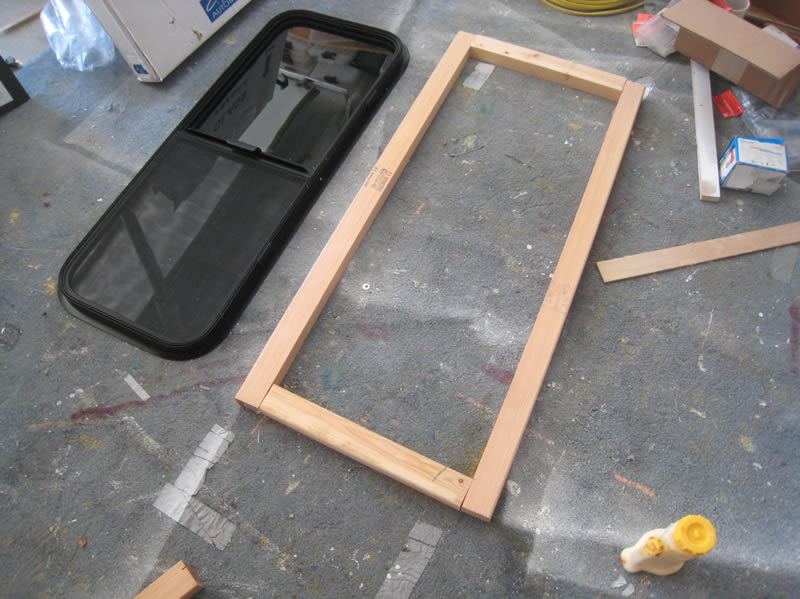
Make the Wall Spacer Frame
The clamp ring that comes with the window pulls the window frame tightly against the van wall and holds it in place. The clamp rings are made for a specific wall thickness -- in the case of our windows, they offer clamp rings for 2 1/4 inch walls and 1 1/2 inch walls. Our finished wall will be quite close to 2 1/4 thick, so use selected that clamp ring.
In order to give the clamp ring something to clamp against, it necessary to build a set of spacers around the inside of the window opening that is the same depth as the clamp ring and the finished wall.
If the wall paneling is going to fit under the clamp ring, then the spacer thickness plus the paneling thickness should equal the a bit more than the clamp ring depth. I say a bit more than the clamp ring depth because if its a bit less, the clamp ring will stop out against the window frame before the butyl tape has been compressed.
Thanks to Motion Windows for the diagram
Our spacer frame is 2 inches thick is is made from 2 by 4's ripped down to 2 inches -- so they are 2 inches deep and 1.5 inches wide.
|
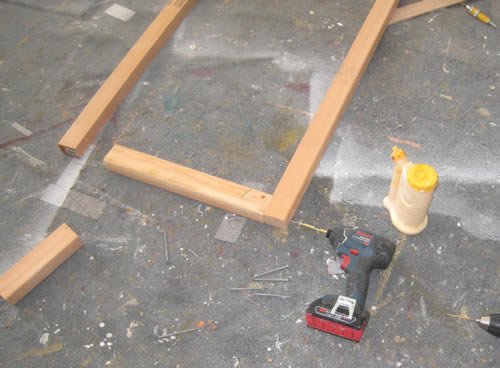
The corners are fastened with two 3 inch screws and glue. Just as an aside, the glue bottle in the picture is the worlds best glue bottle -- from Rockler.
|
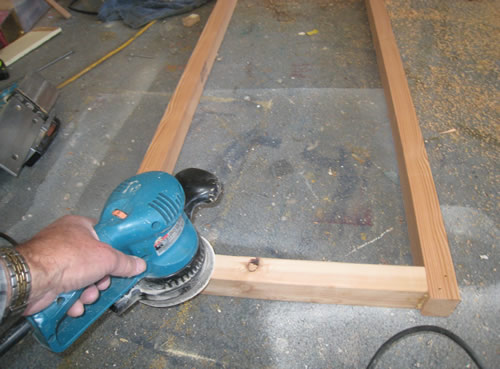
Smoothing off the frame.
|
The clamp ring is made for a 2 1/4 inch thick wall. In our case, the 2 1/4 is made up the 2 inch thick inner frame (above) and the 1/4 inch thick wall paneling.
Glue the Spacer Frame to the Van Wall
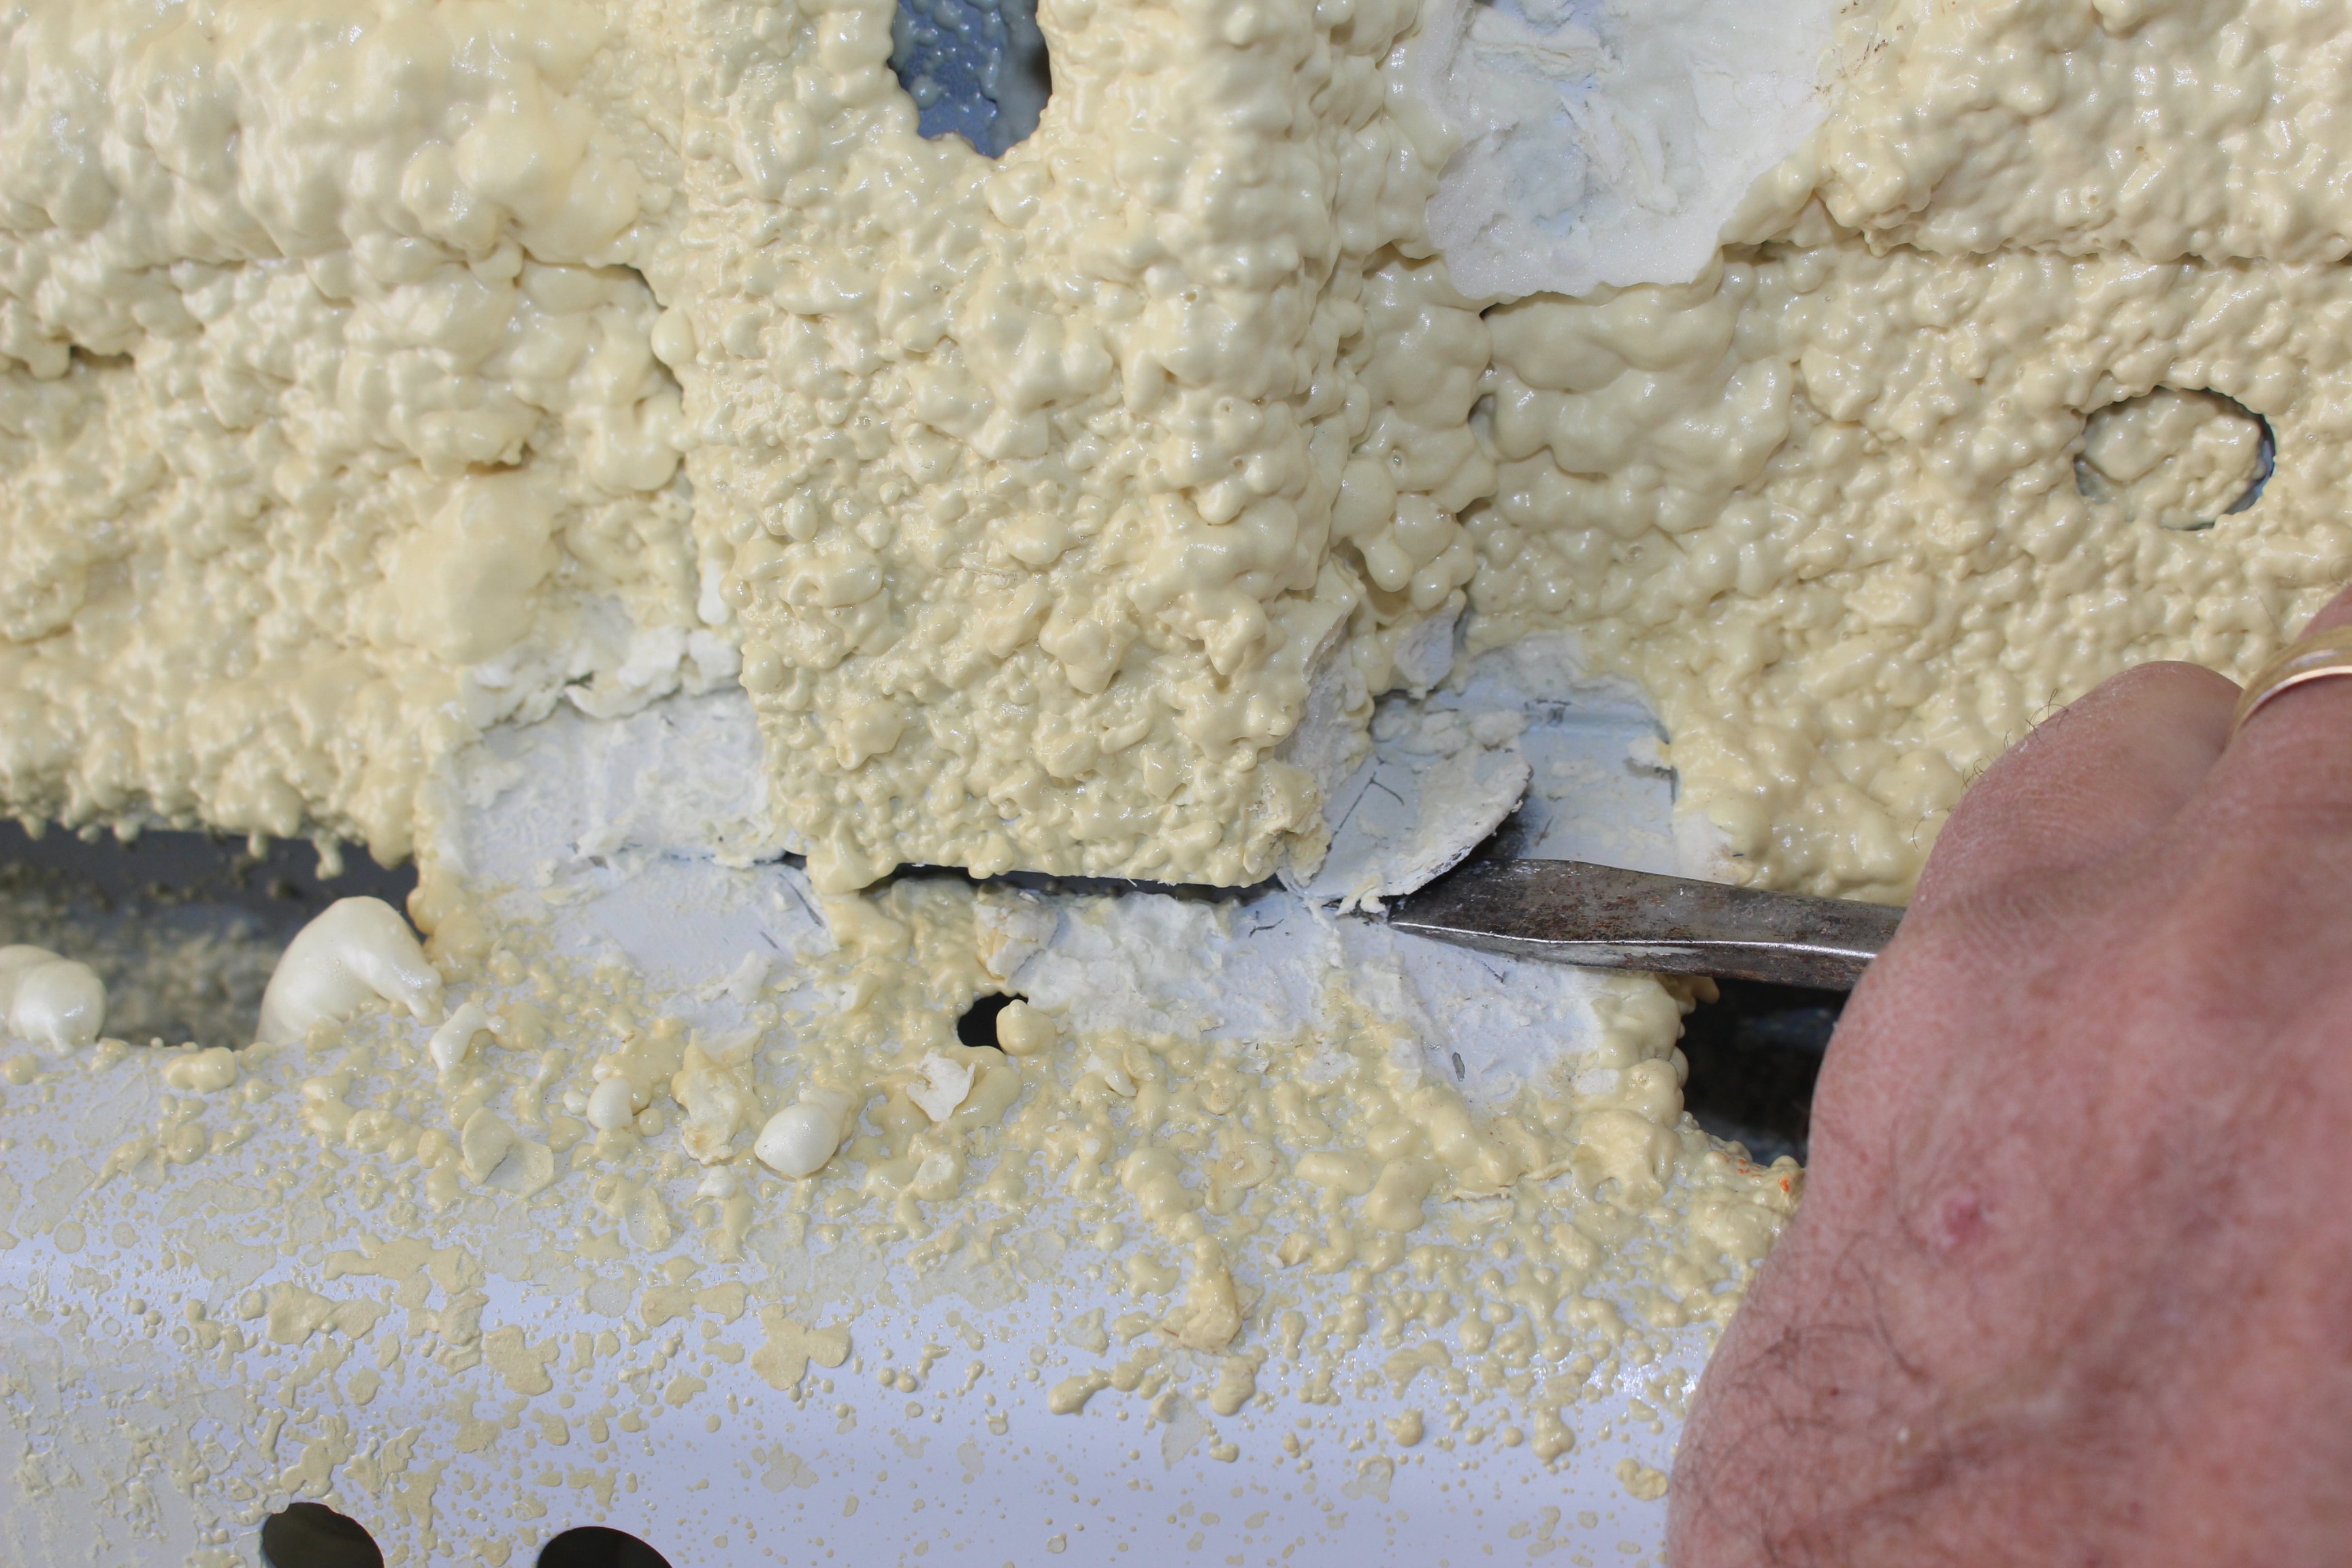
I used a polyurethane caulk/adhesive from the hardware store
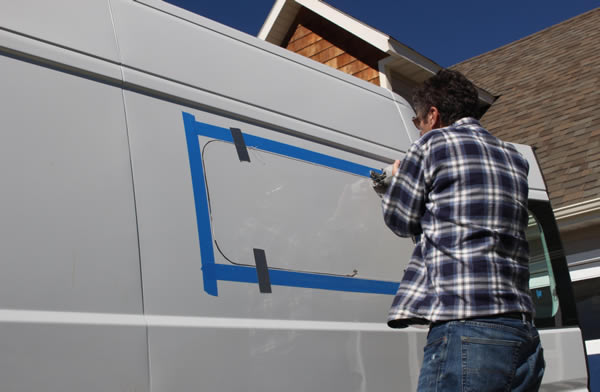
At this point, check the fit of the window frame from the outside and the crimp ring from the inside. I had to use a mini grinder with a very rough sandpaper disk to take down a couple high spots on the spacer frame.
Staple 1/4 inch plywood strips that represent the wall paneling that will be added later.
|
Spacers installed and window being trial fitted into the opening.
|
If the van paneling is to fit under the clamp ring, then add spacers the same thickness as the paneling will be to the inside of the spacer frame. When the paneling is added later, the clamp ring is removed, the spacers representing the paneling are removed, the actual paneling is added, and the clamp ring is put back in place.
The picture above shows the paneling spacers stapled in place and a trial fit of the window frame and clamp ring.
Apply Butyl Tape to Window Frame
Butyl tape is used to weather seal the window frame to the van sidewall. Its easy to work with, and (hopefully) provides a good and long lasting seal.
To apply the butyl tape, lay the frame down on something soft with the outside facing down. Then just go around the edge as the pictures show with the butyl tape. Press it down with your fingers as you go. Its easier to go around the corners if you peel the paper tape off before going around the corners.
Place Window in Opening and Secure with Clamp Ring
Place the window frame in the opening and center it up. Then push it in hard so that the butyl tape holds the frame in place. The butyl tape has enough stick to hold it in place while you go inside the van to place the crimp ring. A larger window (or cold weather?) might require a 2nd person to hold the window in place from the outside while the clamp ring is screwed in place.
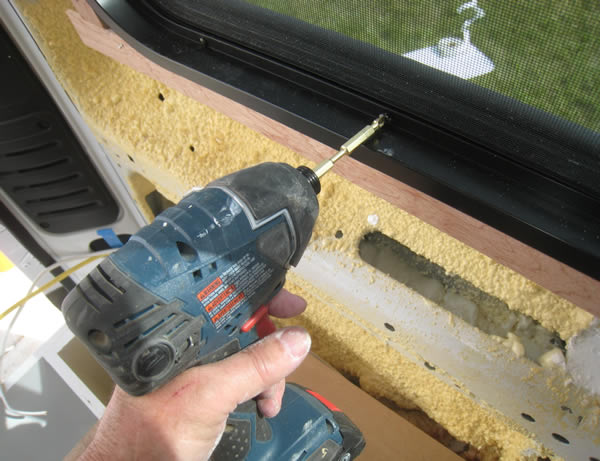
Then go inside the van, and place the clamp ring and start a screw or two on top and a screw or two on the bottom Be careful not to put too much outward force on the window frame as you might push it right out of the opening.
Then start all the clamp ring screws and tighten them up until you have taken all the slack out. Then start tightening each screw a bit more so that it just starts to squeeze the butyl tape out a little. Check outside frequently as you do this to make sure that the frame is being pulled in uniformly. Once you have a little bit of butyl tape squeeze out all the way around you are don.
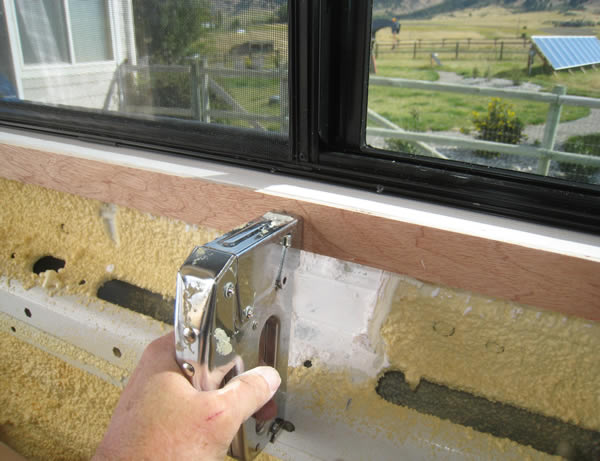
Tightening the clamp ring screws from inside van.
|
I tightened the clamp ring screws until there was a bit of Butyl Tape squeeze out.
|
Clean Up Butyl Tape
There will be excess butyl tape extending beyond the frame. You can remove this with a plastic putty knife.
Be careful not to scratch the paint.
You might have to do this again after a day or so as more of the butyl continues to squeeze out.
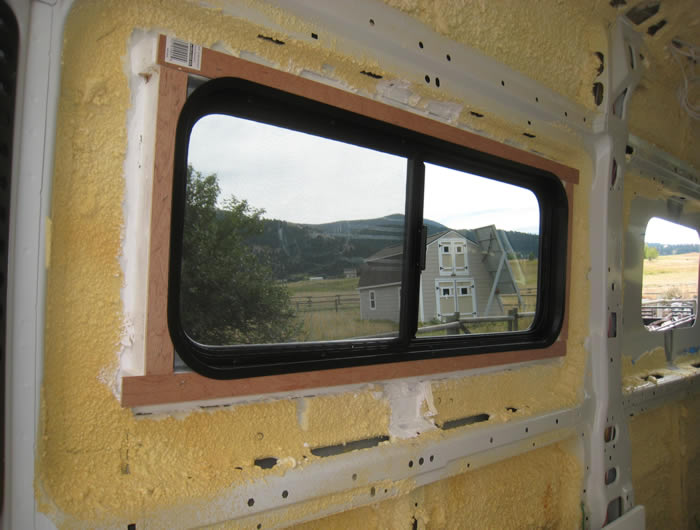
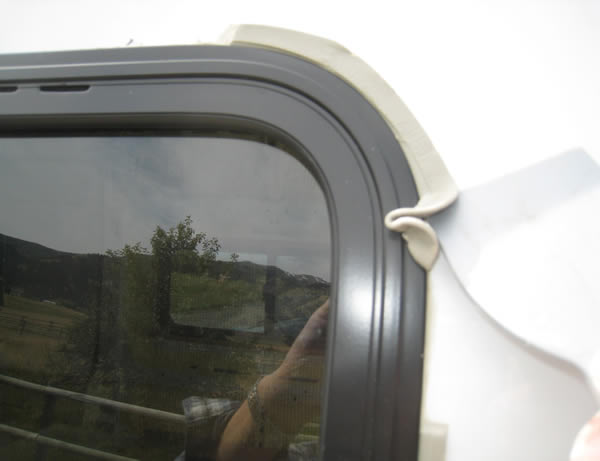
Finished Windows
I'm happy with the finished product.
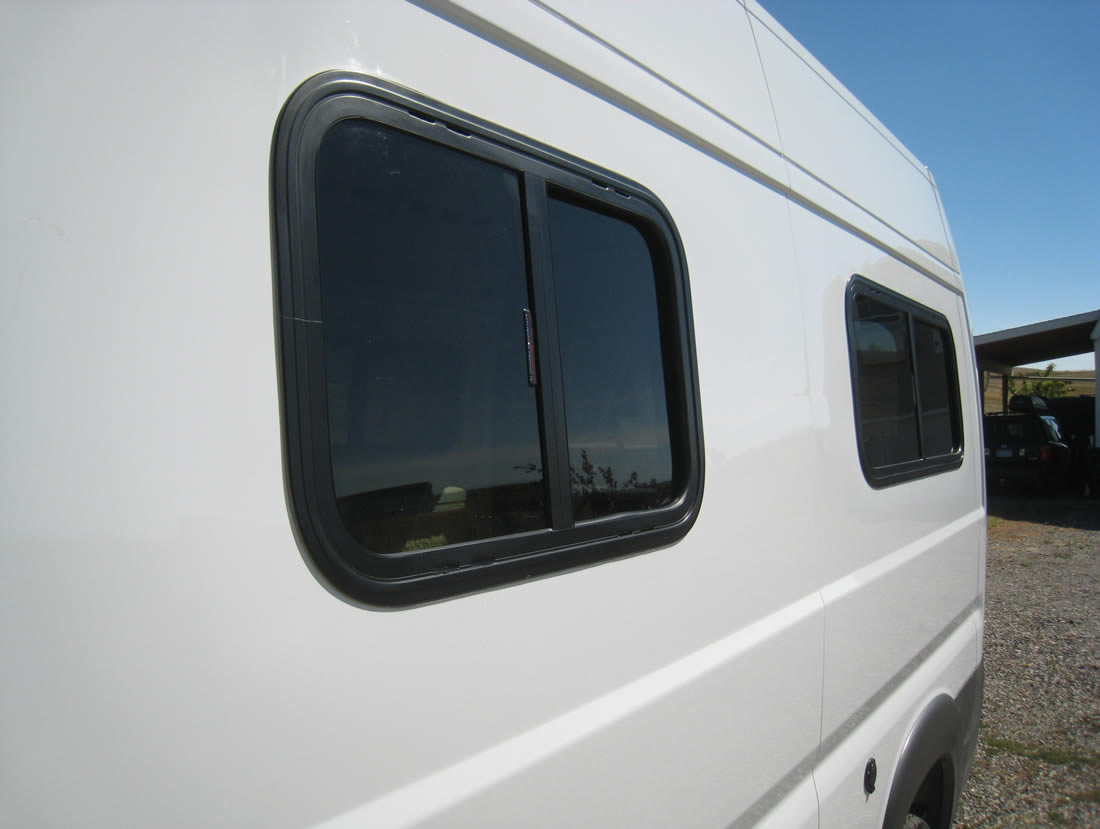
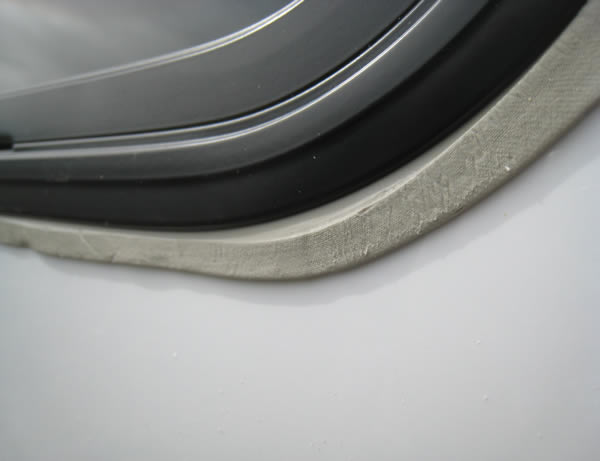
If you get the light just right, you can see the change in curvature that the flat windows cause, but its very subtle and not at all objectionable to me.
Cost, Weight and Time
Time to do the windows was in the 12 man hour area -- spread over 2 1/2 days.
| Item |
Cost($) |
Weight(lb) |
| 3 Windows |
555 |
34 |
| 2 by frame/spacer |
10 |
18 |
| metal removed |
0 |
-16 (removed) |
| Caulking etc |
5 |
0 |
| Total |
570 |
36 |
Comments or Questions...