Search
The Renewable Energy site for Do-It-Yourselfers
Step-By-Step Construction Details
The pictures below go over the
construction of the tank in detail.
Its a simple project to build.
Click on pictures for full size
images.
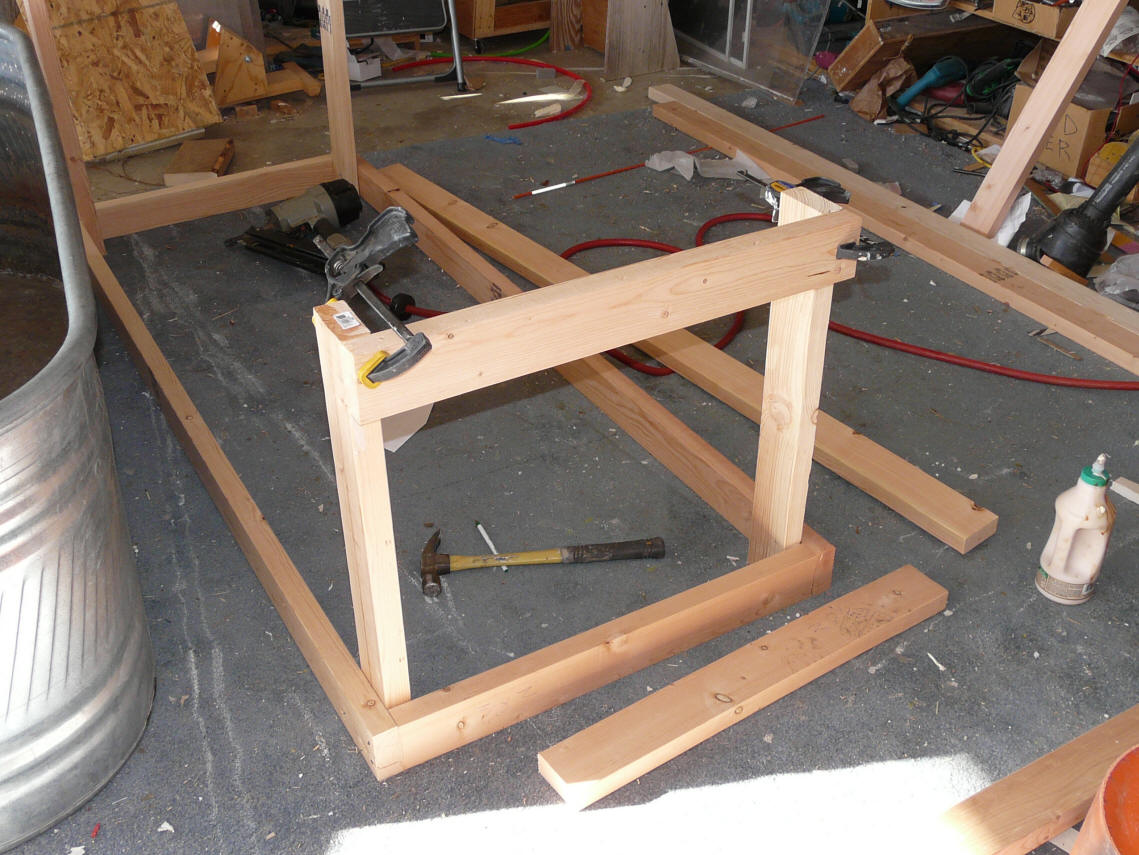
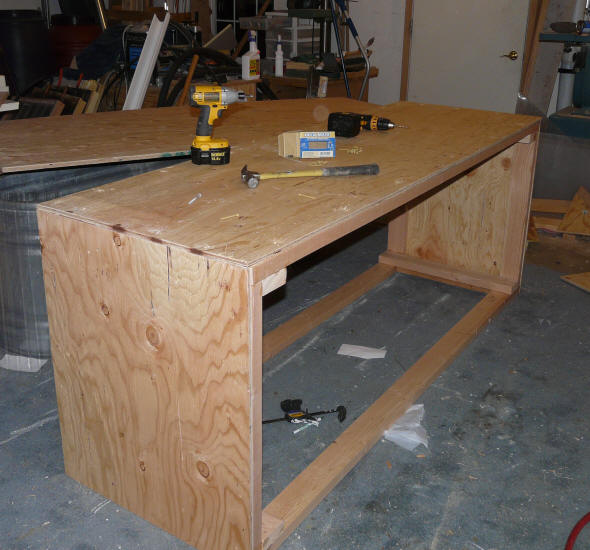
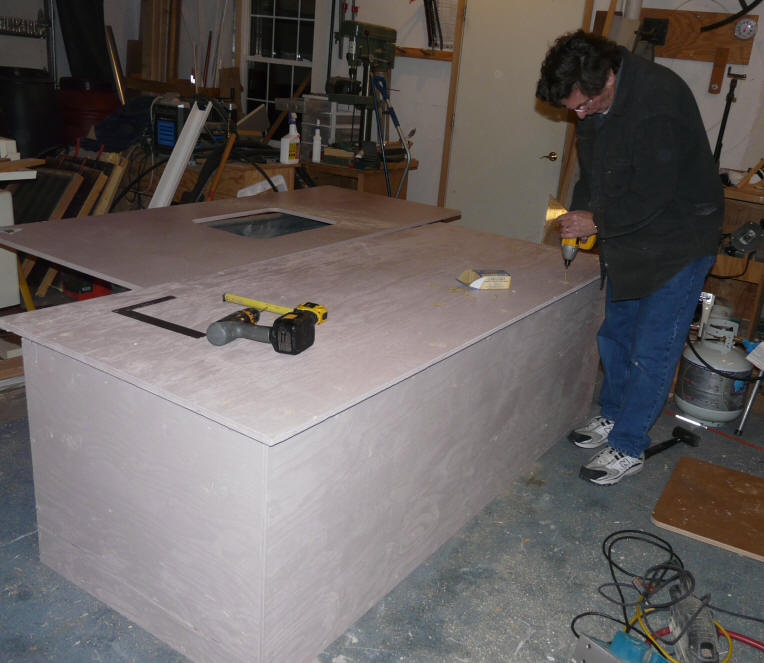
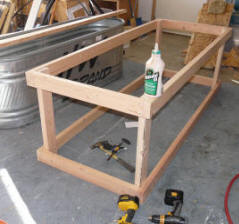
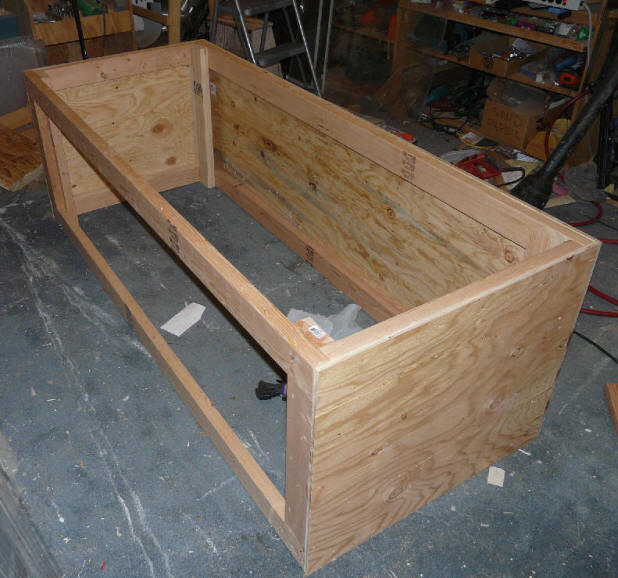
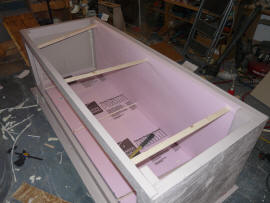
Make the 2X4 Frame for the Box
|
Allow for insulation thickness between
the frame and tank. |
 |
Check for square. |
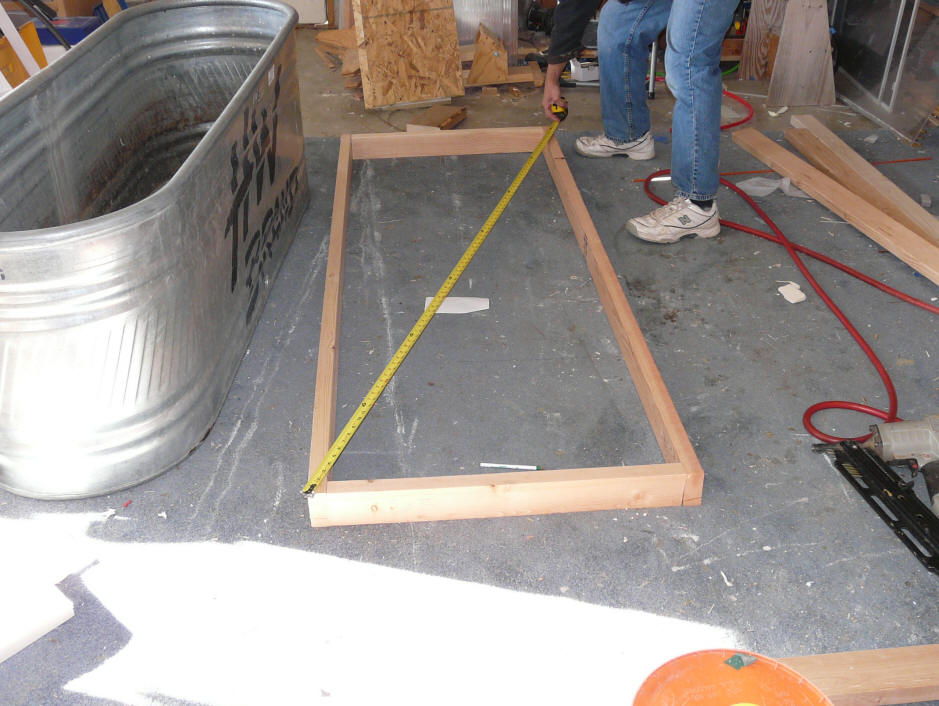
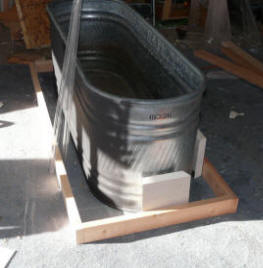
Build the base frame sufficiently
large to allow for 2 inches of rigid foam board insulation around the sides and
back. In the front, allow about 3 inches of space behind the
glazing. The easiest way to get the size right is to place your tank
on the shop floor, and build the frame around it with the right clearances.
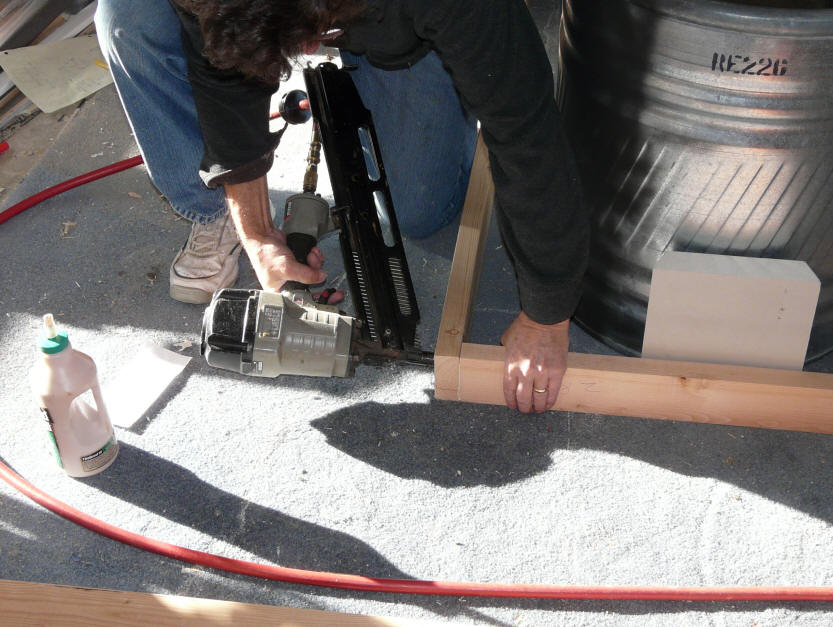
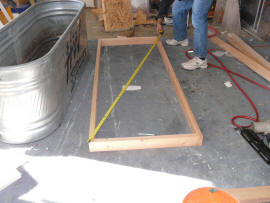
With the frame size established, glue
the corners and nail or screw.
Check the frame for square by
measuring the diagonals.
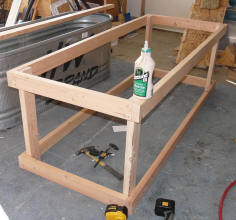
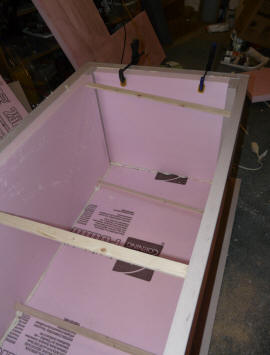
|
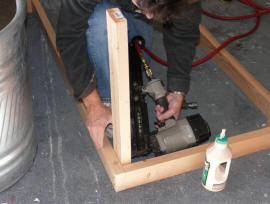
Fastening the verticals in place
on the bottom frame. |
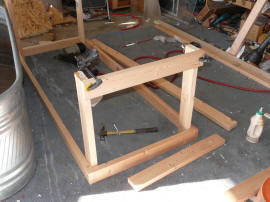
Assembling the top frame on
the verticals. |
The finished box frame. |
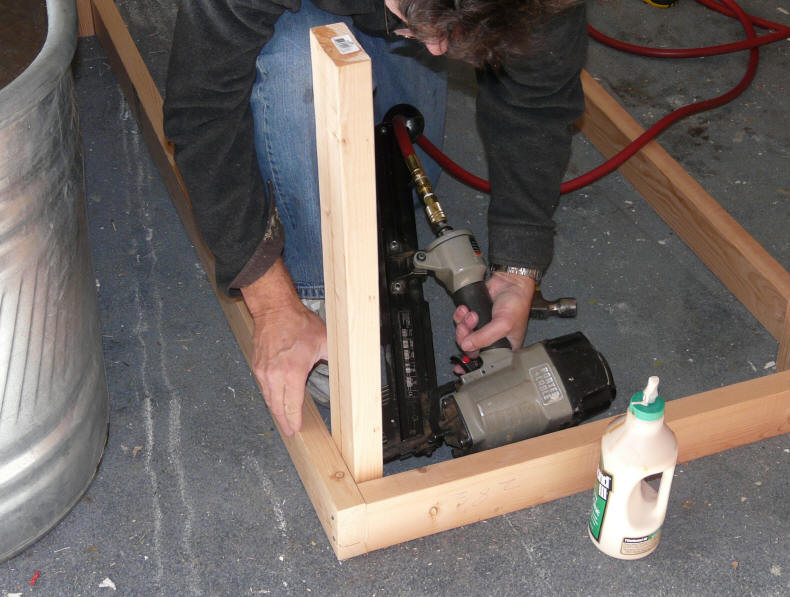
Glue and nail the box verticals in
place. The height of the verticals should be measured carefully to allow
for the height of the tank plus two layers of 2 inches of rigid foam board insulation
under the tank. So, if the tank is 22 inches high, the verticals would be
22 + 2 + 2 = 26 inches high.
Now, assemble the top frame at the
top of the 4 verticals. The top frame is exactly the same size as the
bottom frame.
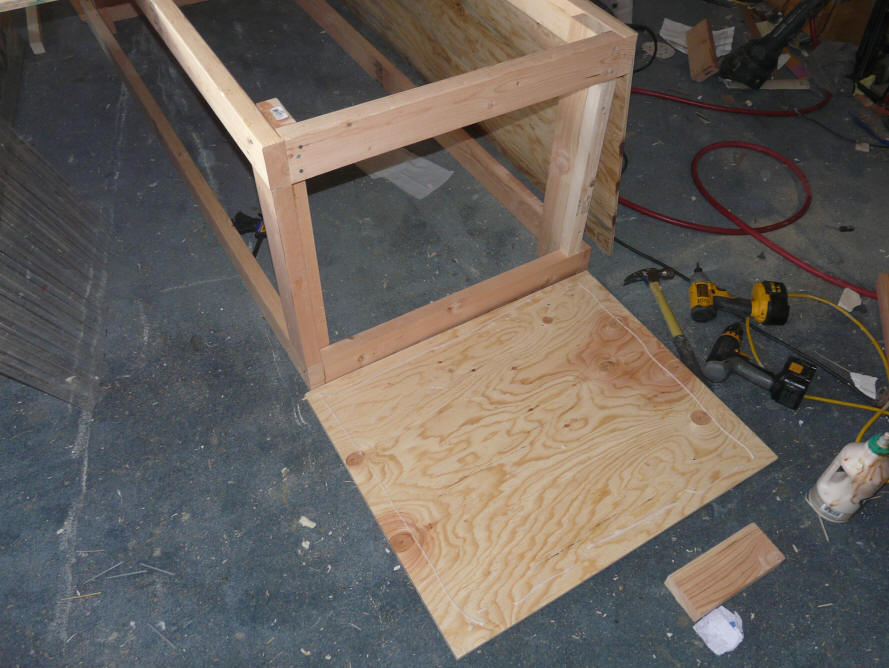
Cut and Install the Box Sides and
Back
|
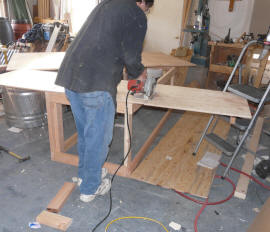
Cut out the sides and back from
plywood. |
Note the filler 2X2 on back vertical,
and filler 2X4 on front vertical.
See note below. |
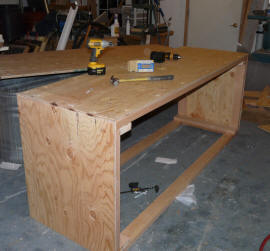
Attach the sides and back to the
box frame -- uses glue and
screws or nails. |
Next, cut out the plywood sides and
back for
the box.
On the front of the box, add the 2X4
filler to provide a surface for the side to screw to, and a place to attach the
collector glazing -- see the middle picture above.
On the back of the box, add a 2X4 filler along the back vertical to provide a
surface to nail the sides and back to -- the added 2X4 should be flush with the
outer edge of both the side and back of the top and bottom frame. The
picture shows this as a 2X2, but it should have been a 2X4, and should be
installed so that it is flush with both the back and side edges of the top and
bottom frame.
This added 2X4 provides a surface to
glue and nail the sides and back to.
See the middle picture above.
Box frame with sides and back installed. The collector glazing will
go in the front opening.
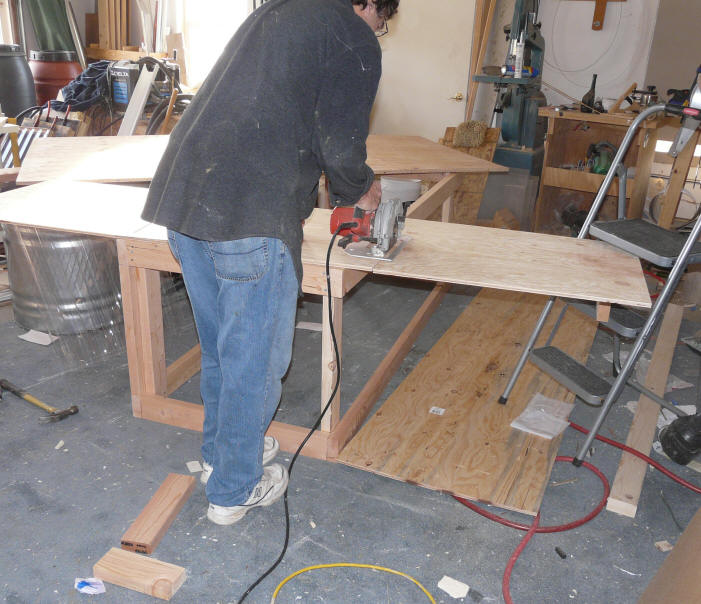
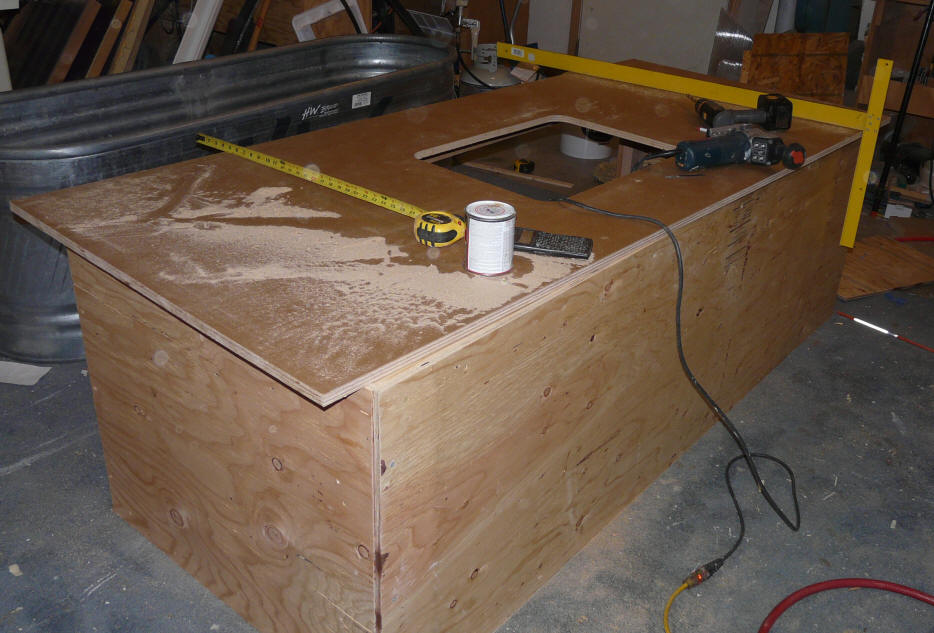
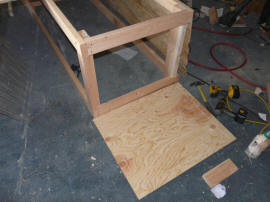
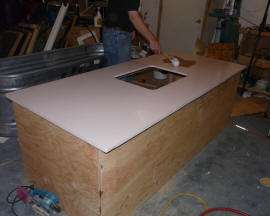
Install Top and Bottom
Cut out the top.
The top should be cut large enough to overhang 1 inch on each side, 1 inch on
the back and 2.5 inches on the front. The larger front overhang allows for
the thickness of the outer layer of glazing.
Cut a hole in the top that is
sufficiently larger for the stock to drink through. The drinking opening
for this tank is 16 inches deep by 22 inches wide.
The bottom can be cut to the same
size.
I used MDO (Medium Density Overlay) plywood for the top to
provide for more weather resistance. The MDO holds up very well in outdoor
weather, but is about twice as expensive as plywood.
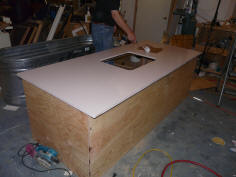
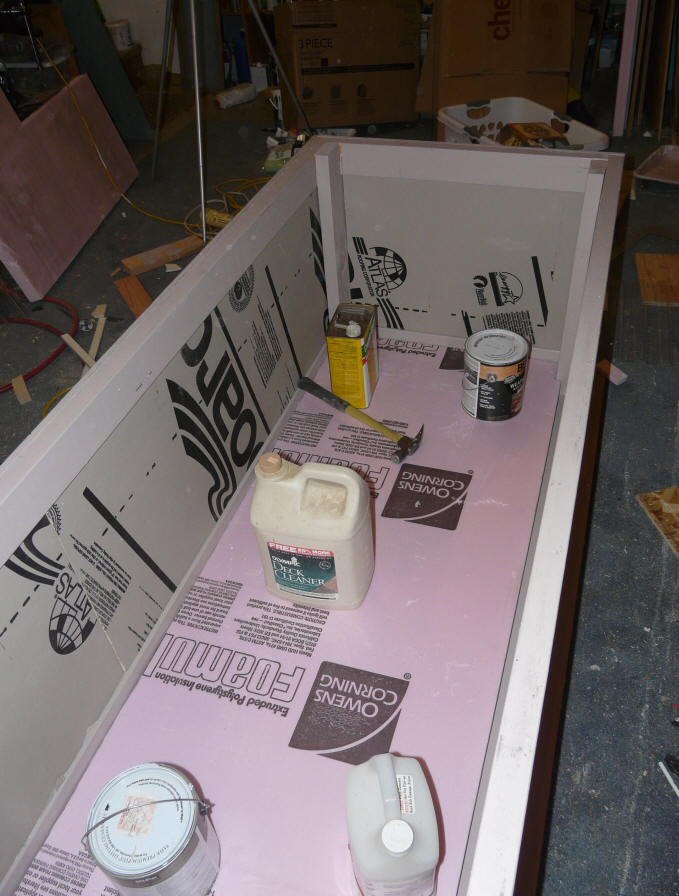
Paint and Seal
|
Paint everything -- two coats
would be a good idea. |
Place a bead of silicone seal
around the surface that
the top will sit on, and let
cure before installing top. |

Screw and glue the bottom in
place -- then seal around the edges. |
Paint everything inside and out.
Home Depot had a returned gallon of this lovely color for $5. It is a
combination exterior paint and primer -- what a deal.
Seal all the edges to prevent air
infiltration.
Put a bead of silicone seal all the
way around the surface that the top will sit on and let it cure -- this forms a
sort of gasket to reduce air leakage once the top is screwed down. The top
should not be glued down, as you will want to be able to remove it.
Flip the box over, and screw and glue
the bottom to the box frame using deck screws. Seal all these edges.
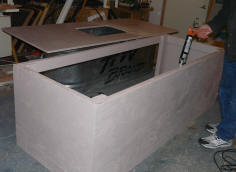
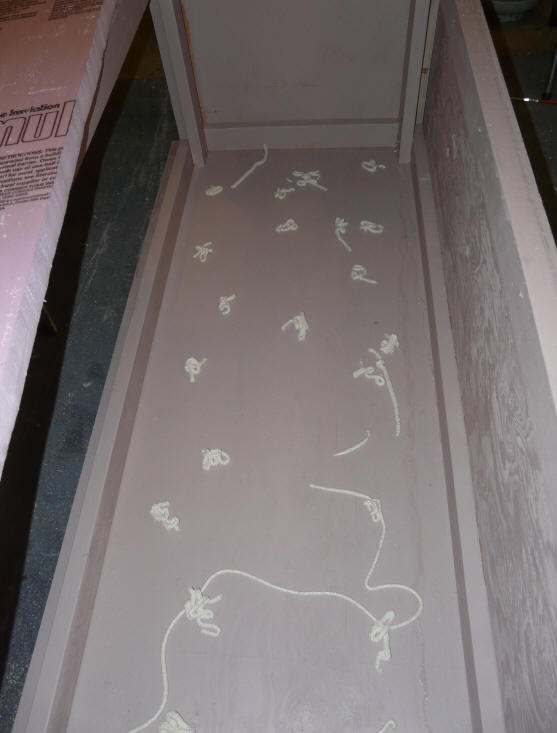
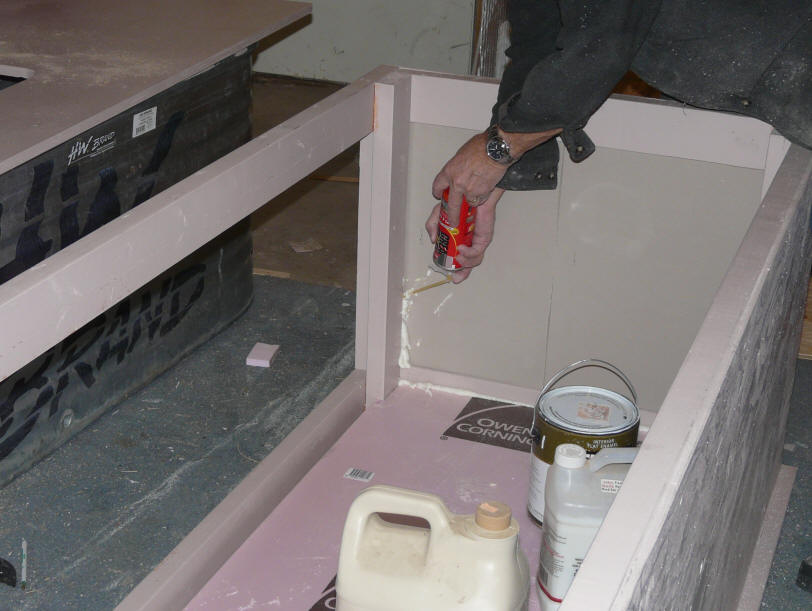
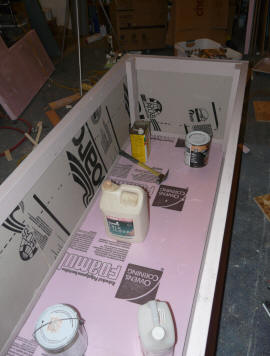
Install the Insulation Board
|

Use Great Stuff polyurethane
foam in a can as adhesive
hold the insulation boards in place. |
Weight down the insulation
board until the Great Stuff
sets. |

Use Great Stuff to seal all the
edges of the panels. |
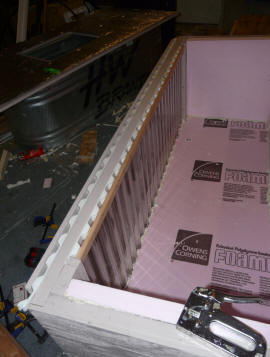
Cut out the rigid foam board
insulation panels to fit the bottom, back and sides.
Test fit them to make sure they fit
against the plywood back, bottom and sides.
Put some dabs of Great Stuff
polyurethane foam in a can on the bottom. This will act as an adhesive to
hold the insulation board in place.
Place the insulation board into the
Great Stuff, and then weight it down to let the foam cure.
The first layer on the back and sides
is 1 inch thick insulating boards (could be 1.5 inch thick) that is pushed in
between the box frame 2X4's.
A 2nd layer of foam board will be
installed inside this.
|
Installing the 2nd layer of foam board
insulation |
Us clamps and sticks to hold
the insulation board in
place until the foam cures. |
Note that the 2nd layer of bottom insulation must leave room for the
glazing in front of it. |
Now add a 2nd layer of 2 inch thick
rigid foam board over the bottom, sides and back.
Use the Great Stuff as adhesive in
the same way as the first layer.
If this seems like a lot of
insulation, you may be right -- see the discussion at the end on insulation
levels.
I used a mix of insulation board
types because I had some of the grey polyisocyanurate insulation left over.
The extruded polystyrene (usually pink or blue) is probably a good choice for
this application, since it is very resistant to absorbing moisture, and will
keep its insulation value even in wet or moist situations.
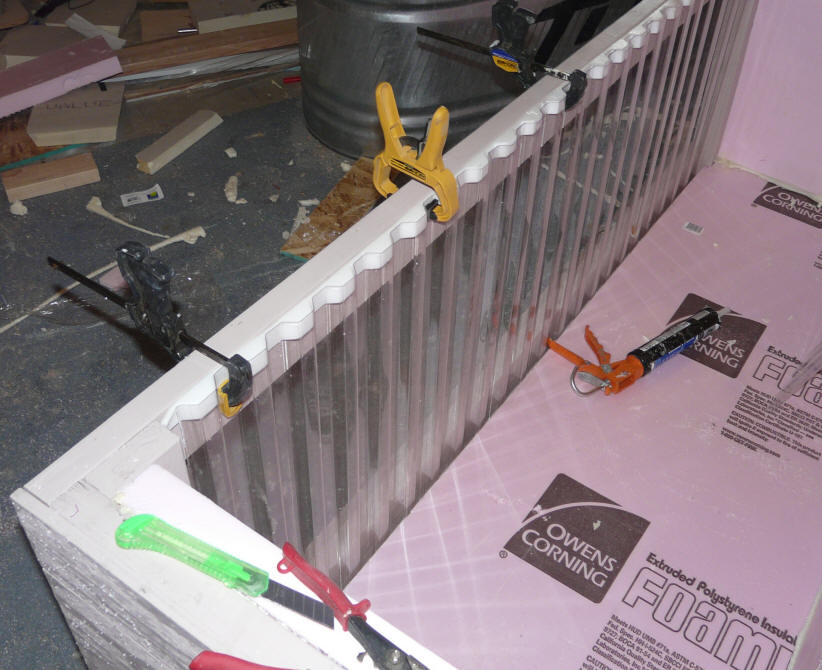
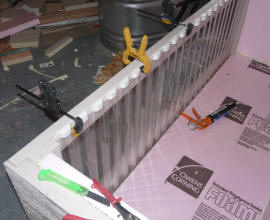
Install the Collector Glazing
This tank uses two layers of SunTuf
glazing on the south tank wall. The sun shining through the glazing onto
the black painted tank wall heats the water significantly on a day with sun.
The double glazing reduces the heat loss at night to about half what it would be
for single glazing.
|
This shows how the inside
layer of SufTuf glazing is installed.
The board along the top of
the glazing holds the glazing
securely in place against the frame --
it is screwed through the glazing
into the 2X4 frame.
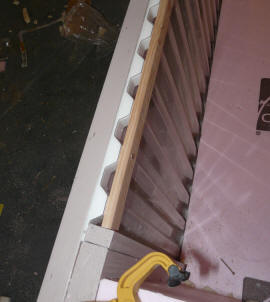
|

The outer layer of glazing is
held in place with a clamping
strip that is screwed through
the glazing to the underlying
2X4 frame. |
Both layers of glazing installed with
the clamping strips. Note the Great
Stuff foam used to fill the gap between
the bottom insulation and inside glazing. |
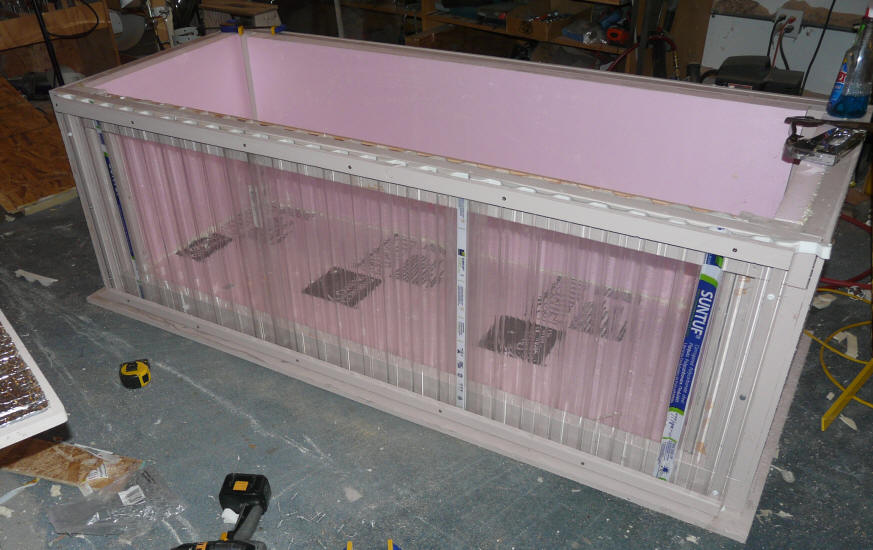
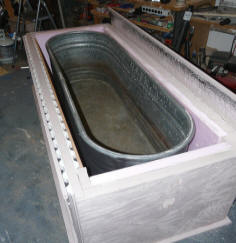
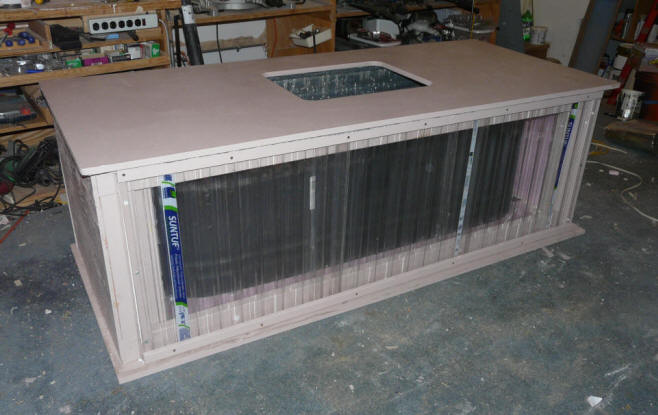
Completed box -- ready to install the galvanized tank and the lid.
Note that the last corrugation
on the left and the last corrugation on the right have 3/4 by 3/4 inch (true
size) vertical strips of wood that seal up and support the edge of the glazing.
Install the Tank and Top
|

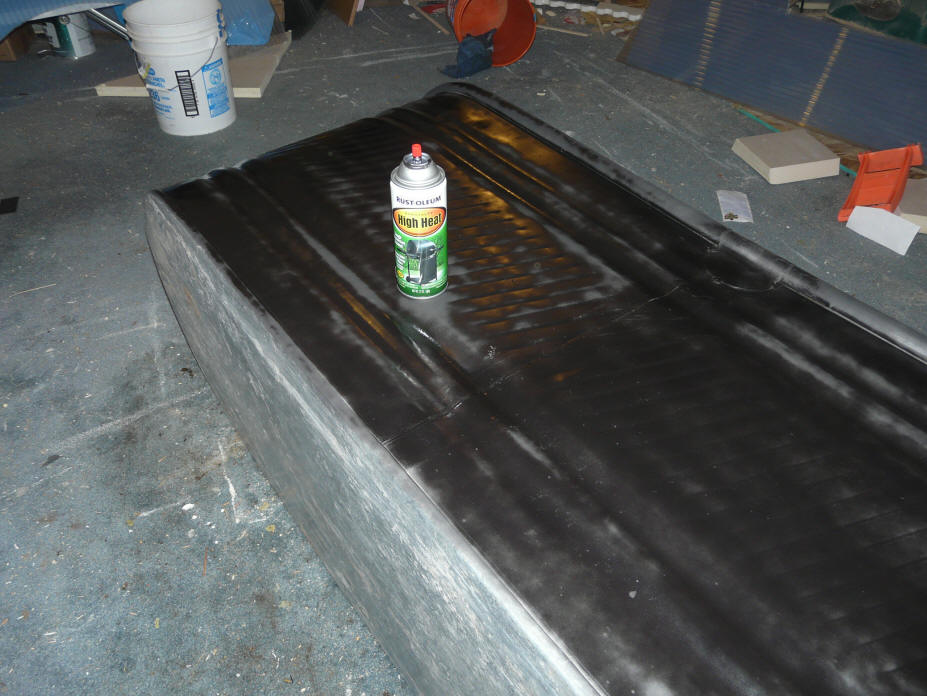
Paint the side of the tank that
will face the glazing with high
temperature flat black BBQ paint.
Two coats will likely be needed. |
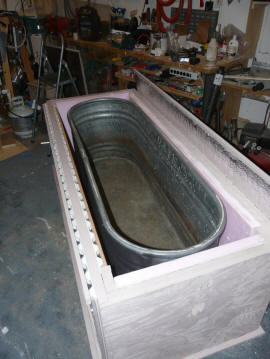
Place the tank in the box with
the back against the back
insulation board. There should be
roughly a couple inches between
the glazing and the tank wall. |
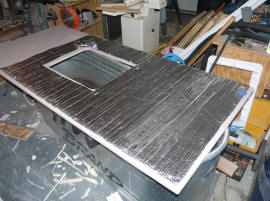
The Reflectix insulation being
applied to the bottom of the
cover. |
Paint the side of the tank that will
be facing the collector glazing with black paint to make it a good solar
absorber. I use high temperature, flat black BBQ paint that most hardware
stores sell. Set the tank aside and let the paint fully dry -- if you can
put the painted side in the sun for a day that will help fully cure the paint.
Place the tank in the box with the
back of the tank against the back of the box. There should be an inch or 2
or 3 between the inside glazing the tank wall.
I installed a layer of the Reflectix
bubble insulation on the underside of the cover. The idea is that the
Reflectixs will help to reduce radiation losses from the water surface and also
provide a better seal between the cover and box -- besides, I had it on hand :)
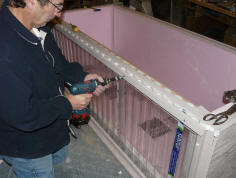
The top is secured with 10 deck
screws to allow it to be removed easily.
The finished stock tank in the shop.

Stuff fiberglass insulation in the
open areas to insulate further and
reduce air circulation.
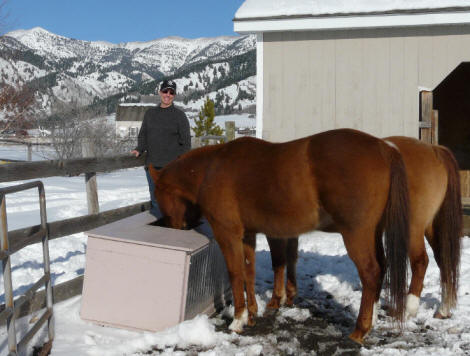
First fill.
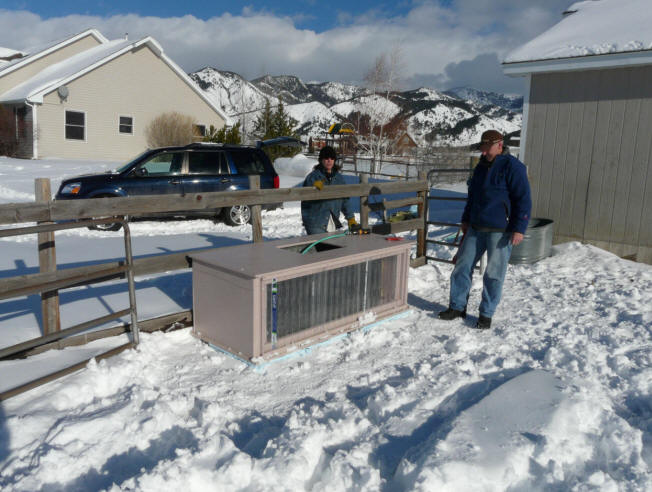
Preparing a Place for the Tank
Prepare a place for the tank to sit. A good way to do
this would be to make
a bed for the tank of a few inches of washed gravel -- this would keep it out of
the mud. The collector side of the tank must face rough south -- anywhere
from SW to SE is ok.
Since we did not get the tank done
until mid winter, there was snow on the ground when it was placed. We
put some foam board scraps under the tank to keep it off the snow a bit.
As the snow melted in the spring, the tank settled unevenly and now sits at a
bit of an angle.
Gary March 15, 2009