Helping ClubRust with Solar Heating Low Cost Homes in Northern Mexico
ClubRust builds several low cost homes for families in northern Mexico each year. They would like to work out a way to insulate and solar heat these homes. The very small budget for these homes makes this a difficult design challenge.
So, here is your chance to help out with some ideas for solar heating and insulating these homes on a tight budget -- see David's writeup below for all the details. If you have any helpful thoughts, ideas, or comments, please use the Comments section at the bottom of the page.
The solar heating and insulating project is described below by David of ClubRust.
Needed:
Most cost effective means to insulate and heat small houses in mild winter climate with little or no electricity.
Ideally the solution would provide heat thru a few cloudy days and cost less than $700.
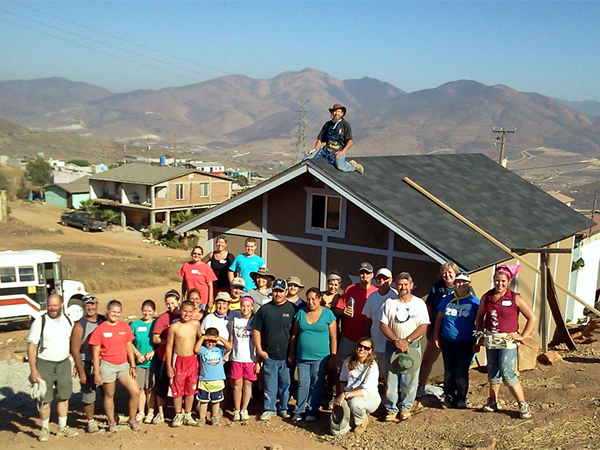
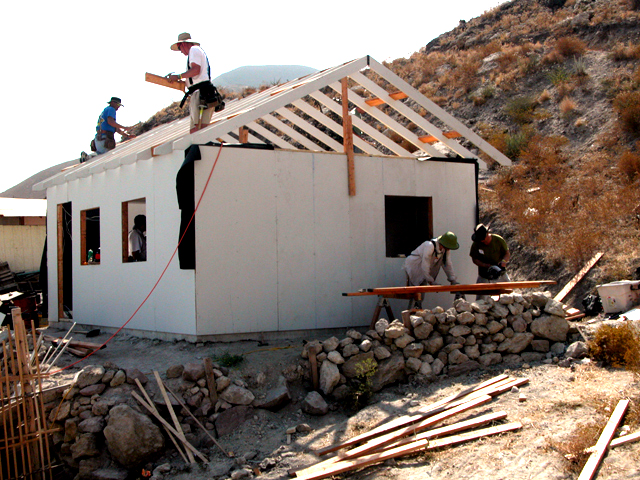
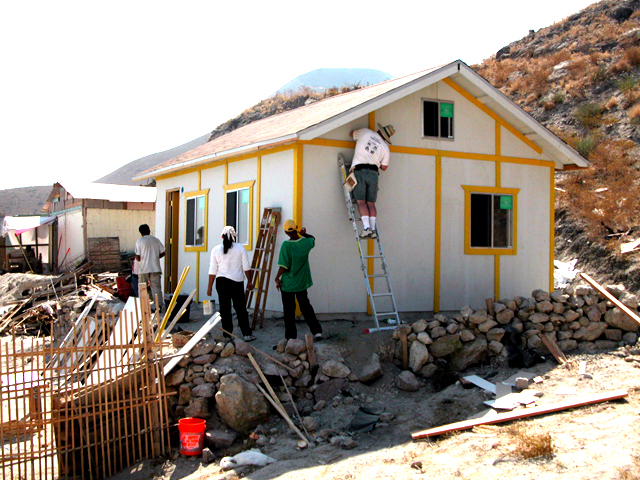
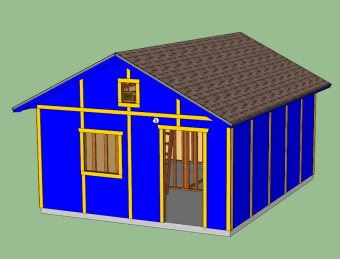
Typical house is 320sf wood-frame construction on concrete slab -- see below for more detail.
Some background on the community:
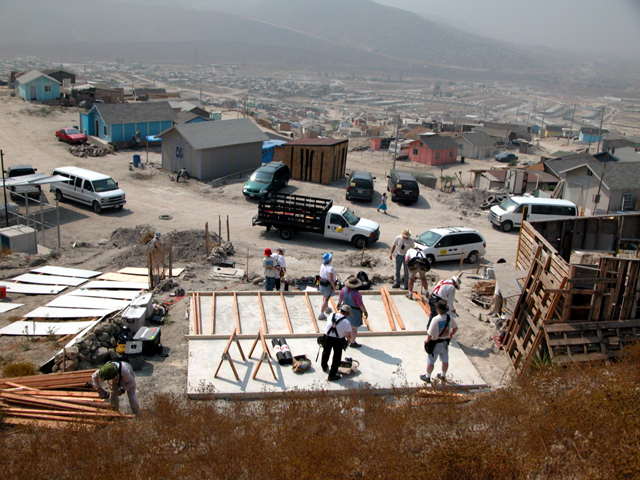
The communities targeted for the solar heating are "colonials" located on barren hills just a few miles south of the California border about an hour East of the coast.
Many of the residents come from much farther south. They hear about the great paying jobs in the "Great North".
So they sell everything thing they have and move north. Yes the jobs pay more, but the cost of living is way more.
So they end up worse off, with no way to go back.
House details:
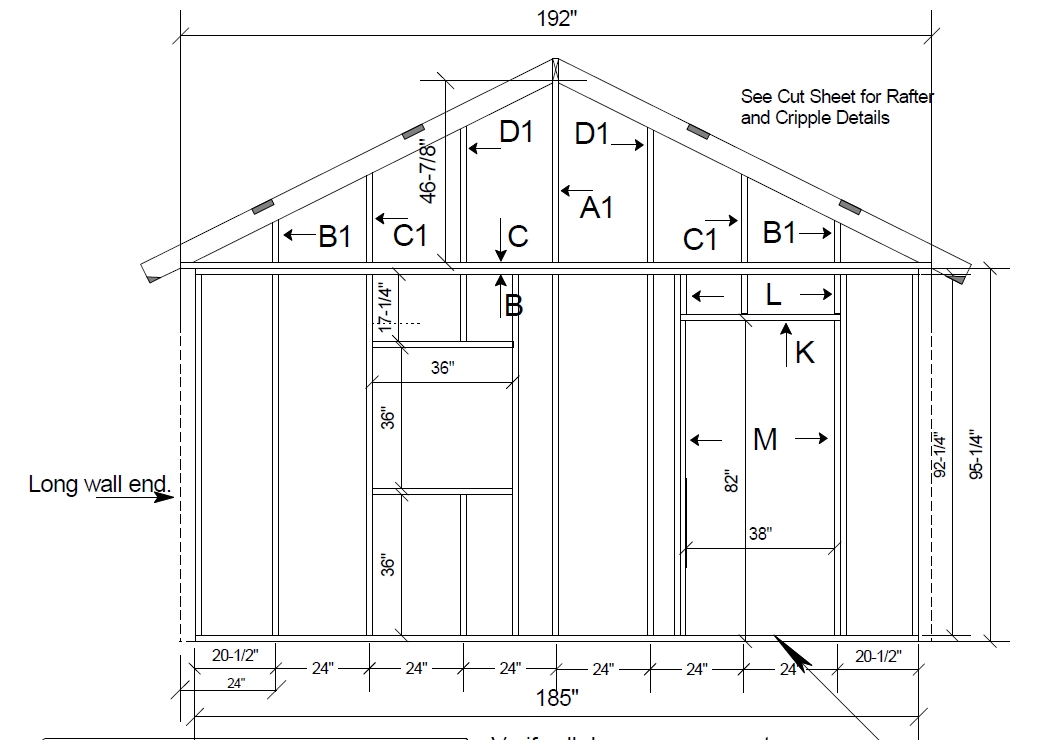
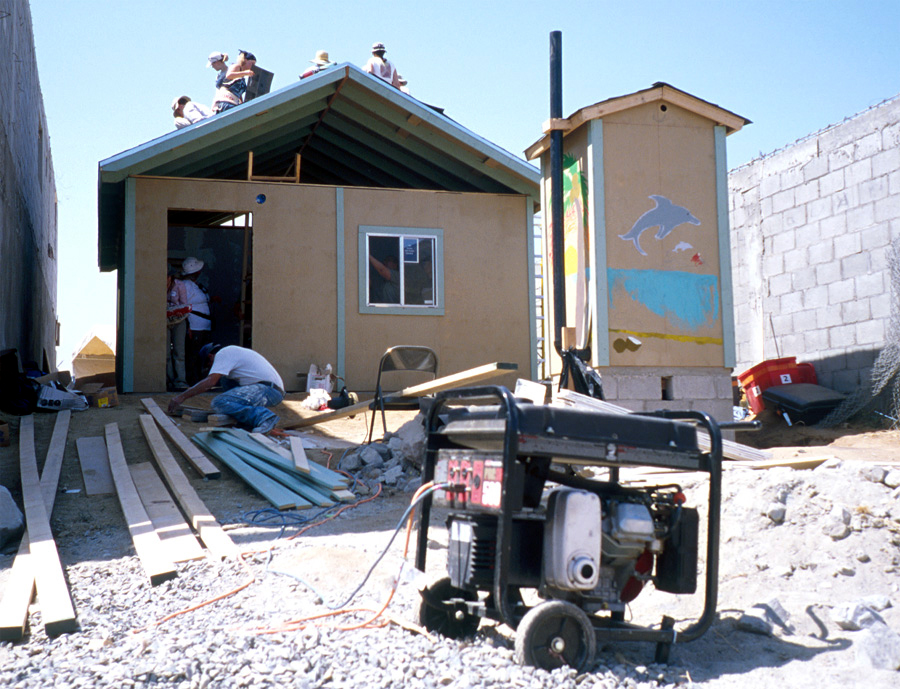
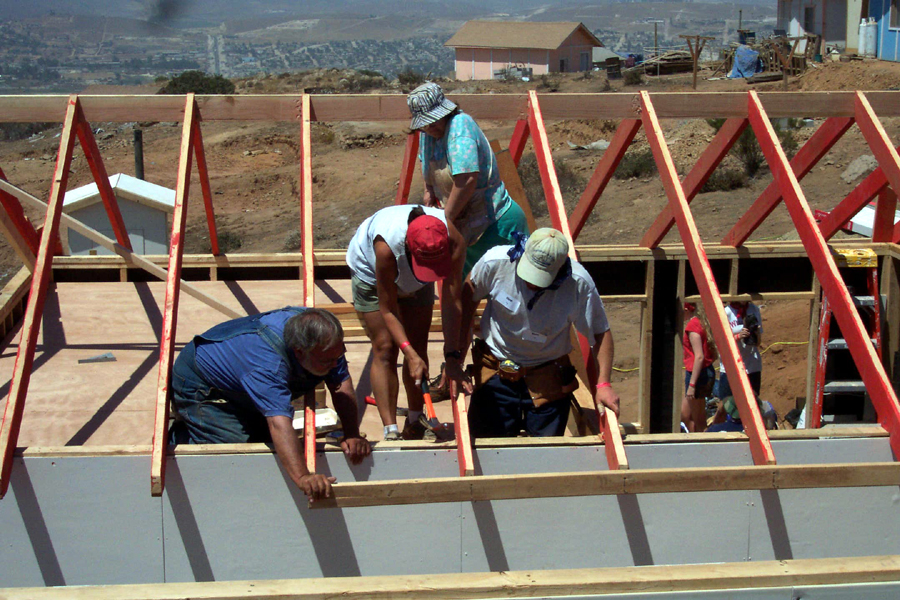
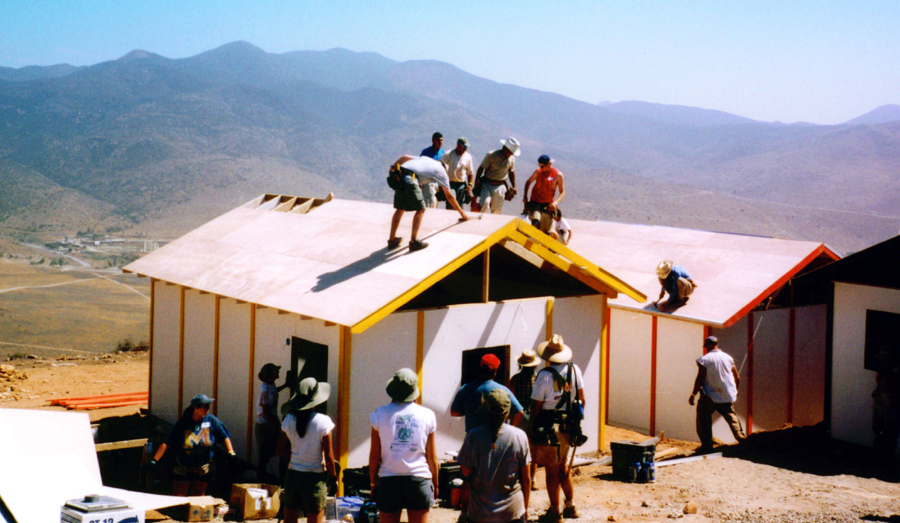
Main room (16'x20') with 8' walls and sloping vaulted ceiling, 12' high at peak (often with ceiling fan).
2 bedrooms (8'x10') with 7' ceilings connect to main room (with doorways, but no doors). Over the bedrooms is a loft (for the kids) with A-frame sloping ceiling.
Each room has a window (three 3'x3', one in loft '2x2'). Main room has the exterior door.
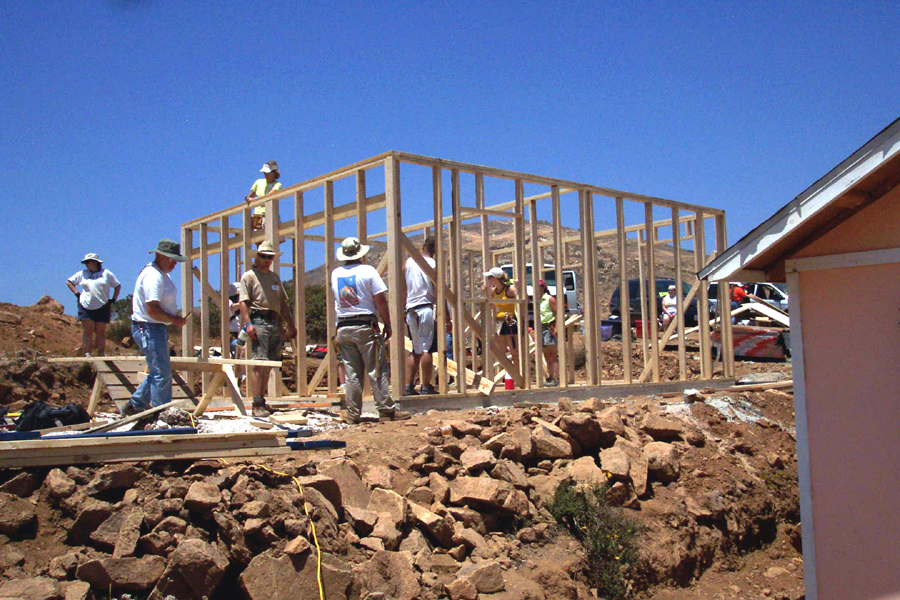
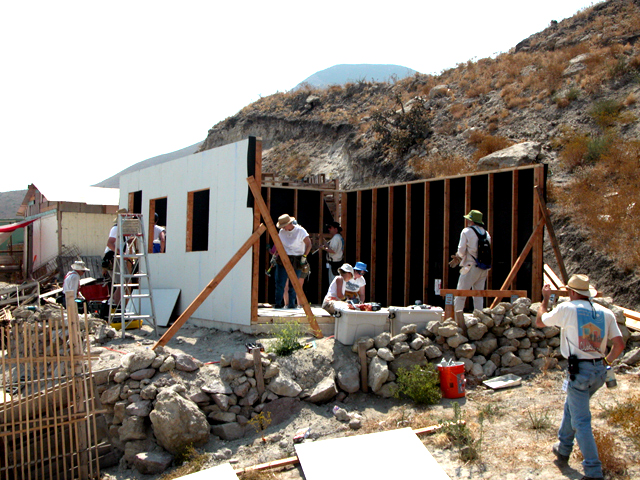
Floor of house is a concrete slab (no insulation). Walls are all 2x4 studs 24" oc with plywood exterior and drywall interior (no insulation).
Roof is plywood sheathing with asphalt shingles. The ceiling above loft is drywalled (no insulation).
There is no plumbing in the house, the bathroom is an outhouse.
The houses are wired for electricity, but the families can't afford to pay for the amount of electricity needed for heating and cooling.
Different groups have built hundreds of houses with this basic design over the last 10 years in this area of Mexico.
So a cost-effective design for solar heating and insulation upgrade could be used on hundreds of houses.
House surroundings:
The lot sizes in the community are typically 10m x 20m (33' x 66'). And the houses are 16'x20' with an outhouse nearby and usually an older shack on the same lot. Most lots are not level and can be closely surrounded by other houses.
Thus an ideal solar heating design should allows lots of flexibility in the placement of the collector for good sun exposure.
Weather conditions:
I don't have good weather data. Closest weather station I could find was in Eastern Tijuana Mexico (about 20 miles from the coast) where the daily low temperature drops below 45F only about 25 times a year and it rarely ever gets below 40F. The winter highs reach 68F about half the days. The daily temperature swings are >=15F about 70% of the winter days, so I would expect at least 70% of the winter days to have some some direct sunlight.
The colonials are about 10-15 miles farther from the coast and a bit higher in elevation (around 32.5N Lat, 116.7W Long). I've been told it does occasionally drop below freezing at the colonials. So I would expect the winter low temperature statistics to be shift about 10F colder than the Eastern Tijuana data. Similarly the highs may be lower too, but probably not at much, say 5F. It can also be a bit windy and dusty on the hills. So the collector needs to be fairly sturdy.
Based on these estimated weather statistics, a good heating system goal would be to keep the house temperature at 65F thru three consecutive nights with lows of 40F where the intervening (2) days are cloudy with highs of 50F. This would determine the requirements on the thermal mass for heat storage.
And I would expect direct sunlight for 70% of winter days, assuming some partly cloudy days, we could approximate it by saying we can expect to have 50% of the days clear and 50% cloudy. With the clear days averaging 65F. This would determine the average solar energy available to "charge" the thermal mass.
Some potential options:
Even with the aggressive cost goal ($700), most families would not be able to afford it without financial help.
So it would be good to offer a second even cheaper design (with less performance) that many more family's could afford on their own. With a design goal to heat only the 2 bedrooms to 65F over two nights with lows of 40F where the intervening day is cloudy with a high of 50F (smaller volume, less duration).
House insulaiton model:
An optimal design would need to include adding insulation.
I created a heat loss model of the house and calculated the heat loss with no insulation and with various levels of insulation in the wall, ceiling and concrete slab floor perimeter. Results:
Baseline house with no insulation requires approximately 150W to maintain house temperature for every degree (F) of difference between the inside and outside temperature.
Using loose fill cellulose in the walls, 1" rigid foam insulation around the slab perimeter (9 to 12" down in the soil), and 0.75" EPS rigid foam sandwiched between 2 layers of roof sheathing (to isolate from living space) -- knocks the heat loss down to about 55W/F temperature difference.
Using dense-packed cellulose in the walls, 1" rigid foam insulation around the slab perimeter (9 to 12" down in the soil), and 2" ISO rigid foam sandwiched between 2 layers of roof sheathing (to isolate from living space) -- knocks the heat loss down to about 40W/F temperature difference, but costs about twice as much as option 2.
For the minimal design to heat only the 2 bedrooms, with no insulation, the heat loss would be about 55W/F temperature difference.
And with loose fill cellulose in the walls, and just 1" rigid foam insulation around the slab perimeter near the bedrooms (9 to 12" down in the soil), the heat loss would be about 35W/F temperature difference. The relative cost of this minimal-insulation design is very cheap and therefore very cost effective.
Notes on insulation:
From what I have read, the hardest part of the insulation solution is cheaply insulating the roof in a way that is safe and not a difficult/time consuming. For example, in order to use cheap cellulose insulation in the ceiling (between the rafters), we would have to first insulate above the rafters with a water resistant material like closed-cell foam (expensive) to prevent condensation from soaking the cellulose insulation between the rafters, then we would also have to drywall the entire ceiling on the underside of the rafters (very difficult to do over the main room due to the height).
The houses have ventilation holes near at the top of the wall (under the eaves), so if the house is very well insulated, the convection heat losses will become significant (I ignored them in my heat loss model).
The water table on the hills is way down and the average deep ground temperature in the region is about 72F. So there should be very little (long term) heat loss going down into the ground (most of the losses are on the perimeter). I even considered using earth tubes to provide heating and cooling of the houses. But the soil is way too hard to dig enough tunnels.
For the bedroom-only heating design, the bedroom ceiling is under the loft floor, so even without added insulation, it inherently provides about R3 of insulation and the heat losses will heat the loft some before it exits thru the roof.
Cellulose factory:
I like Gary's suggestion to create a mini cellulose insulation factory to minimize the insulation costs for the walls.
ClubRust builds 4-5 houses a year (in July), but the leaders of ClubRust also direct a Ranch in Tecate, Mexico where lots of similar volunteer house builders stay. So if we could create a cellulose "factory" at the Ranch, then other groups could use it. And of course we can provide it to any families that want to insulate their own already-built houses. I would like some more ideas and advice on how to create such a "factory", especially the best way to shred the newspaper (hammer mill?) and add the boric acid fire retardant. And of course where to find a cheap shredder and cheap source for boric acid.
Mother Earth News did some experiments with making cellulose insulation back in the 70's -- this is the article...
Or, if you have any ideas on alternative inexpensive insulation.
Potential Solar Heating Designs:
Just to get things started, here are some initial thoughts on providing solar heat and a better thermal envelope:
Use a simple drainback solar heating system with heat storage in water tanks inside the house living space. The solar collector might be PEX or CPVC to reduce initial cost. The pump might be a simple, PV powered so that no controller is needed. The heat storage tanks could be simple, non-pressurized tanks, such as these tanks made from plywood with plastic liner. The tank(s) could double as the heat distribution system by placing them in the living space such that their heat loss heats the room -- movable insulation could be used to regulate the flow of heat into the room.
Either of the two above schemes might be used with the thermal storage mass being the concrete slab with PEX pipes running through it. This would probably require at least minimal insulation under the slab. A quick estimate says that this scheme would fall short of the storage goal, but it is simple and cheap.
The south wall of the house might be built as a Trombe wall -- possibly with movable insulation to reduce night heat loss. This would again fall short of the heat storage goal, but would be simple and cheap, and might make use of local materials for the wall?
The above schemes are just a starting point -- lets hear what you think of them, and lets hear some alternatives.
Questions on specific very-low-cost materials and parts
1. Does anyone have experience using this PC cooling pump submerged in hot (130F - 140F) water long term?
2. Does anyone have experience using cheap 6mil polyethylene sheeting as a water tank liner? Could it be expected to hold up for 10+ years in a vented water tank with water temperatures limited to 130F or 140F?)
3. Looking for source for cheap 5W solar panel with voltage regulator.
4. Looking for good source for very cheap glazing -- prefer 48-51" wide roll -- that could hold up for a few heating seasons (collector could be covered in summer).
5. Looking for a cheap reliable passive method of minimizing stagnation temperatures in a vertical or near-vertical collector. I'm considering a glazed drainback collector design using very cheap materials (PVC pipe and LDPE tubing, mounted on the house South wall with no insulation behind it), but it would not tolerate stagnation temperatures above around 180F. E.g. some kind of support that would melt at 180F and open some vents in the top and bottome of frame (by gravity) or drop a white shade inside the collector (also by gravity).
6. Looking for a cheap way to add some minimal insulation in the house roof (say R3 to R8) underneath the asphalt shingles and above the rafters. The easiest way seems to be to put EPS rigid foam insulation boards under the roof sheathing and above the rafters (open rafters, no drywall in ceiling). But I read that it is unsafe to have foam insulation in a living space without a "vapor barrier" to prevent harmful fumes from filling the house. What type of barrier is needed between foam insulation boards and a living space to be safe? Would a layer of painted and taped plywood do? So bottom-to-top stackup would be roof rafters, painted plywood (taped at seams), insulation boards, plywood or OSB, roofing felt and asphalt shingles. Would this work? And is there a cheaper approach?